Thursday, May 31, 2012

Beauty Butterfly Scrapbook Layout

Hello blogging friends!  Today, I have a scrapbook layout to share with you. 


My youngest son and I were out for a walk one day not too long ago and I happen to have my camera with.  While we were walking I snapped a few pictures of some animals, flower and this beautiful butterfly.  I just love how this picture turned out with the focus on the flowers and butterfly and the background almost looks like watercolor.  This is one layout that I am not going to put in an album, instead I think I am going to put it up on an easel for a home decor piece.   


I used  LF-014 Jewel Alphabet die templates to create the title.  I cut/embossed each of the letters twice with Posh Milk Chocolate and Gumdrop Green paper from Discount Cardstock. I slightly offset and layered the letters to create a shadow effect.  I also added Diamond Clear Glitter from The Rubber Cafe' to the top of the letters for a little sparkle and then I used 3D Foam Squares to adhere the letters to the layout.


The pattern paper is Kaisercraft Provence from the Bonjour Collection.  I also stamped a few butterflies on to the pattern paper.  The image is from S-114 Vintage Treasures from The Rubber Cafe' and I used Clearsnap Donna Salazar Mix'd Media Inx Truffle.  I just recently picked up a few of Donna's Inx and I have to tell you I ♥ them!!  They are so rich and creamy and now I want them all!!  LOL!  I also used Prismacolor Colored Pencil PC-1032 Orange Citrouille to add a little color to the butterflies and a little more glitter too.  To create the large butterfly I used LF-006 Wonderful Wings.  I added a handmade stick pin, seam binding and glitter to the butterfly.  In the background I also die cut a piece of Zutter Donna Salazar 7 x 7 Corrugated Board using LF-251 Grand Big Scalloped Ovals.  I used Ranger Acrylic Paint Dabber Snow Cap on the corrugated board.


I stamped the sentiment - Spread Your Wings - along the bottom of the layout.  The sentiment stamp is also from The Rubber Cafe'.  


I also added Noelle Lace Trim from Really Reasonable Ribbon.  This is some of my favorite lace trim, I love the dainty edging!  I also added some tiny white butterflies.  The butterflies are the drop out pieces from the S4-329 Butterfly Circles die template.  

Thank you so much for stopping by today!

Hugs & Smiles,
Heidi 


Supplies
Stamps:  The Rubber Cafe' S-114 Vintage Treasures, G-771 Spread Your Wings
Paper:  Discount Cardstock Posh Milk Chocolate, Pop-Tones Berrylicious, Gumdrop Green, SpearmintKaisercraft Bonjour Collection Provence
Ink:  Clearsnap Donna Salazar Mix'd Media Inx Truffle; Prismacolor Colored Pencil PC-1032 Orange Citrouille; Ranger Acrylic Paint Dabber Snow Cap
Dies:  Spellbinders Grand Calibur, LF-014 Jewel Alphabet, LF-006 Wonderful Wings, LF-251 Grand Big Scalloped Ovals, S4-329 Butterfly Circles
Accessories:  Really Reasonable Ribbon Noelle Lace Trim, White Seam Binding; The Rubber Cafe' Scrap Happy Sheer Glue, White Pearls, Diamond Clear Glitter; Zutter Donna Salazar 7 x 7 Corrugated Board; Scrapbook Adhesives by 3L 3D Foam Squares; Handmade Stick Pin; Hot Glue

Wednesday, May 30, 2012

All About Faith Little Bird Card

 Hello blogging friends!  The post for today is going to be a quick one--I have several projects I am working on--busy times right now! ;-) 


Here is the card that I have to share with you for today.  It was a pretty quick and easy little card but I just love the colors and I love how it turned out.  All of the cardstock is from Discount Cardstock and I have all of the colors and links listed below.  These are the four die template sets I used to create the die cuts--S5-085 Mix'd Media Elements, S5-084 Girlie Grunge Labels, S5-071 Twisted Metal Tags and Accents, S5-090 Romantic Rectangles.  I also used the New Peacock Feathers Distress Ink from Ranger and I ♥ this color!!  So pretty!!


Here is a close up of the little bird with the label word blocks.


At the top of the card I added some Craft Tape from Recollections, a handmade stick pin and a Black Seam Binding bow.  The seam binding is from Really Reasonable Ribbon


Thank you so much for stopping by today!  I hope you have a Wonderful Day!!

Hugs & Smiles,
Heidi

Supplies
Paper:  Discount Cardstock Black, (Pop-Tones) Berrylicious, Sno Cone, Sweet Tooth
Ink:  Tsukineko Memento Tuxedo Black; Ranger Distress Ink Peacock Feathers
Dies:  Spellbinders Grand Calibur, S5-085 Mix'd Media Elements, S5-084 Girlie Grunge Labels, S5-071 Twisted Metal Tags and Accents, S5-090 Romantic Rectangles
Accessories:  Really Reasonable Ribbon Black Seam Binding; Recollections Craft Tape (birds on a wire); Scrapbook Adhesives by 3L 3D Foam Squares; Handmade Decorative Stick Pin

Tuesday, May 29, 2012

Sew On Quilt Card

Hello blogging friends!  Today I have a fun sewing themed card to share with you.


For the base of the card I used a Chocolate Brown paper and layered it with a piece of Kraft colored paper.  Next I added a paper doily to the background.  Then I used the Grand Calibur, S5-111 Angle Approach and S4-342 Square Swatches to create the die cuts.  I used Ivory paper for the squares and then Raspberry paper for the Cut-Fold-Tuck die templates.  These two shapes together have the look of a quilt pattern. 


I inked the edges of the squares with Vintage Photo ink and then I layered the two pieces with 3D Foam Squares and added a pearl to the center.  

 Next I stamped the sentiment from the CR-02255 Just Keep Calm stamp set from JustRite Papercraft.  Then I used  S5-088 Sewing Elements to create the spool, buttons and scissors.  I threaded the buttons and also wrapped thread around the spool and I used Premium Craft Foil for the scissors. 


 Thank you so much for stopping by today!  I hope you have a wonderful day!!

Hugs & Smiles,
Heidi


Supplies
Stamps:  JustRite Papercraft CR-02255 Just Keep Calm
Paper:  Discount Cardstock Simply Smooth Ivory, DoubleMates Racy Raspberry, Kraft, Posh Milk Chocolate Felt; Paper Doily
Ink:  Tsukineko Memento Rich Cocoa; Ranger Distress Inks Vintage Photo, Antique Linen, Bundled Sage, Victorian Velvet
Dies:  Spellbinders Grand Calibur, S5-111 Angle Approach, S4-342 Square Swatches, S5-088 Sewing Elements
Accessories:  Spellbinders Premium Craft Foil; Recollections Pearls; Scrapbook Adhesives by 3L 3D Foam Squares

Monday, May 28, 2012

Pro 31 Designs Project Pink & Black Ensemble

Hello blogging friends and Happy Memorial Day!!

Today, I have a pretty little Pink and Black Ensemble to share with you, including a video.  


The ensemble includes a coin purse, necklace and a headband.  To create the ensemble I used products from Pro 31 Designs.


Here is a close up of the necklace.


Here is a close up of the headband.

Below is a supply list including all of the links.  Don't forget to check out Pro 31 Designs and also if you are on Facebook please visit Pro31 Designs FB Page and like them---tell them Heidi sent you! ;-)

I hope you are all having a Wonderful Holiday weekend and let us not forget all of the Brave Men & Women who have severed in the Military (Past and Present) so that we may have Freedom!!!  And a Huge Thank You to their families as well!!! ♥ ♥ ♥

Thank you so much for stopping by today!

Hugs & Smiles,
Heidi
Supplies
Pro 31 DesignsScalloped Large 3D Acrylic Flowers (Pink), 3-Tone Wheat Sprays (Green), Rosette Ribbon Trim (Pink), Double Ruffle Satin and Organza Trim (Black)
My Stash:  Black Satin Ribbon, Jewelry Findings, Hot Glue

Saturday, May 26, 2012

Graduation Invite and a Happy Birthday!!

Hello blogging friends!  Today, I have a graduation invite to share with you.  


I wanted to make something a little more girly and fancy so I added some fun embellishments.  Now I wouldn't make a ton of these for a large celebration but for a smaller get together these fancy little invites would be perfect. 


To start I stamped the diploma image on to Crane Lettra Ecru card from Discount Cardstock with Top Boss Tinted Embossing ink from Clearsnap and then heat set with Gold Embossing Powder from Ranger to create a border across the bottom.  Then I added a piece of Black Satin Ribbon from Really Reasonable Ribbon.


Next I stamped the banner and sentiment on to Crane Lettra Ecru card with Tuxedo Black ink and then I used the Grand Calibur and S5-090 Romantic Rectangles die templates from Spellbinders to cut/emboss the decorative rectangle.  I used CR-03745 Summer Words Clear stamp set from JustRite Papercraft for all of the images and sentiment.  I also die cut one of the S4-362 Ribbon Buckles and cut it in half and then placed it behind the decorative rectangle.  I used 3D Foam Squares from Scrapbook Adhesives by 3L to layer the pieces.
 

from Pro 31 Designs.  I love the 4mm pearls, they are the perfect size to use on cards and the curly roses are so fun to work with too!  I lightly misted the curly rose using some homemade shimmer spray in a gold/brown tone.  Then I added a few leaves with the rose.  To create the leaves I used S4-328 Foliage die templates.


On a more personal note I want to wish my oldest son Dusty Happy Birthday!!  He is 19 yrs old today!!  Where oh where did the time go?  I am so proud of him and the wonderful young man he has become!!  He is off with a bunch of his friends playing paint ball today--I am sure they are having a blast!!  I love you Dusty!!  ♥

Thank you so much for stopping by today!  I hope you have a wonderful holiday weekend!! 

Hugs & Smiles,
Heidi

Supplies
Paper:  Discount Cardstock Crane Lettra Ecru card/envelope set
Stamps:  JustRite Papercraft CR-03745 Summer Words Clear
Ink:  Tsukineko Memento Tuxedo Black; Clearsnap Top Boss Tinted Embossing
Dies:  Spellbinders Grand Calibur S5-090 Romantic Rectangles, S4-362 Ribbon Buckles, S4-328 Foliage
Accessories:  Really Reasonable Ribbon Black Satin (May Ribbon Club); Pro 31 Designs 4mm White Flat Back Pearls, White Mulberry Curly Roses (8103); Ranger Gold Embossing Powder; Scrapbook Adhesives by 3L 3D Foam Squares; Heat Tool, Hot Glue, Homemade Shimmer Spray Gold/Brown

Wednesday, May 23, 2012

Cherish Daisy Card

Hello blogging friends!  Today, I have a card to share with you using Ranger Distress Markers and the beautiful daisy stamp from the CR-03705 Botanical Medallions & Banners Clear Stamp Set


I used Crane Lettra Ecru card/envelope set, Goldenrod paper from Discount Cardstock and I also used Watercolor Paper for the daisy image.


I stamped the daisy image on to the watercolor paper using Tsukineko Memento Rich Cocoa ink and then I started to add the color using Ranger Distress Markers.  For the petals I used Mustard Seed and Wild Honey.


Next I colored the centers using Antique Linen, Vintage Photo and Walnut Stain.


For the leaves I used Scattered Straw, Peeled Paint and Bundled Sage.


Next I stamped the frame image around the flowers using Tsukineko Memento Rich Cocoa ink and then used Antique Linen, Vintage Photo and Wild Honey Distress Markers to color the frame.  Then I used the Grand Calibur and JustRite Papercraft Custom Dies JB-10025 Nested Oval Medallion Label Dies to cut/emboss the label shape. 


To finish the card I stamped the swirls and the word Cherish and then I added May Arts Textured Two-Tone Brown/Antique Gold Ribbon from Really Reasonable Ribbon and added Root Beer (Brown) Jellie Dots from The Rubber Cafe' to the upper corner.  I also used 3D Foam Squares from Scrapbook Adhesives by 3L to the label to add some dimension to the card. 

Thank you so much for stopping by today!  I hope you have a wonderful and creative day!!

Hugs & Smiles,
Heidi


Supplies
Paper:  Discount Cardstock Crane Lettra Ecru card/envelope set, Goldenrod; Pro Art Watercolor Paper
Stamps:  JustRite Papercraft CR-03705 Botanical Medallions & Banners Clear Stamp Set
Ink:  Tsukineko Memento Rich Cocoa; Ranger Antique Linen, Vintage Photo, Distress Markers
Dies:  Spellbinders Grand Calibur; JustRite Papercraft Custom Dies JB-10025 Nested Oval Medallion Label Dies
Accessories:  Really Reasonable Ribbon May Arts Textured Two-Tone Brown/Antique Gold Ribbon; The Rubber Cafe' Scrap Happy Sheer Glue, Root Beer (Brown) Jellie Dots; Scrapbook Adhesives by 3L 3D Foam Squares

Friday, May 18, 2012

Blue Hydrangea Card - Bazzill Basics Paper - Card Shoppe Paper

Hello blogging friends and Happy Friday!  Not too long ago Bazzill contacted me to see if I would like to try out some of their New Cardstock--Card Shoppe.


Card Shoppe is a New cardstock that is perfect for card makers and paper crafters.  It is smooth, heavy-weight (100 lbs), and folds with a crisp edge.  It is prefect to use with Copic markers and it won't warp when using mists.  Card Shoppe is available in 28 coordinating colors in 8.5 x 11 sheets.  **NOTE--The Bazzill Basic Paper website has been doing some maintenance and once everything is up and going I will come back and add in all of the direct links.  ;-) 

Over the next few weeks I will be sharing several projects with you using the Card Shoppe papers.   Bazzill was very generous to send and extra paper pack so I will be having a fun give-away in the next couple of weeks too!  So be sure to Follow, Subscribe or check back ofter--you won't want to miss out on this great prize!!  


Here is the card I designed using the Card Shoppe papers.  I wanted to try a few different techniques with the paper just so I could see how it would hold up and the paper is Fantastic!!  I did stamping, coloring with Copic markers, die cutting, embossing and paper shaping.


To start I used Rich Cocoa ink and stamped the image on to Marshmallow (white) cardstock.  Then I started to add color using Copic markers.  I used four shades of blue for the flowers.


Next I used two shades of green Copic markers to color the leaves.  Sorry, but I forgot to take a picture of the bow after I colored it but I used three shades of pink to color the bow.


I used S4-356 Floral Ovals die template to create the die cut.  I wanted to air brush on the inside of the die cut so I left the die template in place and created a mask to put over the floral image.  I used a yellow marker on the inside of the oval and a blue marker for the flowers on the outer edge. 


After die cutting, air brushing and removing the mask this is what the die cut looks like. 


Next I used Gumdrop (green) paper and S4-328 Foliage die templates to cut/emboss some leaves and then I used a green Copic marker to airbrush them.


For the little flowers Icy Mint (lt. blue) Card Shoppe paper and two of the flower die templates from S5-089 Home Sweet Home.  To shape the flowers and leaves I used a larger ball stylus and a foam pad.  


Here is a close up of the colored image and the die cut oval and flowers.  I added Pearls for flower center and Diamond Clear Glitter to the flowers and leaves.  The Pearls and Diamond Clear Glitter are both from The Rubber Cafe'.


I added some May Arts Ribbon Sample Delicate Vintage Lace and May Arts 1/4'' Fuchsia Silk Ribbon from The Stamp Simply Ribbon Store.  For the embossed background I used Icy Mint (lt. blue) Card Shoppe paper and EL-002 Regal M-Bossabilities Folder from Spellbinders.  For the card base I used Gumball (med.blue) Card Shoppe paper.  


This is my first card using the Card Shoppe paper from Bazzill but I really like working with the papers.  They are nice and smooth, work great with Copics and die cut and emboss beautifully!  I am looking forward to creating more projects and trying more techniques with the Card Shoppe papers.

Thank you so much for stopping by today and I hope you have a Wonderful Friday!!

Hugs & Smiles,
Heidi


Supplies
Stamps:  JustRite Papercraft CR-03705 Botanical Medallions & Banners
Paper:  NEW Bazzill Basics Paper Card Shoppe Marshmallow (white), Icy Mint (lt. blue), Gumball (med.blue), Gumdrop (green)
Ink:  Tsukineko Memento Rich Cocoa; Copic Markers BG70, B000, B21, B34, RV10, R83, RV66, Y11, TG61, YG63
Dies:  Spellbinders Grand Calibur, S4-356 Floral Ovals, S5-089 Home Sweet Home, S4-328 Foliage, EL-002 Regal M-Bossabilities Folder
Accessories:  The Rubber Cafe' Scrap Happy Sheer Glue, Diamond Clear Glitter, Pearls, Stick "EM" Tool; The Stamp Simply Ribbon Store May Arts Ribbon Sample Delicate Vintage Lace, May Arts 1/4'' Fuchsia Silk Ribbon; Scrapbook Adhesives by 3L 3D Foam Squares; Hot Glue

Tuesday, May 15, 2012

Pro31 Designs Sweet Smile Card

Hello blogging friends!  Today I have another project from Pro31 Designs to share with you and I also have a video.  This is only my second video and I am not a tech savvy person by any means but luckily my wonderful husband has stepped in and helped me out!! ♥


Here is the card I designed using several products from Pro31 Designs and Spellbinders™.  I love the vintage/ shabby chic look!  The pattern paper and the stamp set I used are both from the London Market Collection from Pink Paislee. The Simply Smooth Ivory, DoubleMates Racy Raspberry and Kraft cardstock papers are from Discount Cardstock.  


One of the products I used from Pro31 Designs is these Mulberry Curly Roses (8103).  These roses are a great size for paper crafting but one of the things that I love about them is that you can take them apart and use the center rosebud for a smaller flower.  (as shown in the video)


I used one Curly Rose as is and then I took two of them apart to make smaller rosebuds.  But don't throw away the bottom parts of the rose you can still alter them for another project by putting a large pearl or rhinestone in the center, a button or another smaller flower in the center for a whole new look.  I wanted to try and match the color of the roses in the pattern paper so I made a color wash using Victorian Velvet ink, then I also used Aged Mahogany and Antique Linen to add more color.


Here is a close up of the flowers.  Once the flowers were dry then I added a chunky glitter and brushed on Antique Linen Distress Stain with a paint brush to give it more of an aged look.   I also added some Iridescent Crystal Beaded Sprays in with the flower cluster and Ivory Tear Drop Pearl Trim along the bottom of the card. 


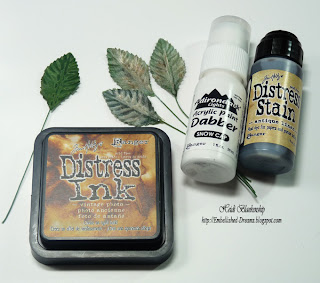
I used a few of the Small Green Fabric Leaves and I also altered them to match the paper.  First I  applied Snow Cap Acrylic Paint Dabber to the leaves and next I added Vintage Photo ink and a paint brush with water to move the ink around. Then I added glitter and Antique Linen Distress Stain to the leaves.


The butterfly image and the sentiment are from Vintage Impressions Clear Stamps from the Pink Paislee London Market Collection.  I stamped the images on to Simply Smooth Ivory paper using Rich Cocoa ink.  Then I inked the inside edges with Antique Linen Distress Ink.  I used S5-090 Romantic Rectangles die template from Spellbinders.  To create the frame I used Kraft paper and S5-083 Antique Frame and Accents die template and applied Snow Cap Paint Dabber, Vintage Photo and Rich Cocoa ink. 


To create the layered butterfly I used Simply Smooth Ivory paper, Victorian Velvet, Aged Mahogany and Antique Linen Distress Inks.  The smallest butterfly is an image from the stamp set and I watered down the inks and fussy cut the image.  For the two larger butterflies I used LF-006 Wonderful Wings die templates and the same paper and inks.  The body of the butterfly is one of the Ivory Tear Drop Pearls from the beaded trim.  I also added chunky glitter and Antique Linen Stain.


Thank you so much for stopping by today!  I hope you enjoy the card and the video.  Have a wonderful and creative day!

Hugs & Smiles,
Heidi


Supplies
Ink:  Tsukineko Memento Rich Cocoa, Ranger Antique Linen, Vintage Photo, Victorian Velvet, Aged Mahogany Distress Inks, Antique Linen Distress Stain, Snow Cap Acrylic Paint Dabber
Accessories: Scrapbook Adhesives by 3L 3D Foam Squares, JoAnn's Clear Chunky Glitter; Hot Glue


LinkWithin

Related Posts Plugin for WordPress, Blogger...