Showing posts with label Mixed Media. Show all posts

Tuesday, October 3, 2017

Happy Halloween Banner - Tonic Studios USA

Hello everyone!  I can't believe it's already October.  We've had kind of a strange start to the Fall weather with the warmer temps.  The start to the holidays will be here before we know it.  It seems like once school starts then the next thing it's Halloween and after that time just seems to fly by.  Today, I have a fun Halloween banner to share with you using some of the fantastic new Halloween dies from Tonic Studios.  I'm just sharing a few pictures here on my blog and if you would like to see the full tutorial you can click HERE to visit the Tonic Studios USA Blog.


Here is a look at the Happy Halloween banner.  Sorry the picture isn't very big.  It's hard to get a longer photo to fit in the space without cutting part of it off lol.  But if you click on the images you will be able to see larger ones with more detail.


I had so much fun creating this banner!  I used Tim Holtz Distress Oxide Inks for the background on all of the banner pieces.  Once the banner was all assembled then I added glitter drops, crystal drops, and glow drops for embellishments.  I added the ruby slippers glitter drops to all of the spiders.  Halloween paper spiders are the only spiders I like lol.


Here is a close up to see where I added the glow drops on the haunted house.


This is the first banner piece.  I am loving the Halloween dies!  The next few pictures are close ups of each banner piece.


I also added some of the glow drops to the moon.


To finish off the banner I added seam binding in between each of the banner pieces.  I can't wait to hang this banner up and decorate for Halloween.

Don't forget if you would like to see the full tutorial you can click HERE to visit the Tonic Studios USA Blog.  Are you creating any home decor pieces for Halloween or fun cards, treat bags?  Halloween is a favorite at our house so I think we will be getting all of the decorations out this weekend.  Thanks so much for stopping by today!

Hugs & Smiles,
Heidi


Supplies Used: 
Paper:  
Starthmore Mixed Media Paper 
Cardstock - Black, White
Dies:  
Grand Gala Beautiful Bunting Die Set 1796e 
Spooktacular Coffin Treat Box Die Set 1800e (spider, bat, skull) 
Huanted House Insert Die Set 1802e 
Witchy Bits Halloween Trio Die Set 1820e (hat) 
Happy Halloween Minature Moments Die Set 1861e 
Rococo Wicked Web 1822e 
Rococo Pumpkin Scene 1823e 
Rococo Creepy Cauldron 1821e 
Inks:  
Tim Holtz Distress Oxide Inks 
Twisted Citron 
Spiced Marmalade 
Wilted Violet 
Black Soot
NUVO:  
Nuvo Glimmer Paste - Black Diamond 952n 
Nuvo Crystal Drops Gloss - Ebony Black 650n 
Nuvo Glitter Drops - Ruby Slippers 752n 
Nuvo Glow Drops Neon - Banana Split 747n 
Nuvo Glue Pen Medium 203n 
Nuvo Light Mist Spray Bottle 849n 
Ribbons:  
Seam Binding 
Purple 
Orange
Yellow
Green 
Accessories/Tools:  
Essentials Easy Clean Mat 1514e 
Tim Holtz – 8″ Guillotine – 160e 
Tim Holtz – 5 inch/ 12.3cm Mini Snips – 816e 
Tangerine Die Cutting Machine with Plates 138e   
Mini Ink Blending Tools 
1" Foam Circles
Palette Knife 
Foam Tape 
Heat Tool 

Monday, January 2, 2017

Tonic Studios - Sneak Peek - Let It Snow 7 x 14 Mixed Media Canvas


Hello everyone!  Here is a little sneak peek of a Let It Snow 7 x 14 mixed media canvas that I designed for Tonic Studios.  I used dies, embellishment mousse, stencils, glimmer paste New script brush pens, crystal drops and glitter to create this fun and whimsical winter canvas,

I hope you will hop on over to the Tonic Studios USA Blog and check out the tutorial.  I have a full step-by-step tutorial with instructions and photos.  You can click HERE to see the blog post.  I hope you enjoy the project and I would love to hear your thoughts.

Thanks so much for stopping by today!

I hope the New Year is off to a great start for all of you!!

Hugs & Smiles,
Heidi

Thursday, March 31, 2016

Creating Crystal Like Flowers with ICE Resin® - Video

Hello blogging friends!  Today, I am sharing the video I made for ICE Resin® showing how you can add resin to paper flowers to give then a crystal or glass like look.  ICE Resin® looks so beautiful on paper!  So just remember it's not just for jewelry making you can use it on your paper crafting and mixed media projects.


If you would like to see a full step-by-step tutorial on how I designed the project you can 
click HERE to visit the ICE Resin® Blog.

I hope you enjoy the video!  Thanks so much for stopping by today!

Hugs and Smiles,
Heidi

Learn more about Heidi Blankenship
Instagram:  heidimblankenship
Pinterest:  heidimb


ICE Resin®/Ranger™ Supplies:
ICE Resin® 
ICE Resin® ICED Enamels™ Relique Powder Raspberry
ICE Resin® ICED Enamels™ Relique Glitz Gold Glitter
ICE Resin® ICED Enamels™ Medium
Paper Sealer
Brushes
Cups and Stir Sticks
Ranger Perfect Pearls™ - Pink Gumball, Sour Apple, Turquoise
Ranger - Multi Medium Matte

Other Supplies Used
Small Fancy Wood Frame, ArtCult.etsy.com - Vintage Style Image Bingo Butterfly Girl, Vintage Sheet Music, Wild Orchid Crafts Paper Flowers and Leaves, Vintage Book Paper, Ivory Flat Back Pearls, Sequins, Rhinestones, Craft Foam, Heat Tool, Hot Glue, Scor-Tape™

Tuesday, March 29, 2016

Creating Crystal Like Flowers with ICE Resin®

Hello everyone!  Today, I have a technique to share with you using ICE Resin®, ICED Enamels, Glitter, Ranger Perfect Pearls, and various types of paper from vintage sheet music to paper flowers.  I have to say I just love the look of ICE Resin® on paper!  It doesn’t matter if it is vintage paper or newer paper, sealed or not sealed it always has such a beautiful and unique look.  


I mixed up some of the ICE Resin® and then added small amounts of the resin to different cups.  Then I used few different colors of Ranger Perfect Pearls and added it to the resin.  I used the stir stick to mix the ICE Resin® and Perfect Pearls.  Doing this created a beautiful pearl colors.  I used a paint brush to add the pearly resin to the paper flowers and leaves.  When the ICE Resin® cures the flowers have a beautiful crystal look to them and they become hard from the resin.  I also added some of the ICED Enamels™ Relique Glitz Gold Glitter to the center of the larger flowers and the edges of this leaves for a bit of added sparkle.  Once the ICE Resin® has cured the flowers can be added to all kinds of home décor and DIY projects.  


Here is a close up.  I have a full step-by-step tutorial with pictures over on the ICE Resin Blog.  If you would like to find out all of the details you can click HERE.

I hope you enjoy the tutorial and remember ICE Resin® isn't just for jewelry you can use it with paper crafting too!

Thank you so much for stopping by today!

Hugs and Smiles,
Heidi


Learn more about Heidi Blankenship
Instagram:  heidimblankenship
Pinterest:  heidimb


ICE Resin®/Ranger™ Supplies:
ICE Resin® 
ICE Resin® ICED Enamels™ Relique Powder Raspberry
ICE Resin® ICED Enamels™ Relique Glitz Gold Glitter
ICE Resin® ICED Enamels™ Medium
Paper Sealer
Brushes
Cups and Stir Sticks
Ranger Perfect Pearls™ - Pink Gumball, Sour Apple, Turquoise
Ranger - Multi Medium Matte

Other Supplies Used
Small Fancy Wood Frame, ArtCult.etsy.com - Vintage Style Image Bingo Butterfly Girl, Vintage Sheet Music, Wild Orchid Crafts Paper Flowers and Leaves, Vintage Book Paper, Ivory Flat Back Pearls, Sequins, Rhinestones, Craft Foam, Heat Tool, Hot Glue, Scor-Tape™

Tuesday, August 11, 2015

DecoArt Metallic Lustre - Projects - Q & A

Hello blogging friends!  In a couple of recent posts I used a new product (well at least new to me) DecoArt Metallic Lustre and I have had some question about the product.  What does it look like--how to apply it--and what can it be used for???  So I thought I would do a blog post to share with you the projects I have done (in case you missed them) and to also try and answer the questions.


This is what the DecoArt Metallic Lustre looks like in the packaging and it comes in a variety of colors.  It comes in a tub like container with a twist off lid.


This is what the DecoArt Metallic Lustre actually looks like in the container.  It is soft and easy to apply with your fingers.  The consistency is kind of like a thick body butter.  You can apply it with your finger, a sponge or even a paint brush.  If using a paint brush I would add just a tiny bit of water to the brush so it will be smother and easy to apply.


Here you can see what the DecoArt Metallic Lustre looks like with and without water added to it.  


You can also add it to metal!  This is a metal filigree piece from ButterBeeScraps.  I applied it right from the container with my finger and used a paper towel to buff off the excess.  Then I sprayed a light coat of Krylon Crystal Clear to seal it.


Here you can see the difference in the two metal filigree pieces.  The DecoArt Metallic Lustre is kind of like Rub-N-Buff but a lot less odor and it washed off easily with soap and water.


Here is the first card that I used the DecoArt Metallic Lustre on.  You can click HERE to see the original blog post.  On this card I rubbed the DecoArt Metallic Lustre on to the embossed areas of the paper.  Something to note about using this product on the paper---you will have to set it aside and wait for it to dry (just a few minutes) or heat set with a heat tool.  I have also been asked once it is dry if it will rub off.  For the most part the answer is No it won't rub off if you are just touching the card,  However if you rub pretty hard on the area then yes you will get a little (very tiny amount) of the shimmer on your fingers.  If this is something you are worried about you could lightly spray it with hairspray to seal it.  But if you are using the DecoArt Metallic Lustre on a scrapbook layout then I would suggest using an archival sealer.


Here is the second card I designed using the DecoArt Metallic Lustre.  On this card I added a little water to the DecoArt Metallic Lustre and used it to stamp on top of the watercolor.  You can click HERE for the original post.


Sharon, owner of The Stamp Simply Ribbon Store carries the DecoArt Metallic Lustre in her online store and it is available in six color choices.

I hope this has been helpful and I have been able to answer your questions.  If you have any other questions please leave them in the comment section or feel free to email me.

I hope you all have a wonderful day and Happy Crafting!

Hugs & Smiles,
Heidi

Thursday, May 7, 2015

Mixed Media Sing Out Loud Canvas - JustRite Papercraft May Release Day Three

Hello everyone!  Today, is the third and finally day of the JustRite Papercraft May New Release and I have a fun mixed media canvas to share with you.


How fun is this bright, bold and playful canvas?  Now I will admit using the bright and bold colors for me is a little out of my comfort zone but what the heck--I just had fun with it.  Check out the cute little birdie--love it!!  I used the CL-02157 Script Background Cling Stamp kind of randomly in the background and for the main focal point I used the New CR-02183 Sing Out Loud Clear Stamps.  Lots of fun layers with Ken Oliver Crafts-Color Burst , Stamping, Gesso, and paper piecing.


I don't have a full tutorial for the canvas but I did snap a couple of pictures of the background from when I started working on it.  I actually used a piece of Strathmore Mixed Media paper and then the finished piece was adhered to a hard canvas board.  I misted the paper with water and then I sprinkled on some of the Pthalo Green and Ultramarine Blue Ken Oliver Crafts-Color Burst .  I let the colors and the water kind of do their magic on their own.  I misted a little more water and then just moved the paper around a little.  Then I used a heat tool to dry the paper and set the colors.  Next I misted more water on to the craft mat where there was still color burst and then I gently tapped the paper into the mix picking up more color.  I did this a few times until I was happy with the look and then I heat set and dried the paper again.  Doing this will add layers and depth to your paper.


Next I did a combination of lightly misting the paper and also spraying some water in to my hands and letting it drop on the paper.  I let the water sit on the paper for a minute or so and then I put a paper towel on top of the paper and blotted to remove the water.  Doing this also removes some of the watercolor wherever the water was.  It creates a fun textured look.


Once I had all of the color added to the background then I sprayed a couple layers of Krylon Clear Satin Sealer on to the paper.  Doing this will seal the colors so you can add layers of other paints, mediums or whatever you would like on top of the background without messing up the background.  Next I used Stazon Jet Black ink and randomly stamped the CL-02157 Script Background Cling Stamp.  When the ink was dry I dry brushed over most of the paper with white gesso.  The gesso does help to tone the colors down just a bit and it covers up some of the script stamping in the background.  Once the gesso was dry then I applied some Golden Glass Bead Gel.  I mixed some of the Ultramarine Blue Color Burst in with the gel.  You can see the beaded gel at the top of this picture (you can click to enlarge the picture for more detail).


The gel does take a little time to dry so while I was waiting on that I stamped and fussy cut the little bird, wing, and flowers,  For the banner I used a EK Success punch.  Once the gel was dry then I started stamping on to the paper.  I stamped all of the images using StazOn Jet Black ink.  Then I wanted to add some shading so I went over the bird and flowers with a Spectrum Aqua Marker Black working in just small areas and then I rubbed and blended out the color with my finger.  Once the shading was done then I added all of the paper piecing.


All of the pattern paper is from the Simple Stories I AM 6 x 6 Paper Pad Collection.  I added 3D Foam Squares to all of the pattern paper pieces except for the body of the bird.


To finish off the piece I added a few pearls.


The Sing Out Loud Clear Stamps is perfect for mixed media, art journaling and card making.  I had a lot of fun playing with the new set and creating the canvas.

Please be sure to visit all of the Design Team Members in the link list below to see all of the fun projects they have created to share with you.


Thanks so much for stopping by today!

Hugs & Smiles,
Heidi

Supplies
Stamps:  JustRite Papercraft CR-02183 Sing Out Loud Clear Stamps, CL-02157 Script Background Cling Stamp
Paper:  Strathmore Mixed Media Paper, Simple Stories I AM 6 x 6 Paper Pad
Ink/Paint:  StazOn Jet Black Ink, Spectrum Aqua Marker Black, Ken Oliver Crafts-Color Burst Pthalo Green, Ultramarine Blue
Punch:  EK Success Banner Punch
Accessories:  Gesso, Krylon Clear Satin Sealer, Golden Glass Bead Gel, Ranger Multi Medium Matte, White Pearls, Gray Twine, Scrapbook Adhesives by 3L 3D Foam Squares, Mini Canvas Board

Wednesday, April 1, 2015

JustRite Papercraft - Day Two April New Release - DIY Hope Frame

Hello everyone!  It's day two of the JustRite Papercraft April New Releaase!  Today, I have a fun DIY home decor piece to share with you.


I altered a simple wood frame to create this pretty frame using some of the stamps from  JustRite Papercraft.  To start I painted the frame with white acrylic paint and then lightly sanded the frame to give it an aged look.  Then I used the CR-04620 Let Your Soul Sing Clear Stamps with the matching SVG File to stamp the branches and flowwers and cut images of the birds and butterflies.  Then I used the new CR-02171 Grunge Alphabet Clear Stamp Set and SVG Grunge Alphabet Digital Cut File Download for CR-02171 to stamp and cut the letters for the word Hope.


Here is a close up.  I used a piece of twine and black mini clothespins to attach the letters.


Here is a close up of the butterflies.


I also used the CL-02157 Script Cling Background Stamp for the background piece in the frame.


I picked this frame up at Michael's for just a couple of dollars and with just a little paint and stamps I was able to create this fun DIY home decor piece in less than an hour.


Thanks so much for stopping by today!

Hugs & Smiles,
Heidi


Supplies
Stamps:  JustRite Papercraft CR-02171 Grunge Alphabet Clear Stamp Set,  CR-04620 Let Your Soul Sing Clear Stamps, CL-02157 Script Cling Background Stamp
Paper:  White
Ink:  Imagine Crafts/Tsukineko StazOn Jet Black, Memento Tuxedo Black
SVG Cut Files:  JustRite Papercraft SVG Grunge Alphabet Digital Cut File Download for CR-02171, Let Your Soul Sing SVG
Accessories:  Frame, White Acrylic Paint, Sand Paper, Mini Clothespins, Twine, Hot Glue

Sunday, March 22, 2015

Day One Stencil Girl and Ken Oliver Crafts Blog Hop


Hello everyone!  Today, is the first day of the Stencil Girl and Ken Oliver Crafts Blog Hop.  Designers and Style Contributors from both teams have come together to create some fabulous projects using products from both companies.  We hope to inspire you!


For my project I designed a 8 x 10 mixed media canvas board and I have a tutorial to share with you.


First I applied a layer of white gesso to the canvas.  Once that was dry then I used the 6 x 6 Rembrandt's Words Small Stencil and added a layer of the crackle texture paste.


Once the crackle texture paste was dry then I misted the entire canvas with water and sprinkled a little bit of the Ultramarine Blue Color Burst on to the canvas.  Here you can see the Color Burst already starting to activate with the water.


I used a large watercolor brush and kept adding more water to move the Color Burst around the canvas until I achieved a look I liked.  If you get more than you would like in one spot you can use a paper towel to lift up a little of the color.  Set this aside to dry or you can use a heat tool.


Sorry, I know it's a little hard to see exactly what I am doing in this picture from all of the texture paste lol.  Here I am using the 9 x 12 Nosegay Stencil and adding a layer of the crackle texture paste.


After the crackle texture paste was dry then I started to watercolor the flowers using Color Burst.  I used Alizarin Crimson for the flowers.  Here you can see a close up of the Color Burst as soon as I applied it to the crackle texture paste.  I love how it fills in all the little cracks and makes the flowers really pop.  I mixed a few colors of the Color Burst to create a darker green.  I used Pthalo Green, Alizarin Crimson, Ultramarine Blue, and Lemon Yellow.


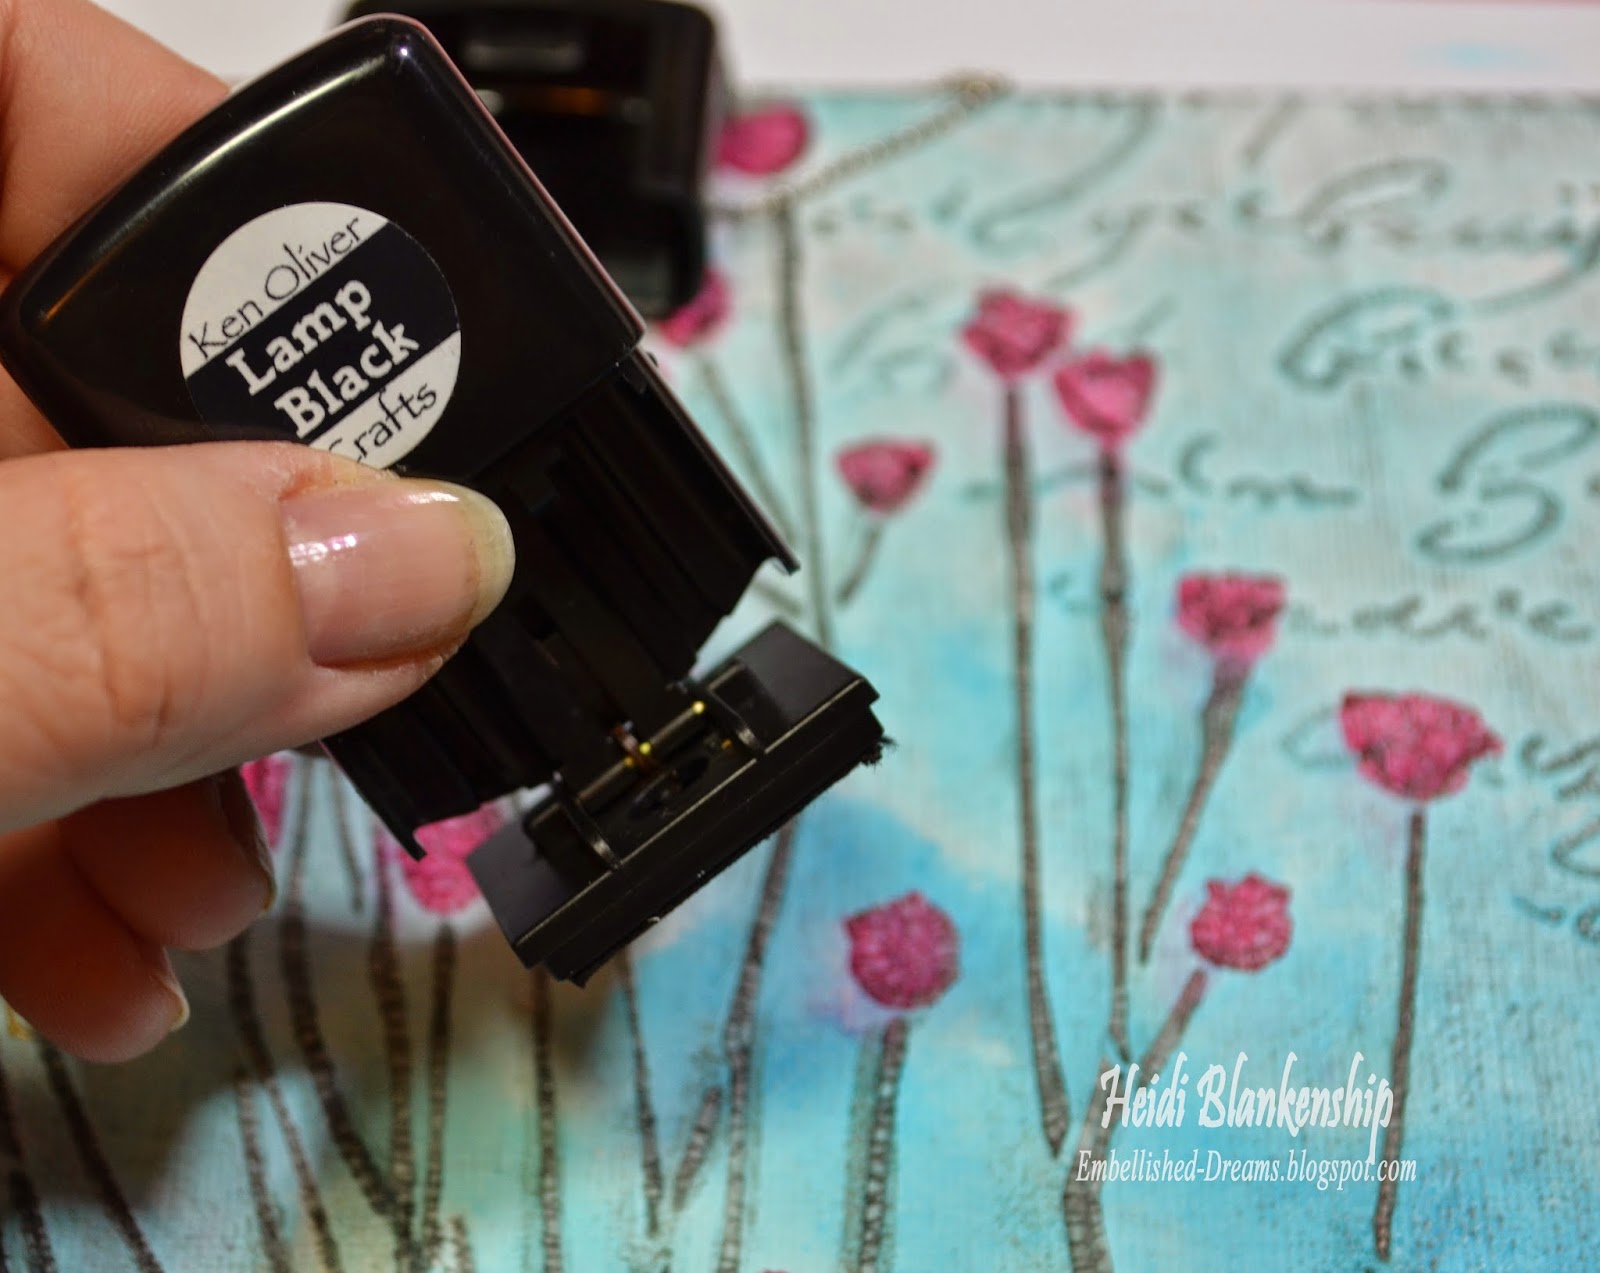
Next I used the Lamp Black Click It Ink to go over the entire canvas board.  Doing this really adds a lot of depth and dimension to the canvas and it picks up all of the little cracks in the texture paste.


To finish off the canvas I created some die cuts using Stick It and the die template from Tonic Studios.  I removed the backing on the Stick It and applied it to the canvas.  Then I added the gold foil on top of the adhesive and rubbed it to to transfer the foil.  I thought this would add a nice decorative element and gold foil it very hot right now.


Here is a close up of some of the flowers with the gold foil along the edge.


I added a few bits of the gold foil along the edges of the canvas.


I hope you enjoyed the tutorial.  Please be sure to visit the blogs listed below to see what the Designers and Style Contributors have created to share with you.

Heidi Blankenship-You are here :)

Thank you so much for visiting our blogs today and I hope that you'll be inspired to create something with Stencil Girl Products and Ken Oliver Crafts! We have a crafty haul of prizes from Ken Oliver up for grabs, just leave a comment below and you'll be eligible to win!

Winners will be randomly selected from our blogs, just leave a comment to become eligible for a prize. It's that easy!

We'll list the daily winners in the comments sections of our respective blogs so watch for the winners names.  

Here's what we're giving away!
12 Daily Prizes - 1 Pack Ken Oliver Crafts 6x6 Papers(24 pieces).
2 Grand Prizes on Friday- 1 Complete Set of Color Burst (6 Colors); 1 Complete Set of Click It Ink Pads (6 Colors); 1 Set Pegz Alphabet Stamp Set;
Leave a comment on each StencilGirl Talk post and the team members posts to be entered to win a $50 gift certificate from Stencil Girl!
Join us every day this week, you can enter every day...

Thank you again and

GOOD LUCK!  

Hugs & Smiles,
Heidi


Friday, January 30, 2015

The Stamp Simply Ribbon Store - Valentine Wish Card

Hello everyone!  Today, is my day to post for The Stamp Simply Ribbon Store and I have yet another Valentine card to share with you, LOL.  There is such a short time span to create and share Valentine cards so I have to get them in while I can.  :)  


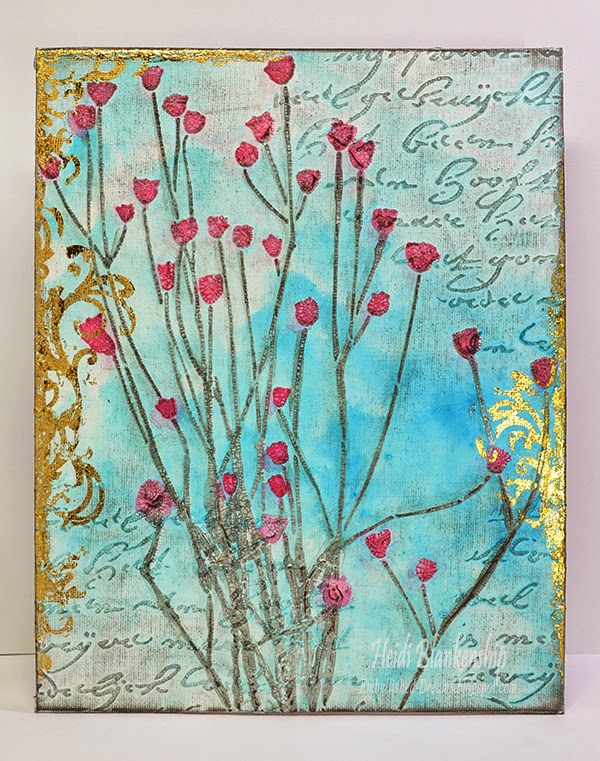
This card has a little bit of mixed media for the background.  But I have to tell you I just love how the background turned out!  The colors are so soft and pretty and the texture with the crackle gives the background just a touch of a vintage/shabby chic look.  I started with a piece of Ranger Watercolor Paper.  I used the Prima Designer Stencil 6 x 6 -Flourish and Studio 490 Embossing Paste Crackled Texture to create the textured background.  Then I set it aside to dry.  Once it was dry I used Worn Lipstick and Broken China Tim Holtz Distress Inks with some water to create a watercolor wash on the background.  I used a heat tool do dry the paper.  Then I took the Antique Linen Tim Holtz Distress Ink and rubbed it directly on top of the texture so the crackles would pick up some of the ink.  Then I used a heat tool to dry the ink.

Here is a close up of the background paper so you can see the color wash and the crackle texture.  The Prima stencil is so pretty and the flourish pattern is perfect for vintage style projects.


I fussy cut the image from the  Graphic 45 Sweet Sentiments 8 x8 paper pad.  I also tried to match the colors for the background to the colors in this image.  I layered the image with some pink and blue cardstock and then I added a bow using May Arts Ivory Silk Ribbon.  I also added a few Kaisercraft Mini Paper Blooms-Fairy Floss and  5mm Crystal Sequins.


Please be sure to check out The Stamp Simply Ribbon Store for all of the fantastic paper crafting products and the Blog for inspiration from the Design Team.

Thanks so much for stopping by today! I hope you have a great weekend!

Hugs & Smiles,
Heidi


Supplies
Paper:  Graphic 45 Sweet Sentiments, Ranger Watercolor Paper, Cardstock-Pink, Blue
Ink:  Tim Holtz Distress Inks-Worn Lipstick, Broken China, Antique Linen
Ribbon:  May Arts Ivory Silk Ribbon
Accessoreis:  Prima Designer Stencil 6 x 6 -Flourish, Studio 490 Embossing Paste Crackled Texture, Kaisercraft Mini Paper Blooms-Fairy Floss, 5mm Crystal Sequins, Scrapbooks Adhesives by 3L 3D Foam Squares, E-Z Runner Permanent Strips-Refillable Dispenser 49', Paint Brush

LinkWithin

Related Posts Plugin for WordPress, Blogger...