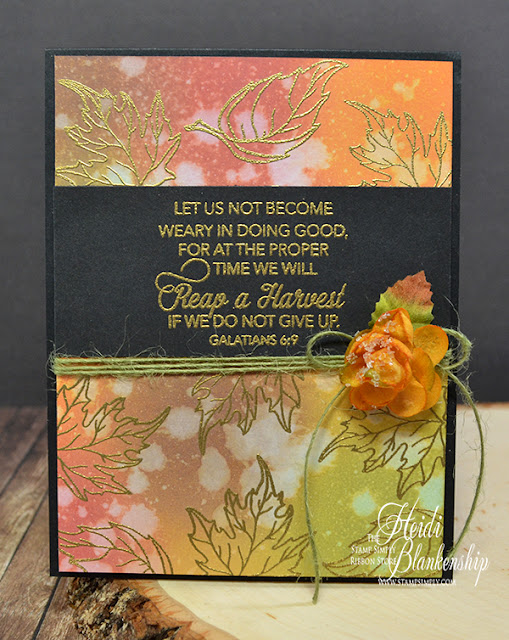
Hello everyone! Today, I have a colorful Fall card to share with you using some of the Stamp Simply Clear Stamps and Tim Holtz Distress Oxide Inks. I just can't get enough of the Oxide Inks! They are so easy to work with and blend so beautifully to create backgrounds.
Here is the card I designed. With the Oxide Inks and the Stamp Simply Clear Stamps it is so fun to create your own pattern paper.
To start, I placed a piece of Ranger Watercolor paper on my Craft Mat with the smooth side up. I used the Mini Ink Blending Tools to apply the ink. I started with the lightest color and worked my way to the darkest color. I used Tim Holtz Distress Oxide Inks - Fossilized Amber, Spiced Marmalade, Peeled Paint, Fired Brick, Vintage Photo. After the first layer on inks and went back and blended more ink into the paper for a smooth blended look.
I used the Distress Sprayer Bottle to add water droplets to the paper and then I used a paper towel to blot up the excess water. After achieving the look I wanted I used a heat tool to dry the paper.
After the paper was good and dry I used the EK Success Powder Tool to go over the entire piece of paper. The powder tool is great to use when you are heat embossing. It keeps the embossing powder only where you stamp so you won't have excess embossing powder on your paper.
Next I stamped both of the leaves from the Stamp Simply Clear Stamps - Harvest SS-010 with VersaMark Ink. Then I applied Super Fine Detail Gold Embossing Powder and used my heat tool to melt and heat set the powder. I just love how the gold embossing looks on the paper.
The sentiment I used is from the Harvest SS-010 stamp set and I used VersaMark Ink and Super Fine Detail Gold Embossing Powder to heat emboss. I cut the background piece down in size for a card front and then I added the piece of black cardstock with the sentiment. Then I added some May Arts - Sage Burlap String and a Petaloo Botanica Collection Sugared Minis Gold/Sienna flower.
To finish off the card I added Foam Tape to the back of the card front and then I adhered that piece to a black A2 top folding card.
I hope you enjoyed today's card share and tutorial! All of the supplies I using can be found at The Stamp Simply Ribbon Store. I encourage you to check out the Stamp Simply Blog where you will find lots of inspiration from the design team.
Happy Friday and I hope you have a wonderful weekend!
Hugs & Smiles,
Heidi
Supplies
Stamps: Stamp Simply Clear Stamps - Harvest SS-010
Paper: Ranger Watercolor, Cardstock - Black
Ink: VersaMark Ink, Tim Holtz Distress Oxide Inks - Fossilized Amber, Spiced Marmalade, Peeled Paint, Fired Brick, Vintage Photo
Ribbon: May Arts - Sage Burlap String
Accessories: Ranger - Mini Ink Blending Tools, Distress Sprayer Bottle, Super Fine Detail Gold Embossing Powder, Craft Mat, EK Success Powder Tool, Petaloo Botanica Collection Sugared Minis Gold/Sienna, Scrapbook Adhesives by 3L - E-Z Runner, Foam Tape, Heat Tool, Paper Towel


Oh my goodness Heidi, this is one gorgeous card! (I had to pin it!) So gorgeous, well done!
ReplyDeleteEXQUISITE card, Heidi! Just plain beautiful with the gold embossing! Looks so royal!
ReplyDeleteBeautiful card!
ReplyDeletea lovely card Heidi. and to think fall is just around the corner. TFS. (gail)
ReplyDelete