For my projects I used the Best Buds Vintage Postcard Kit and matching Stamp Set. I love working with the Vintage Postcard Kits, the images are so beautiful and the creative possibilities are endless. The Vintage Postcard Kits come with 6 Large Images, 12 Image Embellishments, 18 Ivory Chipboard Pieces and a Matching Stamp Set.
 The first project I created is a little mini wall hanging with one of the large images from the Best Buds Vintage Postcard Kit and one of the large ivory chipboard pieces.
  I started out by cutting out the image of the bird with the nest and lilacs and using 3-in-1 Advanced Craft Glue from Beacon to adhere the cardstock image to the chipboard piece. Then I sanded the edges for a nice smooth finish. Next I inked the edges using Vintage Photo Distress Ink from Ranger and then I stamped the floral vine images with Rich Cocoa Memento Ink from Tsukineko. Here is a close up where you can see the stamped images around the edge of the chipboard.
  Then I misted the edges with Honey Dew Mist, Glimmer Mist from Tattered Angels. I let the Glimmer Mist sit for a few seconds and then took a kleenex to lightly blot it. Once the paper was dry then I stamped the sentiment with gold pigment ink and added gold embossing powder and heat set.
  Here is a close up picture where you can see the shimmer from the Glimmer Mist on the edge of the chipboard.
 I also added some Lilac, Lavender and Ivory Flower Soft to the lilacs, a few pearls and finished of the wall hanging with a light blue sheer ribbon.
 For the backside of the postcard I used Peeled Paint Distress Ink from Ranger to ink the chipboard. Then I stamped several of the stamp images from the Best Buds matching Stamp Set. I also added Honey Dew Mist, Glimmer Mist from Tattered Angels to the edges and a few pearls.
Supplies~
Crafty Secrets~Best Buds Vintage Postcard Kit, Best Buds Stamp Set
Ink~Ranger-Vintage Photo, Peeled Paint Distress Ink, Tsukineko-Memento Rich Cocoa Ink, Gold Pigment Ink
Other~Tattered Angels Glimmer Mist Honey Dew Mist, Flower Soft Lilac, Lavender, Ivory and Flower Soft Glue, Beacon-3-in-1 Advanced Craft Glue, Gold Embossing Powder, Heat Tool, Pearls, Blue Sheer Ribbon.
For my second project I altered a tiny little candy tin.
 I started by using two colors of Glimmer Mist, Coffee Shop and Honey Dew Mist on the tin and then I heat set the Glimmer Mist. When I was doing the heat setting I did it a little longer and let the Glimmer Mist bubble up in some areas. Doing this seemed to give the tin an older look.
  Then I added a piece of lace trim. I used on of the Image Embellishments from the Best Buds Vintage Postcard Kit from Crafty Secrets and a piece of the Ivory Chipboard. I sanded and inked the edges using Vintage Photo Distress Ink from Ranger. To adhere the lace and chipboard I used 3-in-1 Advanced Craft Glue from Beacon and For the buttons and pearls I used Gem-Tac from Beacon.
 Supplies~
Crafty Secrets~Best Buds Vintage Postcard Kit
Ink~Ranger-Vintage Photo
Other~Tattered Angels Glimmer Mist Coffee Shop, Honey Dew Mist, Beacon-3-in-1 Advanced Craft Glue, Gem-Tac, Heat Tool, Lace Trim, Pearls and Buttons, Candy Tin
Don't forget to check out all of the Fabulous projects made by the Crafty Secrets Design Team! Here is a list with links to their blogs. I also wanted to let you know that Marisa Grosson will be giving away a $30 Gift Certificate for Crafty Secrets on her blog and Sandy Redburn, owner of Crafty Secrets is also going to be having some fun Blog Candy on the Crafty Secrets Blog.
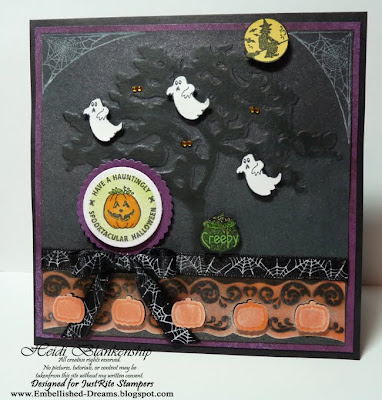
Thank you so much for stopping by today and I hope you enjoy the Crafty Secrets Design Team Challenge! I hope you have a Wonderful Weekend and a Spooktacular Halloween!!!
Smiles!
Heidi


