Hello and welcome to the first Design-abilities Blog Hop! We are the
Spellbinders® Blog Team and we wanted to do something fresh, fun and
creative to bring our team together. But before we get started we want
to let you know this blog hop is just for fun and creative inspiration
we are not sponsored by Spellbinders Paper Arts®. Starting this month
we are going to do a Blog Hop every other month (on the 16th) and we
will have a link list to all of the Designer. Sometimes we might not
all be able to participate but we would still encourage you to visit all
of the Blog Team Members and check out their blogs. You will find all
kinds of ideas for die cutting, papercrafting, mixed media, DIY
projects, jewelry, home decor, lots of tutorials and techniques. As
designers we are always inspired by each other and we hope to inspire
you too.

For my project I altered a 5 x 5 frame for Halloween. I love to decorate for Halloween and this little altered frame is the perfect home decor piece. I painted the frame with black acrylic paint. Then I added a piece of pattern paper to the center. I used S4-126 Classic Squares Large, S4-295 Lacey Squares die templates to die cut the cute little witch image. All of the pattern paper is from the Authentique Thrilling 6 x 6 paper pad. I used 3D Foam Squares from Scrapbook Adhesives by 3L® in between the die cut layers.

I added a fun flower cluster in the top corner using some of the WOC Flowers in Halloween colors. To create the leaves I used S2-049 Corner Sprigs. The little leaf sprig die cuts are perfect to use with the flowers and the size of the leaves is just right. I think this might be my favorite new die template set! I also added some diamond Stickles for a little sparkle.

On the side of the frame I added another flower cluster, some Black Seam Binding and a MB3-001S Circle Hatpin-Silver. The image in the hatpin is also from the Authentique Thrilling 6 x 6 paper pad. I also added a few beads to the hatpin.

To create the hatpin I used the MD1-007 Circles One die template to die cut the image. Then I added a little glossy accents in the hatpin and added the image. To top it off I added a clear epoxy circle sticker. I have had these stickers for a few years and I am not sure which company they are from but I am sure if you do a goggle search these will pop up.
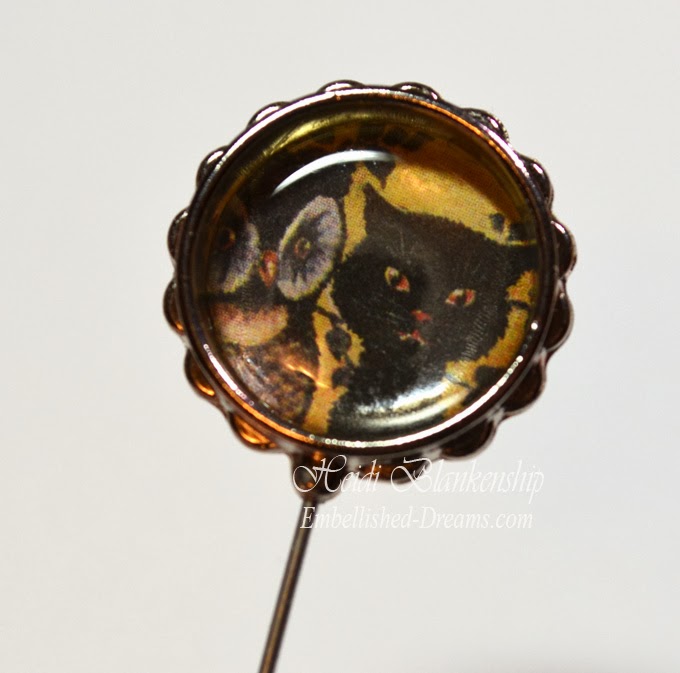
Here is a close up of the hatpin.

Please be sure to visit all of the Blog Team Members in the link list below to see what they have created to share with you. Seth, wasn't able to join us this month but please hop on over and check out his blog too--he has some really inspiring designs!
Thank you for joining us today and we hope you enjoy the blog hop!
Please be sure to join us
December 16th for our next blog hop.
Hugs & Smiles,
Heidi
Supplies
Paper: Herbal Garden; Authentique Thrilling 6 x 6 paper padDies: Spellbinders Creative Arts® Grand Calibur® Machine, S4-126 Classic Squares Large, S4-295 Lacey Squares, S2-049 Corner Sprigs, MD1-007 Circles One, MB3-001S Circle Hatpin-Silver
Accessories: Really Reasonabl Ribbon Black Seam Binding, WOC Flowers; 5 x 5 wood frame, black acrylic paint, Ranger Diamond Stickles, Glossy Accents; Scrapbook Adhesives by 3L® 3D Foam Squares; Clear Epoxy Circle Stickers