Showing posts with label Flower Soft. Show all posts

Friday, May 20, 2011

Nestabling™, Swirls and Pearls - Sweet Little Birds

Good morning and welcome to the Want2Scrap™ blog! Today, I have a pretty Spring card filled with Nestabling™, Swirls and Pearls to share with you. Here is the card that I designed using Nestabling™ Lacey Ovals Moss Pearl, (love this color of green! *wink*) 72 Count - White Pearls - Self Adhesive , Swirls, Finesse - Brown Rhinestone - 2 Pack - Self Adhesive and Baby - White - Pearls -100 Count. To start I cut/embossed a piece of Simply Smooth Ivory cardstock from Discount Cardstock using the Grand Calbiur™ and S4-314 Lacey Ovals #5 die template from Spellbinders™. Then I added the Nestabling™ Lacey Ovals Moss Pearl from Want2Scrap™. Look how beautifully and perfectly the Nestabling™ fits on the lacey edges of the die cut. Next I cut/embossed the image of the birds using the Grand Calibur™ and S4-110 Classic Ovals Large #4 die template from Spellbinders™. The image of the birds is from Crafty Secrets Birds & Botanicals Images & Journal Notes.Here is a close up of the image and Nestabling™.
Next I wanted to add a Swirls, Finesse - Brown Rhinestone - 2 Pack - Self Adhesive but I knew it was going to be a little big for the space I had left on my card so I cut the swirl into two pieces. By cutting the swirl it does tow things--allows me to use it in the space I have and I can create a different look for the swirls depending on the placement. Here is a picture with the placement of the swirl. I also added 72 Count - White Pearls - Self Adhesive and Baby - White - Pearls -100 Count to the tip of each swirl. I love this look! It give the appearance the swirl and pearls are all one piece. I added a flower for and embellishment at the bottom. To create the flower I cut Simply Smooth Ivory cardstock, using the Grand Calibur™ and S5-050 Rose Creations die templates. Then I inked the edges with Spun Sugar Distress Ink and added a 72 Count - White Pearls - Self Adhesive to the center and then added Flower Soft around the pearl. For the leaves I used S4-328 Foliage and Herbal Garden Medium Prismatic cardstock. I inked the leaves with Peeled Paint Distress Ink. For the sentiment I used word blocks from Crafty Secrets Altered Fairies Creative Scraps.All of the cardstock used is from Discount Cardstock. For a finishing touch I added Diamond Stickles to the image, flower and leaves.

Want2Scrap™ Supplies Used:
Nestabling™ Lacey Ovals Moss Pearl
72 Count - White Pearls - Self Adhesive
Swirls, Finesse - Brown Rhinestone - 2 Pack - Self Adhesive
Baby - White - Pearls -100 Count

Cross Promotional Products Used:
Dies: Spellbinders™ Grand Calibur™, S4-314 Lacey Ovals #5, S4-110 Classic Ovals Large #4, S4-328 Foliage, S5-050 Rose Creations
Accessories: Beacon Adhesives™ Zip Dry™

Other Supplies Used:
Paper: Discount Cardstock Simply Smooth Ivory, Chamois Cascata Felt, Herbal Garden Medium Prismatic, Posh Milk Chocolate Felt
Ink: Tsukineko Memento Rich Cocoa; Ranger Spun Sugar, Peeled Paint Distress Ink
Accessories: Crafty Secrets Birds & Botanicals Images & Journal Notes, Altered Fairies Creative Scraps (sentiment); Flower Soft Sage, Sunshine Yellow, Autumn; Ranger Diamond Stickles; Scrapbook Adhesives by 3L3D Foam Squares

Thank you so much for stopping by today and don't forget to check out the the Want2Scrap™ Blog! I hope you have a Happy and Creative Friday!!

Hugs & Smiles,
Heidi

Tuesday, May 10, 2011

JustRite Stampers - New Releases for May - You are the Best

Good morning! So what do you think about all of the New Releases from JustRite Stampers? Are you loving them? I know I am!! Today, I have another New Release to share with you CL-02135 You are the Best. The You are the Best stamp set is filled with ribbons, banners, and sentiments and includes 22 stamps! Some of the stamps in the set are also designed to match these Spellbinders die templates, S4-213 Blossom Three, S5-028 Nested Pennants and S4-029 Nested Lacey Pennants.Here is the card that I designed using CL-02135 You are the Best stamp set from JustRite Stampers. I used the ribbon images from the stamp set along with S4-312 Blossom Three die template from Spellbinders to create a couple of flowers. To start I stamped the images using Rich Cocoa ink on to Simply Smooth White Cardstock from DCS.Then I added color to the images using Copic markers.I lined up the images with the S4-312 Blossom Three die templates and taped them for perfect placement. Then I used the Grand Calibur to cut the flower images.Next I added Antique Linen Distress Ink to the edges of the flowers and then shaped them.I edges each of the flowers with Gold Pigment ink and Gold EP and heat set. Then I added Earth Flower Soft and Autumn Medley Glitter from Sparkle N Sprinkle to the center of the flowers.To make the little flag I used two of the stamps from the Your are the Best stamp set and S5-028 Nested Pennants. For the leaves I used S4-321 Nested Leaves. I added Swirls, Finesse - Brown Rhinestone - 2 Pack - Self Adhesive and 72 Count - Pink Pearls - Self Adhesive from Want2Scrap.Supplies
Stamps: JustRite Stampers CL-02135 You are the Best
Paper: Discount Cardstock Simply Smooth White, Herbal Garden Medium Prismatic, Posh Milk Chocolate; Prima Madeline Collection
Ink: Tsukineko Memento Rich Cocoa; Ranger Distress Inks Antique Linen, Peeled Paint; Copic Markers
Dies: Spellbinders Grand Calibur, S4-312 Blossom Three; S5-028 Nested Pennants; S4-321 Nested Leaves
Accessories: Want2scrap Swirls, Finesse - Brown Rhinestone - 2 Pack - Self Adhesive, 72 Count - Pink Pearls - Self Adhesive; Joann's Gold EP; Flower Soft Earth; Sparkle N Sprinkle Autumn Medley; Beacon Adhesives Zip Dry; Scrapbook Adhesives by 3L 3D Foam Squares.

Than you so much for stopping by today!! I hope you can take a little time to visit each of the Design Team Members listed below and see what they have created to share with you.

JustRite Inspiration Blog

Sharon Harnist

Mona Pendleton

Angela Barkhouse

Sankari Wegman

Heidi Blankenship

Barb Schram


Have a Happy and Creative Day!!

Hugs & Smiles,
Heidi

Saturday, March 19, 2011

Crafty Secrets and Eclectic Paperie (Shabby) blog hop

Good morning! Yesterday was the Blog Hop with Crafty Secrets and Eclectic Paperie and I had other commitments for my blog yesterday so Sandy, owner of Crafty Secrets posted my projects for the Blog Hop on the Crafty Secrets Blog and now I get to share them here with you today. If you missed the Blog Hop yesterday here are the details and you could have a chance to win some great blog candy!! Both EP and Crafty Secrets will be giving away prizes. A total of six prizes all together! You can find out more about the prizes on the Heartwarming Vintage and Eclectic Paperie blogs. ( linked below). The more DT blogs you visit and leave comments on, the more you increase your chances to win one of the 6 prizes. Winners to be announced on Monday. **Edit** Sandy from Crafty Secrets added a few more prizes!! So you know what that means--even more chances to win!!!

I have two projects to share with you today. The first one is a tag I designed using Wonderland Tea Creative Scraps and Greetings from Wonderland stamp set from Crafty Secrets. I hand cut the tag image, rabbit, key hole and ticket from the Wonderland Tea Creative Scraps. I used Copic marker BG72 Ice Ocean to color in the checker border and on the ribbon. Then I inked all the edges with Vintage Photo Distress Ink. I stamped the sentiment on to the tag and the cat onto Simply Smooth White Cardstock and colored with Copics.I added a black eyelet to the top and added the ribbon and added Pink Stickles to the roses.

Supplies
Stamps: Crafty Secrets Greetings from Wonderland
Paper: Discount Cardstock Simply Smooth White
Ink: Tsukineko Memento Tuxedo Black; Ranger Vintage Photo Distress Ink; Copic Markers
Accessories: Crafty Secrets Wonderland Tea Creative Scraps; Ranger Pink Stickles; SCRAPBOOK ADHESIVES By 3L™ 3D Foam Squares; Ribbon, Eyelet

For my second project I designed a sweet little boy card. I think the Little Boys stamp set from Crafty Secrets is so adorable!I started by stamping several of the images from the Little Boys stamp set using Rich Cocoa ink. Then I started to add color using Copic markers. Next I added the greens for the shirt and the grass. I used three Copic colors for the hair.These are the Copic colors I used for the skin, eyes and cheeks and lips.After all of the coloring was done I used the Grand Calibur, S4-307 Reverse Wonky Rectangles #6 and S4-324 Ribbon Banners from Spellbinders to cut/emboss the die cut shapes. Then I inked the edges with Antique Linen Distress Ink. To add a little texture to the grass I added Ultra Fine Sage Flower Soft.I stamped the image of the frog, colored with Copic markers and added a 3D Foam Square to pop him up.I stamped the images of the airplane, colored with Copic markers and added a 3D Foam Square to pop it up. I also added faux stitching lines around the edge.For the base of the card I used LF-246 Grand Labels Eleven.

Supplies
Stamps: Crafty Secrets Little Boys
Paper: Discount Cardstock Simply Smooth White; WolrdWin Green, Blue
Ink: Tsukineko Memento Rich Cocoa; Ranger Antique Linen Distress Ink
Dies: Spellbinders™ Grand Calibur™, LF-246 Grand Labels Eleven #2, #3, S4-307 Reverse Wonky Rectangles #6, S4-324 Ribbon Banners
Accessories: Flower Soft Glue, Ultra Fine Sage; SCRAPBOOK ADHESIVES By 3L™ 3D Foam Squares


Crafty Secrets Team

The E-Team:

Thank you so much for stopping today and I hope you have a fantastic weekend!!

Hugs & Smiles,
Heidi

Thursday, October 28, 2010

Spellbinders Layout - The Mask

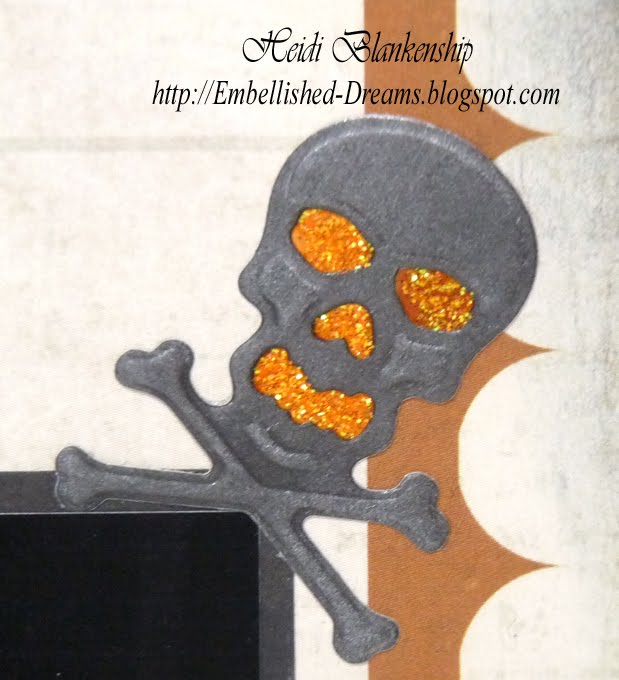
Hello! I can't believe Halloween is just a couple of days away and then it will be November! Where does the time go? Today, I have a Halloween layout to share with you using several of the Spellbinders™ Halloween die templates and My Mind's Eye papers. The photos are of my oldest son from last Halloween. He designed the mask himself and then we ordered some really wild looking contacts for him. I thought the mask turned out really cool looking and all of his friends loved it! But what made it kind of creepy is that he didn't talk at all and you couldn't tell who he was once he put everything else on so he had fun messing with people all night. Oh to be young again--LOL!To create the row of pumpkins across the top of the layout I cut/embossed and then airbrushed three of the pumpkins from S4-281 Jack O' Lanterns. I added the three die cut pumpkins across the top of the photo and then I cut out some pumpkins from the My Mind's Eye The Spider Web "Pumpkin Patch" paper. To add a little dimension I layered the pumpkins using 3D Foam Squares from SCRAPBOOK ADHESIVES By 3L™. Then I added Orange Peel Stickles to the eyes, nose and mouth of the pumpkins and Ultra Fine Sage Flower Soft on the stems and vines.For the graveyard scene I cut/embossed and inked several Halloween die cuts using S4-279 Graveyard Scenes and Shapes and S4-280 Halloween Fence Scene and Shapes and Brilliance Starlite Silver and Cosmic Copper inks. I layered all of the Halloween die cuts and then added Orange Peel Stickles to the windows in the house and the face on the tree. I also added Ultra Fine Sage Flower Soft to create mossy grass. I cut/embossed a few bats using S4-277 Nested Bats and added tiny red rhinestones for eyes.Here is a close up of the skull and crossbones.

Supplies
Paper: My Mind's Eye The Spider Web "Halloween Night", "Pumpkin Patch"
Ink: Tsukineko Memento Tuxedo Black, Brilliance Starlite Silver, Cosmic Copper; Copic Markers
Dies: SpellbindersGrand Calibur™; S4-279 Graveyard Scenes and Shapes, S4-281 Jack O' Lanterns, S4-280 Halloween Fence Scene and Shapes, S4-277 Nested Bats
Accessories: Flower Soft Glue, Ultra Fine Sage; Ranger Orange Peel Stickles; Joann's Tiny Red Rhinestones; SCRAPBOOK ADHESIVES by 3L™ My Stik, 3D Foam Squares; Beacon Adhesive Zip-Dry

I can't wait for Halloween! Tomorrow is my youngest son's Halloween party at his school and I am one of the room parents. He is going to be Harry Potter and he's so excited for the party!!

Thanks so much for stopping by today!

Hugs & Smiles,
Heidi

Tuesday, October 26, 2010

Crafty Secrets - A Merry Halloween Wall Hanging - Crafty Power Blog Post

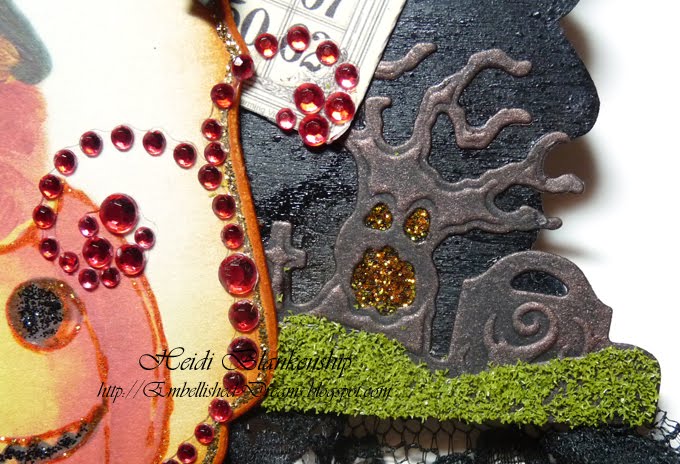
Hello! I can't believe Halloween is only a few days away! I am *crossing my fingers* and hoping the weather will be nice. Halloween is one of my favorite holidays and I have been busy creating last minute gift ideas and cards. Yesterday, I had a blog post on the SCRAPBOOK ADHESIVES By 3L Blog--The Crafty Power Blog. I have a tutorial showing you how to create this cute Halloween Candy Gift Box using two of my favorite adhesives, the NEW MyStik™ Permanent Dispenser and 3D Foam Squares from SCRAPBOOK ADHESIVES By 3L™. Click HERE for all the details! For today I create a fun little Halloween wall hanging using Halloween Vintage Postcard Kit and Halloween Greetings Creative Scraps from Crafty Secrets. I also used S4-279 Graveyard Scenes and Shapes, S4-280 Halloween Fence Scene and Shapes, S4-277 Nested Bats die templates from Spellbinders™.I started by painting the wood sign with black acrylic paint and then added Glimmer Mist and Glimmer Glam and heat set to dry.Next I made two diecuts using S4-279 Graveyard Scenes and Shapes and S4-280 Halloween Fence Scene and Shapes. Then I applies ink to make the embossed areas pop.To create the little bats I used the three smallest die templates from the S4-277 Nested Bats. I used Black 3D Foam Squares from SCRAPBOOK ADHESIVES By 3L™ to add a little dimension.I used this adorable image from the Halloween Vintage Postcard Kit. I sanded and inked the edges and then added some sparkle with Stickles. Then I added the bats and tiny red rhinestones for their eyes and I added a red rhinestone swirl on the side. For the grass in the graveyard I used Ultra Fine Sage Flower Soft. This works perfect for grass/moss and adds a fun texture to your project.Here is a close up of the haunted house. I added Orange Peel Stickles to give the windows a glowing effect.Here is a close up of the other side. The wild looking tree reminds me of the trees in The Wizard of OZ! Love the little bat eyes! *wink*The BINGO card and tickets are from Halloween Greetings Creative Scraps from Crafty Secrets.

Supplies
Crafty Secrets: Halloween Greetings Creative Scraps, Halloween Vintage Postcard Kit
Paper: WorldWin Black
Ink: Tsukineko Brilliance Starlite Silver, Cosmic Copper; Ranger Spiced Marmalade Distress Ink
Dies: SpellbindersGrand Calibur™, S4-279 Graveyard Scenes and Shapes, S4-280 Halloween Fence Scene and Shapes, S4-277 Nested Bats
Accessories: Plaid Pure Black Acrylic Paint; Flower Soft Glue, Ultra Fine Sage; Tattered Angels Stiletto Glimmer Glam, Tiger Lilly, Popsicle, Marshmallow Glimmer Mist; Ranger Gold Black, Orange Peel Stickles; Joann's Rhinestone Swirl, Tiny Rhinestones, Black Lace, Wire; SCRAPBOOK ADHESIVES By 3LCrafty Power Tape, 3D Foam Squares; Sanding Block, Sponge Brush, Paint Brush

Thank you for stopping by today! I hope you are having fun getting ready for Halloween!!

Hugs & Smiles,
Heidi

LinkWithin

Related Posts Plugin for WordPress, Blogger...