Showing posts with label Glimmer Mist. Show all posts

Sunday, October 21, 2012

A Little bit of This & That.

Hello blogging friends!  For today's blog post I have a little bit of this and that to share with you.  I have some beautiful artwork to share with you--but it's not mine.  I have some artwork from my aunt Gail to share with you!  Gail doesn't have a blog and she doesn't do FB either so I am very excited to be able to share some of her work with all of you.  


Here is a little wedding ensemble that Gail made.  I think this is so Gorgeous!!  The sweet little set includes the amazing little high heeled and pearl embellished shoes, the gift box and enclosure card.


Here is a close up of the shoes so you can see all of the details.


The little shoes and card fit just perfectly in the gift box.


Look at this beautiful little sun bonnet!  I tell ya, Gail is just amazing!!  She stopped by one day to show me a little prototype of this bonnet and it wasn't long when she stopped back to show me what she had whipped up.  I LOVE these flowers!!  And look at the gorgeous, deep and crisp embossing detail!!  She used a plastic doily and the Grand Calibur to achieve the embossing.  
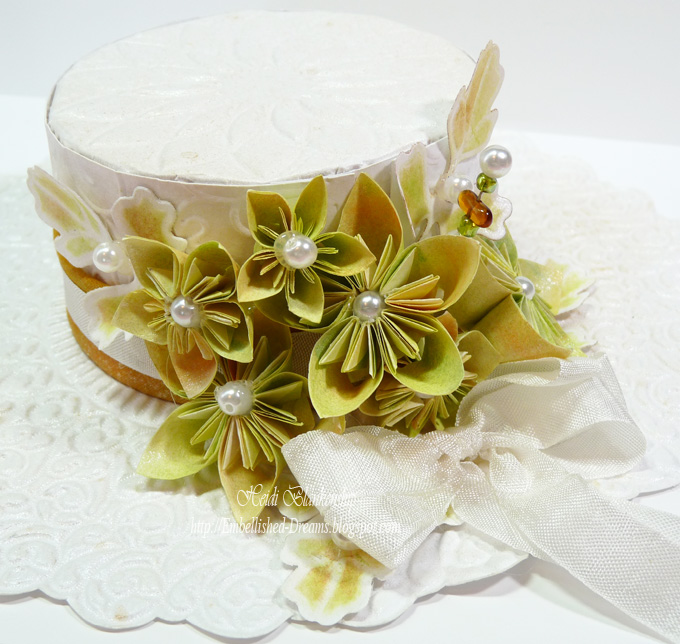

Here is a close up of the beautiful flowers.  Love the pearl centers and the pretty stickpin!


Gail also misted the entire bonnet with pearl glimmer mist.  It was so pretty and shimmery!


Ok, now I have a couple of things to share.  ;-) 


I am happy to share that I had a card published in the October 2012 issue of Crafts 'N Thing.  
Spread Your Wings page 36


I also have a card that was published in the November 2012 issue of CardMaker.
Give Thanks page 38

I have one last thing to share with you today.  About a month ago Gail and I went to a couple of garage sales and let me tell you we totally scored at one of the sales!!


Look at all of this gorgeous lace!!!  Some of it was newer but most of it was vintage lace and trims.  We bought it ALL and then we came back here to my place and split it up.  This picture is my half!!  We were both so excited--just like two little girls in a candy shop!!  LOL!!

Well, I guess that's it for today.  I am so happy to be able to share some of Gail's artwork here on my blog and I hope you enjoy seeing it.  Thanks so much for stopping by today!!

Hugs & Smiles,
Heidi

Friday, April 13, 2012

The Really Reasonable Ribbon and The Rubber Cafe' Blog Hop


Hello blogging friends! Today, is the Really Reasonable Ribbon Blog Hop for the month of April. We have a special treat for the April Blog Hop---the RRR Design Team Members & Special Event Design Team Members will be teaming up with the Design Team Members from The Rubber Cafe'! We will be showcasing the April Ribbon Club Assortment and other Ribbons and Trims from RRR and Rubber Stamps, Glue, Glitter and other Crafty Supplies from TRC.

There will be two prizes offered on the blog hop--one will be on the Really Reasonable Ribbon Blog and the other one will be on The Rubber Cafe' Blog. The prizes are both an approximate value of $20 each. Comments are encouraged on all of the stops but, the prizes will be randomly selected from the two company blogs.


This month there is a beautiful assortment of Pastel Ribbons included in the April Ribbon Club Assortment Click HERE for more details.

If you are following the order of the blog hop you should have just come from Rita's Blog. If not and you just happened to pop in for a visit please click HERE to start the blog hop at the The Rubber Cafe' Blog.


For my project I created a Shabby Paris wall hanging using the Welcome Spring! April Ribbon Club Assortment from Really Reasonable Ribbon and I also used several stamp sets, Scrap Happy Sheer Glue, You're So Fine Glitter and Pearls from The Rubber Cafe'.


I started with a wood wall hanging piece and I put two coats of Gesso on the wood and then I used Spun Sugar, Milled Lavender and Stormy Sky Distress Inks to add some color. Next I misted the entire piece with Iridescent Gold Glimmer Mist. Then randomly stamped the images from S-114 Vintage Treasures using Pumice Stone Distress Ink.


Here is a close up so you can see the Glimmer Mist.


Next I stamped the image of the corset from the I-981 Be Stylish stamp set with Tuxedo Black ink, added a layer of Gesso and then added some color with Spun Sugar Distress Ink. Then I fussy cut the image and added the ribbon to the backside. I used a hot glue gun and scrunched the ribbon as I was gluing it in place to create a ruffle effect.


Here is a close up of the front so you can see all the pretty ribbon ruffles.


I applied Scrap Happy Sheer Glue to the corset and then I added Diamond Clear Glitter and Pearls. I also added wings to the corset. I used S5-101 Wings Of Hope die templates from Spellbinders to create the wings. Then I added Diamond Clear and Bronze Medal glitter to the wings. I stamped the I-985 Paris Nights Background using Tuxedo Black ink, added Gesso and then same colors of Distress Inks as mentioned above. Then I used S5-077 Labels Twenty-Five to die cut the image and I inked the edges and added glitter to the tower.


I used the pink ribbon to create a flower and added a gold filigree jewelry finding and a pearl to the center.


I applied Scrap Happy Sheer Glue and Diamond Clear Glitter to several paper flowers and leaves from I am Roses.


Then I took the ribbon flower and the paper flowers and made a pretty little cluster down in the bottom corner. I also added a few Pearls.


I tied a piece of the pink ribbon to the top for a hanger and then I added more pink, blue and lavender ribbons.


Now to continue in the blog hop you need to hop on over to Cherry's Blog and check out her fantastic project!

Thank you so much for stopping by today and I hope you enjoy the Blog Hop with Really Reasonable Ribbon and The Rubber Cafe'!! Don't forget to visit the RRR Store and check out all of the beautiful ribbons, lace and trims! Also be sure to check out all of the Rubber Stamps and crafty goodness over at TRC!

I hope you have a wonderful and creative day!

Hugs & Smiles,
Heidi

Supplies
Really Reasonable Ribbon: Welcome Spring! April Ribbon Club Assortment
The Rubber Cafe': S-114 Vintage Treasures, I-985 Paris Nights Background, I-981 Be Stylish, Scrap Happy Sheer Glue, You're So Fine Glitter - Diamond Clear, Bronze Medal, Pearls (coming soon), Stick "EM" Up Tool
Paper: Discount Carstock Simply Smooth White
Ink: Tsukineko Memento Tuxedo Black; Ranger Distress Inks - Pumice Stone, Spun Sugar, Milled Lavender, Stormy Sky
Dies: Spellbinders Grand Calibur, S5-077 Labels Twenty-Five, S5-032 Elegant Post, S5-101 Wings Of Hope
Accessories: I am Roses Paper Flowers & Leaves; Tattered Angels Iridescent Gold Glimmer Mist; Scrapbook Adhesives by 3L 3D Foam Squares; Gesso; Gold Jewelry Finding, Wood Sign, Hot Glue Gun

Saturday, January 28, 2012

String of Hearts Love Card

Good morning blogging friends! Today, I have a quick and easy Valentine's card to share with you.


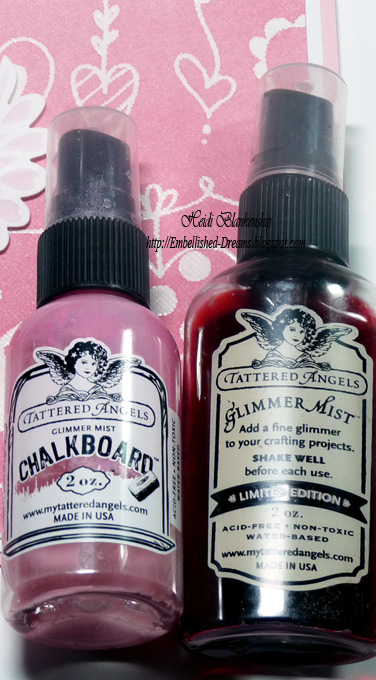
I started with the String of Hearts paper from Discount Cardstock and then added Tattered Angels Glimmer Mist Tutti Fruitti, Chalkboard Cotton Candy to add the color to the paper.


The paper started out white with the embossed pattern of the hearts and when I applied the glimmer mist the embossed is like a resist and doesn't pick up the color.


I used S5-089 Home Sweet Home to cut/emboss the heart and wings and then I added some color with Copic markers. To hang the heart I used Sweetheart Twine from Really Reasonable Ribbon and then added some Diamond Clear Glitter from The Rubber Cafe.

I also stamped the word Love using a stamp from the J-1095 Fabulous Phrases from The Rubber Cafe.

Thank you so much for stopping by today! I hope you have a wonderful day!!

Hugs & Smiles,
Heidi

Supplies
Paper: Discount Cardstock String of Hearts, Simply Smooth White, Frosted Pink Prismatic
Stamps: The Rubber Cafe J-1095 Fabulous Phrases
Ink: Tsukineko Memento Tuxedo Black; Tattered Angels Glimmer Mist Tutti Fruitti, Chalkboard Cotton Candy; Copic Marker R83 Rose Mist
Dies: Spellbinders Grand Calibur, S5-089 Home Sweet Home
Accessories: Really Reasonable Ribbon Sweetheart Twine; The Rubber Cafe Scrap Happy Sheer Glue, You're So Fine Glitter Diamond Clear; Scrapbooks Adhesive by 3L 3D Foam Squares

Tuesday, December 13, 2011

Really Reasonable Ribbon Blog Hop - December Ribbon Club


Good morning blogging friends! Today, is the Really Reasonable Ribbon Blog Hop for the month of December. The RRR Design Team Members and Special Event Design Team Members will be showcasing the Monthly Ribbon Club.


There is a beautiful assortment of White Ribbons, Lace and Trim included in the December Winter Whites Monthly Ribbon Club. Click HERE for more details.

If you are following the order of the blog hop you should have just come from Joanna's Blog. If not and you just happened to pop in for a visit please click HERE to start the blog hop at the Really Reasonable Ribbon Blog.


For my project I designed a Christmas card and matching Christmas ornament.


On the card I made a wide border using several of the ribbons in the Winter Whites collection. Then I stamped the sentiment using Rich Cocoa ink and CR-02250 Winter Words stamp set from JustRite Stampers.


Here is a close up of the little felt mitten. I used S4-285 Nested Mittens die template from Spellbinders™ and also added some of the lace and trim from the Winter White Ribbon Club collection. To create the look of little pearls I used a Viva Cream Pearl Pen.


To create the little Christmas mitten ornament I used ivory felt and the largest die template in the set from S4-285 Nested Mittens. I cut two mittens and then I did a blanket stitch around the edges, leaving the top of the mitten open.


Before sewing the two mittens together I sewed ribbon and lace trim across the top of the front mitten.


Next I die cut the flower and leaves from ivory felt using S5-050 Rose Creations, S4-328 Foliage die templates and then added color and glitter to each piece.


To add the color and glitter I used a mixture of Glimmer Mist and Liquid Laminate, applied it with a q-tip and then added the glitter. I used the Liquid Laminate as an adhesive for the glitter but it also makes the felt harden up once it's dry.


Taking a small piece of the lace trim I created a little rosette for the center of the flower.


Now to continue in the blog hop you need to hop on over to Misty's Blog and check out her fantastic project!

Thank you so much for stopping by today and I hope you enjoy the Really Reasonable Blog Hop!! Don't forget to visit the RRR Store and check out all of the beautiful ribbons, lace and trims!

I hope you have a wonderful and creative day!

Happy Holidays!!

Hugs & Smiles,
Heidi


Supplies

Warm Wishes Card~
Really Reasonable Ribbon: Winter Whites
Paper: Discount Cardstock Simply Smooth White, Simply Smooth Ivory
Stamps: JustRite Stampers CR-02250 Winter Words
Ink: Tsukineko Memento Rich Cocoa
Dies: Spellbinders Grand Calibur, S4-285 Nested Mittens
Accessories: The Rubber Cafe Viva Cream Pearl Pen; Scrapbook Adhesives by 3L™ 3D Foam Squares; Ivory Felt
Link

Mitten Ornament~
Really Reasonable Ribbon: Winter Whites
Dies: Spellbinders Grand Calibur, S5-050 Rose Creations, S4-328 Foliage, S4-285 Nested Mittens
Accessories: Clearsnap Pralines & Cream Fairy Dust Glitter; Beacon Adhesives Liquid Laminate; Tattered Angels Sweet Clover, Winter Pine, S.W.A.K. Glimmer Mists; Ivory Felt, Ivory Thread, Pearls, Jewelry Findings, Pearl Flower Stamens, Hot Glue Gun

Tuesday, November 15, 2011

Sweet & Sassy Birthday

Good morning blogging friends! Today I have a fun, bright and cheery birthday card to share with you.


Personal, I am not usually one for the brighter colors but I had so much fun coloring this CR-02230 Toppsy Turvy Cake image from JustRite and adding all of the pretty and colorful bling from Want2Scrap®.


I used Copic markers to color the image and then used Spellbinders™ Grand Calibur Die Cutting Machine and S4- Labels Fourteen to cut/emboss the shape. Then I layered the die cut, Nestaboard Labels Fourteen and Nestabling Labels Fourteen Hot Pink Rhinestones. I colored the paper doily with glimmer mist and added some die cut accent pieces from S5-071 Twisted Metal Tags & Accents.


For the rose I used S4-352 Spiral Blossom Two from Spellbinders. Once the rose was rolled I added glimmer mist and glitter to match the Nestabling and Ribbon. The ribbon is from the Shimmer Satin Bright Assortment from Really Reasonable Ribbon. I also added some Baby Bling Turquoise Rhinestones to the cake and corners of the card and Baby Bling White Pearls to the swirl die cut accents.

Thank you so much for stopping by today! I hope you have a wonderful and creative day!!

Hugs & Smiles,
Heidi


Want2Scrap
Nestabling Labels Fourteen Hot Pink Rhinestones
Nestaboard Labels Fourteen
Baby Bling Turquoise Rhinestones
Baby Bling White Pearls

Spellbinders Grand Calibur
S4- Labels Fourteen
S4-352 Spiral Blossom Two
S5-071 Twisted Metal Tags & Accents
Beacon Adhesives 3-in-1 Advanced Craft Glue

Paper: Discount Cardstock Simply Smooth White, Bazzill Swiss Dot Salt, Frosted Pink Prismatic, Frosted Teal Prismatic, Lime Denim
Stamps: JustRite Stampers Clear CR-02230 Topsy Turvy Cakes
Ink: Tsukineko Memento Tuxedo Black, Ranger Antique Linen, Copic Markers
Accessories: Really Reasonable Ribbon Shimmer Satin Bright Assortment; Clearsnap Pralines & Cream Fairy Dust Glitter, Glue Gloss, Pink Chalk Ink; Tattered Angels Caribbean Blue, Timeless Lilac, S.W.A.K. Glimmer Mist; Flower Stamens; Paper Doily; Scrapbook Adhesives by 3L 3D Foam Squares

Tuesday, November 8, 2011

JustRite Stampers - New Release - Scrolled Vine Background Stamp & Vintage Wallpaper Background Stamp

Good morning blogging friends! Today, I have two New Release Background Stamps from JustRite Stampers to share with you. Both of these background stamps are so Beautiful!! But before I get started I wanted to let you know that JustRite Stampers is having a Christmas Sale - 25% off Every Christmas Stamp- Cling, Clear, Original. It's a web sale -- no coupon code required!! So be sure to check it out!


Here is the first card I designed using CL-03555 Scrolled Vine Background Stamp and CL-02150 Deck the Halls. I love the beautiful scrolling vines!


To start I stamped the image using Frost White pigment ink from Clearsnap and heat set it to dry. I also inked the edges of the cardstock to give the edges a nice soft look.


I used S5-055 Layered Poinsettia to create the die cuts, shaped the flowers and leaf with a stylus and then layered the flowers.


To add a little sparkle I added Pralines & Cream Glitter to the scrolling vines and the poinsettia.


Here is a close up of the glitter.


Supplies
Scrolled Vine Background Card~
Stamps: JustRite Stampers CL-03555 Scrolled Vine Background Stamp, CL-02150 Deck the Halls
Paper: Discount Cardstock Really Red, Kraft, Posh Hemlock Felt
Ink: Clearsnap Frost White Pigment Ink; Tsukineko Memento Rich Cocoa
Dies: Spellbinders Grand Calibur, S5-055 Layered Poinsettia
Accessories: Want2Scrap™ 72 Count White Pearls; Clearsnap Pralines & Cream Fairy Dust Glitter, Glue Gloss


For my second card I used CL-03550 Vintage Wallpaper Background Stamp and CL-02150 Deck the Halls. I was so happy with how the background turned out! The colors are so soft with a touch of glimmer.


To create the background I used three colors of Distress Ink--Victorian Velvet, Antique Linen and Walnut Stain and inked up the stamp starting with the lightest color, then the medium and then the darkest. Instead of adding water to blend the inks I lightly misted the stamp with Tattered Rose Glimmer Mist. I laid the paper on top of the stamp and used a brayer to go over the paper and transfer the ink.


Here is a close up of the background stamp and the glimmer mist.


The sentiment is from CL-02150 Deck the Halls. I used the Standard Circles Small and S5- Fancy Tags Three from Spellbinders to create the die cuts. Then I added Nestabling Fancy Tags Three White Pearls.


I used S4-340 Create-A-Flake Three for the snowflake and then added some white pearls.


Supplies
Vintage Wallpaper Background Card~
Stamps: JustRite Stampers CL-03550 Vintage Wallpaper Background Stamp, CL-02150 Deck the Halls
Paper: Discount Cardstock Simply Smooth Ivory, Pearl Metallic
Ink: Tsukineko Memento Rich Cocoa, Ranger Victorian Velvet, Antique Linen, Walnut Stain Distress Inks
Dies: Spellbinders Grand Calibur, S5- Fancy Tags Three, S4- Small Standard Circles, S4-340 Create-A-Flake Three
Accessories: Want2Scrap™ Nestabling Fancy Tags 3 White Pearls, 72 Count White Pearls; Tattered Angels Tattered Rose Glimmer Mist, Seam Binding

Please be sure to visit each of the JustRite Design Team Members listed below for some great inspiration using the New CL-03555 Scrolled Vine Background Stamp and CL-03550 Vintage Wallpaper Background Stamp.


Thank you so much for stopping by today!!

Hugs & Smiles,
Heidi

LinkWithin

Related Posts Plugin for WordPress, Blogger...