Showing posts with label Halloween. Show all posts

Tuesday, October 3, 2017

Happy Halloween Banner - Tonic Studios USA

Hello everyone!  I can't believe it's already October.  We've had kind of a strange start to the Fall weather with the warmer temps.  The start to the holidays will be here before we know it.  It seems like once school starts then the next thing it's Halloween and after that time just seems to fly by.  Today, I have a fun Halloween banner to share with you using some of the fantastic new Halloween dies from Tonic Studios.  I'm just sharing a few pictures here on my blog and if you would like to see the full tutorial you can click HERE to visit the Tonic Studios USA Blog.


Here is a look at the Happy Halloween banner.  Sorry the picture isn't very big.  It's hard to get a longer photo to fit in the space without cutting part of it off lol.  But if you click on the images you will be able to see larger ones with more detail.


I had so much fun creating this banner!  I used Tim Holtz Distress Oxide Inks for the background on all of the banner pieces.  Once the banner was all assembled then I added glitter drops, crystal drops, and glow drops for embellishments.  I added the ruby slippers glitter drops to all of the spiders.  Halloween paper spiders are the only spiders I like lol.


Here is a close up to see where I added the glow drops on the haunted house.


This is the first banner piece.  I am loving the Halloween dies!  The next few pictures are close ups of each banner piece.


I also added some of the glow drops to the moon.


To finish off the banner I added seam binding in between each of the banner pieces.  I can't wait to hang this banner up and decorate for Halloween.

Don't forget if you would like to see the full tutorial you can click HERE to visit the Tonic Studios USA Blog.  Are you creating any home decor pieces for Halloween or fun cards, treat bags?  Halloween is a favorite at our house so I think we will be getting all of the decorations out this weekend.  Thanks so much for stopping by today!

Hugs & Smiles,
Heidi


Supplies Used: 
Paper:  
Starthmore Mixed Media Paper 
Cardstock - Black, White
Dies:  
Grand Gala Beautiful Bunting Die Set 1796e 
Spooktacular Coffin Treat Box Die Set 1800e (spider, bat, skull) 
Huanted House Insert Die Set 1802e 
Witchy Bits Halloween Trio Die Set 1820e (hat) 
Happy Halloween Minature Moments Die Set 1861e 
Rococo Wicked Web 1822e 
Rococo Pumpkin Scene 1823e 
Rococo Creepy Cauldron 1821e 
Inks:  
Tim Holtz Distress Oxide Inks 
Twisted Citron 
Spiced Marmalade 
Wilted Violet 
Black Soot
NUVO:  
Nuvo Glimmer Paste - Black Diamond 952n 
Nuvo Crystal Drops Gloss - Ebony Black 650n 
Nuvo Glitter Drops - Ruby Slippers 752n 
Nuvo Glow Drops Neon - Banana Split 747n 
Nuvo Glue Pen Medium 203n 
Nuvo Light Mist Spray Bottle 849n 
Ribbons:  
Seam Binding 
Purple 
Orange
Yellow
Green 
Accessories/Tools:  
Essentials Easy Clean Mat 1514e 
Tim Holtz – 8″ Guillotine – 160e 
Tim Holtz – 5 inch/ 12.3cm Mini Snips – 816e 
Tangerine Die Cutting Machine with Plates 138e   
Mini Ink Blending Tools 
1" Foam Circles
Palette Knife 
Foam Tape 
Heat Tool 

Friday, October 9, 2015

The Stamp Simply Ribbon Store - Vintage Happy Halloween Card

Hello blogging friends!  Today, is my day to post for The Stamp Simply Ribbon Store.  I have another fun and CAS (Clean And Simple) Halloween card to share with you.


Here is the card I designed.  I used  Authentique - Moonlit 6 x 6 paper pad and for this card I let the paper do all the work.  For the background I used a piece of the pattern paper.  I cut it making sure the Happy Halloween sentiment and most of the spiderweb would be in the background.  I layered it on to a piece of dark orange pattern paper that was also from the same paper pad.  Then I fussy cut a few pieces of pattern paper to create the banner.


Here is a close up of the banner.  I used some May Arts Burlap String - Natural to attach all of the banner pieces and then used 3D Foam Squares to pop the pieces up.  I added a Kaisercraft Sparklets Rhinestone Clusters - Ebony to the center of each banner piece.  For a little extra sparkle I went over each banner piece with the Zig Wink of Stella Clear Glitter Brush Pen,


This cute little witch image is also from the same paper pad.  I cut a couple of layers to mat the image and used 3D Foam Squares to pop it up a little.  Then I added more of the Zig Wink of Stella Clear Glitter Brush Pen for a bit of sparkle and that finished off the card.


I used a piece of black cardstock for the card base.  It's an A2 size top folding card.

On a more personal note, I know a lot of you follow Sharon's Blog or on Facebook so you might have seen her post on FB but if not can you please keep Sharon and her family in your thoughts and prayers.  Sharon's mother passed away earlier this week.  Much love and blessings to Sharon and her family during this very difficult time.


Thank you so much for stopping by!

Please be sure to check out The Stamp Simply Ribbon Store for all of the fantastic paper crafting products and the Blog for inspiration from the Design Team.

I hope you have a wonderful weekend!

Hugs & Smiles,
Heidi


Supplies
Paper:  Authentique - Moonlit; Cardstock - Black
Ribbon:  May Arts Burlap String - Natural
Accessories:  Kaisercraft Sparklets Rhinestone Clusters - Ebony, Zig Wink of Stella Clear Glitter Brush Pen, Therm-O-Web 3D Foam Squares, Scor-Tape

Friday, October 2, 2015

The Stamp Simply Ribbon Store - Trick Or Treat Halloween Card

Hello blogging friends!  Today, is my day to post for The Stamp Simply Ribbon Store.  I have a fun, quick and easy Halloween card to share with you.


For my card I used the Authentique Moonlit 6 x 6 paper pad.  This is a great collection of paper and I love that it has some pages with cut out images that are vintage Halloween.  I used this adorable image of the kitten sitting in the pumpkin.  I used 3D Foam Square in between the paper layers for some added dimension.  I used some of the pattern papers to fussy cut some banners.  Then I added some May Arts 2" Webbed Weave - Black and May Arts 3/8" Solid Two Tone Bittersweet with a bow at the top of the card.  To finish off the card I added a couple of Prima Flowers from the  Prima Serenade - Orange and Laraine Black Tie collections.


Here is a close up of the little image and the flowers with the bow.


This image was on part of the pattern paper that I used for the background.


This Halloween card came together so quick and easy!  I can't wait to make a few more with this paper collection.

Thank you so much for stopping by!  Happy Fall and Happy October!

Please be sure to check out The Stamp Simply Ribbon Store for all of the fantastic paper crafting products and the Blog for inspiration from the Design Team.

I hope you have a wonderful weekend!

Hugs & Smiles,
Heidi


Supplies
Paper:  Authentique Moonlit 6 x 6, Cardstock - Black
Ribbon:  May Arts 3/8" Solid Two Tone Bittersweet,  May Arts 2" Webbed Weave - Black
Accessories:  Prima Flowers - Prima Serenade - Orange, Laraine Black Tie, Scor-Tape, Thermo-Web 3D Foam Square

Wednesday, September 23, 2015

ButterBeeScraps - Spooky Vintage Halloween Couple - Home Decor

Hello everyone!  It's almost the end of September so Halloween will be here before we know it.  So I figured I better get started on my Halloween crafts.  Today, I have a fun Halloween home decor piece to share with you.  I used some charms, filigree, resin flowers, and rhinestones from 
ButterBeeScraps to create my projects and then I used some bits and pieces from my own stash too.


I had a couple of small 4 x 4 black frames and I thought these would be great for some framed Halloween home decor pieces.  The background paper and the images of the man and woman are from the Tim Holtz Regions Beyond 8 x 8 Paper Pad.  I also used some black cardstock.  To create the oval die cut shapes I used  Spellbinders Classic Ovals Small and Large.  Then I added all the bits and pieces to embellish each frame.


I wanted to use charms from both the PARISIAN TIBETAN CHARMS COLLECTION (candles) and HAUNTED HALLOWS TIBETAN CHARMS COLLECTION (spiderweb).  One was silver and one bronze.  Anything with gold is so on trend right now and I wanted to accent the frames with gold so I decided to spray paint both of the charms.


For the most part I usually buy Krylon spray paint (it's just a personal fave) but I picked up this Metallic Gold from Rust-Oleum because out of all the bottles of gold metallic spray paint this was the only one that said bright gold on the label and that is exactly what I was looking for.


Here is a closer look at the frame with the man.  I love the images of the vintage photos in the paper pad--they are great for creating small home decor pieces like this.


Here is a close up of the spider on the web.  This charm is from the HAUNTED HALLOWS TIBETAN CHARMS COLLECTION.  I added a SS12 SIAM FLAT BACK GLASS RHINESTONES for the body of the spider.  Then I used a black safety pin to attach the charm to the gold metallic bow.


I added BRASS VINE FLOURISH METAL FILIGREE EMBELLISHMENT (#006-G) to accent to ovals and the vintage photo.  Then I added SS16 JET FLAT BACK GLASS RHINESTONES to the center of each piece.  I used Ranger Multi Medium Matte to adhere all of the bling and metal pieces.


Here is a close up of the frame with the woman.  The frames are basically the same except for the images and the charms.


Here is a close up of the candles.  This charm is part of the PARISIAN TIBETAN CHARMS COLLECTION.  I added a SS20 SIAM FLAT BACK GLASS RHINESTONES to the center of the candles.  Then I added a black safety pin to attach the charm to the gold metallic bow.  I used May Arts Gold Metallic String to create the bows.  To finish the piece off I added a black RESIN FLOWER CABOCHONS (#RES612-BK) to the center of the bow.


Then I added the  BRASS VINE FLOURISH METAL FILIGREE EMBELLISHMENT (#006-G) around the photos and added SS16 JET FLAT BACK GLASS RHINESTONES to the center of the filigree pieces.

I hope you enjoyed this fun framed Halloween home decor piece.  These are so quick and easy to make for the holiday.

Don't forget to check out ButterBeeScraps Online Store and Blog!

Thank you so much for stopping by today!  

Hugs,
Heidi


ButterBeeScraps Supplies
Charms - PARISIAN TIBETAN CHARMS COLLECTION (candles), HAUNTED HALLOWS TIBETAN CHARMS COLLECTION (spiderweb)
Gold Filigree - BRASS VINE FLOURISH METAL FILIGREE EMBELLISHMENT (#006-G)
Resin Flower - RESIN FLOWER CABOCHONS (#RES612-BK)
Black Safety Pin
Flat Back Rhinestones - SS16 JET FLAT BACK GLASS RHINESTONES,  SS12 SIAM FLAT BACK GLASS RHINESTONESSS20 SIAM FLAT BACK GLASS RHINESTONES
Other Supplies
4 x 4 Black Frames
Paper - Tim Holtz Regions Beyond 8 x 8 Paper Pad, Black Cardstock
Dies - Spellbinders Classic Ovals Small and Large
Paint - Metallic Gold Spray Paint
May Arts Metallic Gold String
Ranger Multi Medium Matte
Foam Tape
Hot Glue

Wednesday, October 16, 2013

October Design-abilities Blog Hop - Trick Or Treat Wall Hanging

Hello and welcome to the first Design-abilities Blog Hop!  We are the Spellbinders® Blog Team and we wanted to do something fresh, fun and creative to bring our team together.  But before we get started we want to let you know this blog hop is just for fun and creative inspiration we are not sponsored by Spellbinders Paper Arts®.  Starting this month we are going to do a Blog Hop every other month (on the 16th) and we will have a link list to all of the Designer.  Sometimes we might not all be able to participate but we would still encourage you to visit all of the Blog Team Members and check out their blogs.  You will find all kinds of ideas for die cutting, papercrafting, mixed media, DIY projects, jewelry, home decor, lots of tutorials and techniques.  As designers we are always inspired by each other and we hope to inspire you too.


For my project I altered a 5 x 5 frame for Halloween.  I love to decorate for Halloween and this little altered frame is the perfect home decor piece.  I painted the frame with black acrylic paint.  Then I added a piece of pattern paper to the center.  I used S4-126 Classic Squares LargeS4-295 Lacey Squares die templates to die cut the cute little witch image.  All of the pattern paper is from the Authentique Thrilling 6 x 6 paper pad.  I used 3D Foam Squares from Scrapbook Adhesives by 3L® in between the die cut layers.


I added a fun flower cluster in the top corner using some of the WOC Flowers in Halloween colors.  To create the leaves I used S2-049 Corner Sprigs.  The little leaf sprig die cuts are perfect to use with the flowers and the size of the leaves is just right.  I think this might be my favorite new die template set! I also added some diamond Stickles for a little sparkle.


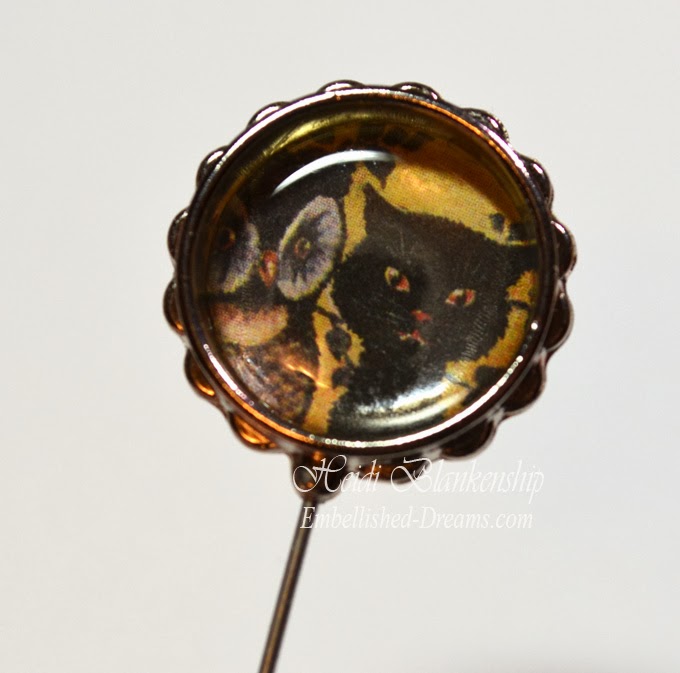
On the side of the frame I added another flower cluster, some Black Seam Binding and a MB3-001S Circle Hatpin-Silver.  The image in the hatpin is also from the Authentique Thrilling 6 x 6 paper pad.  I also added a few beads to the hatpin.


To create the hatpin I used the MD1-007 Circles One die template to die cut the image.  Then I added a little glossy accents in the hatpin and added the image.  To top it off I added a clear epoxy circle sticker.  I have had these stickers for a few years and I am not sure which company they are from but I am sure if you do a goggle search these will pop up.  


Here is a close up of the hatpin.


Please be sure to visit all of the Blog Team Members in the link list below to see what they have created to share with you.  Seth, wasn't able to join us this month but please hop on over and check out his blog too--he has some really inspiring designs!


Thank you for joining us today and we hope you enjoy the blog hop!  Please be sure to join us 
December 16th for our next blog hop.

Hugs & Smiles,
Heidi

Supplies
Paper:  Herbal Garden; Authentique Thrilling 6 x 6 paper pad
Dies:  Spellbinders Creative Arts® Grand Calibur® Machine, S4-126 Classic Squares Large, S4-295 Lacey Squares, S2-049 Corner Sprigs, MD1-007 Circles One, MB3-001S Circle Hatpin-Silver
Accessories:  Really Reasonabl Ribbon Black Seam Binding, WOC Flowers; 5 x 5 wood frame, black acrylic paint, Ranger Diamond Stickles, Glossy Accents; Scrapbook Adhesives by 3L® 3D Foam Squares; Clear Epoxy Circle Stickers

Wednesday, October 31, 2012

Happy Halloween!!


Hello and Happy Halloween!! Just a quick post today--I have one more Halloween card to share with you. 


Sorry it's such a quick post today but we have so much going on.  I am one of the room parents and my youngest son's school and we are having the Halloween party today.  I went up early this morning and took some pictures and the kids are so excited!!  Then we have to finish carving pumpkins and by the time we get that done it will be time to head out for a night of trick-or-treating.  

Thank you so much for stopping by today!  I hope everyone has a Happy and safe Halloween filled with lots of sweet candy goodness!

Hugs & Smiles.
Heidi

Supplies
Stamps:  Gourmet Rubber Stamps Tart and Spice, Invite To Fright
Paper: DiscountCardstock.com Simply Smooth White, Orange Fizz, Black Licorice; Echo Park Chillingsworth Manor 6 x 6 Paper Pad
Ink:  Tsukineko Memento Tuxedo Black; Copic Markers G21, YG25
Dies:  Spellbinder Grand Calibur, S5-131 A2 Matting Basic A, S5-148 Decorative Labels Eight, S5-129 Foliage Two
Accessories:  Shabby Scraps Black Acrylic Flowers, 10 mm Pearl; Green Glitter Glue; Recollections Bling; Scrapbook Adhesives by 3L 3D Foam Squares; Hot Glue

Friday, October 26, 2012

Some Halloween Fun Is Brewing Card

Hello blogging friends!  Today, I have a fun Halloween card to share with you.  


I stamped the cute little Halloween image from the LAD02 Tart and Spice stamp set from Gourmet Rubber Stamps on to Simply Smooth White cardstock and then I colored it with Copic markers.  Next I die cut the image using S4-114 Standard Circles Large.  Then I die cut a couple of other shapes using Orange FizzBlack Licorice and S4-331 Pumpkin CirclesS4-277 Nested Bats die templates.


I layered all of the die cuts using 3D Foam Squares from Scrapbook Adhesives by 3L™.  I used Ranger Orange Peel Stickles and Recollections Bling to embellish the card.  I love adding bling for the bat's eyes.  All of the pattern paper is from Echo Park Apothecary Emporium 6 x 6 Paper Pad.  I also added some Baker's Twine Halloween from Really Reasonable Ribbon.


Thank you so much for stopping by today!  I hope you have a wonderful weekend!!

Hugs & Smiles,
Heidi

Supplies
Stamps:  Gourmet Rubber Stamps LAD02 Tart and Spice
Paper:  DiscountCardstock.com Simply Smooth WhiteOrange Fizz, Black Licorice; Echo Park Apothecary Emporium 6 x 6 Paper Pad
Ink:  Tsukineko Memento Tuxedo Black, London Fog; Copic Markers YR18, YR04, Y38, G14, YG67, T5, C1, C0, 0, E000, E01
Dies:  Spellbinders Grand Calibur, S4-114 Standard Circles Large, S4-331 Pumpkin Circles, S4-277 Nested Bats
Accessories:  Really Reasonable Ribbon Baker's Twine Halloween; Ranger Orange Peel Stickles; Recollections Bling; Scrapbook Adhesives by 3L™ 3D Foam Squares

Spellbinders Paper Arts™ Blog

Wednesday, October 10, 2012

Vintage Street Market - Halloween Treat Bag & Thinking of You Card

**Edit--Sorry this post is coming up a little late.  I had it scheduled and didn't realize it didn't post--not sure what happened.

Hello and Happy Wednesday!  Today, is my post day over at the Vintage Street Market Blog.  I have a Halloween treat bag and a Thinking of You card to share with you today using some of the fantastic Vintage Street Market products.


This is the fun little Halloween treat bag that I made.  Check out the old fashion button candy.


For my second project I made a pretty Thinking of You card.  The base of the card is ivory and then I used some of the pink pattern paper from the Paper Sheets & Tags Dimestore Vogue Collection.

To see more pictures and find out all of the details please click HERE to visit the
Vintage Street Market Blog.


Hugs,
Heidi

Halloween Treat Bag
Vintage Street Market:  Crafty Secrets Halloween Treats Sticker Sheet; Ranger Diamond Stickles
Paper:  Discount Cardstock Soot, Gray Cloud, Banana Split; Paper Bag; Black Crepe Ink:  Tuxedo Black
Dies:  Spellbinders Grand Calibur, S4-114 Standard Circles Lg, S4-330 Nested Tombstones, S5-053 Pumpkin Accents (vines)
Accessories:  Scrapbook Adhesives by 3L 3D Foam Squares  

Always Card
Vintage Street Market:  Paper Sheets & Tags Dimestore Vogue, Pink Twirly Twine, Melissa Frances Mini Flashcards, May Arts Ribbon, Ranger Diamond Stickles
Paper:  Discount Cardstock Simply Smooth Ivory; Paper Doily
Ink:  Antique Linen
Accessories:  Shabby Scraps Pink Acrylic Flower, Key Charm; I Am Roses Flowers & Leaves; Recollection Pearls; Scrapbook Adhesives by 3L 3D Foam Squares

Monday, October 1, 2012

Halloween Blog Candy

Hello blogging friends!  Happy October 1st!!  As many of you know Halloween is one of my favorite holidays.  I love to to decorate for it, love to create fun Halloween home decor pieces, love the costumes and we can't forget the candy--LOL!  So I thought this would be a fun time to offer up some Blog Candy--Halloween Style!

So what do you think?  Are you ready for some fun Halloween Blog Candy?

Check out these yummy goodies.


This is what is included in the Halloween Blog Candy

Cardstock-4 sheets of each color Purple, Black, Green, Orange
2 Brown Paper Bags
2 White Doilies
2 Sm. Glassine Bags
2 Tags
2 Mini Clear Halloween Stamp Sets (Candy/Skull-Potion)
1 Clear Acrylic Block
2 Wood Mounted Halloween Stamps (Pumpkin/Witch Boots)
1 Mini Bat Punch
1 Package Halloween Flair Buttons
1 Package Bakery Twine (Orange/Purple)
2 Packages Adhesive Gems (Green/Orange)
2 yds Ric-Rac Trim (Orange/Purple)
1 yds Black Mini Pom-Pom Trim
1 yd Black Lace
2 yds Black Crepe
1 Glitter Glue (Lt. Yellow)
2 Ink Pads (Orange/Black)
3 Leaf Trinket Pins
6 Garment Pins
2 Memo Pins
3 Charms
Assorted Buttons (Yellow/Orange/Green/Purple)


RULES
1.  Subscribe to my blog.
2.  Leave a comment telling me what you love about Halloween or any fun family traditions.

***You have to do both of the rules to be entered into the drawing.

***Please be sure to have a link back to a blog or an email so I can contact you if you win!!

The Halloween Blog Candy post will be open from today (10/1/12) until midnight (CST) Thursday, October 4th, 2012.  Winner will be announced Friday, October 5th, 2012.

Thank you so much for stopping by today and Good Luck!!

Hugs & Smiles,
Heidi


LinkWithin

Related Posts Plugin for WordPress, Blogger...