Showing posts with label Blog Hop. Show all posts

Wednesday, April 18, 2018

GRADUATION & BEYOND BLOG HOP - Stamp Simply Clear Stamps

Welcome to our Graduation & Beyond BLOG HOP today. We have many projects to share showcasing two of the sets in our NEW April Release - Graduation Sentiments and Scripture for Graduation & Beyond. With these 2 sets your options for cards for so many types of celebratory and congratulatory events are limitless.  Combine them with images, sentiments or Scripture from our other sets and the sky is the limit!


Here is the card I designed using the Stamp Simply Clear Stamps - Graduation Sentiments SS-029 stamp set.  Graduation time is just around the corner and both of the new stamp sets are filled with fantastic sentiments and Scriptures.  For the pattern paper I used a couple of sheets from the Authentique - Dapper collection.  The school colors for our high school are cherry and blue so this paper was perfect.  I thought black and ivory would make a nice accent colors and tie everything together.  I embossed the top portion of a piece of ivory cardstock using the Darice Graduation Hat Background Embossing Folder.  Then I stamped part of the sentiment on the bottom of the cardstock using Memento Tuxedo Black Ink.  For the congrats banner I used a piece of black cardstock and treated it with the EK Success Powder Tool and then I used VersaMark Ink for the stamping.  I applied Stampendous Super Fine Embossing Powder - Detail White and used my heat tool to melt and set the embossing powder.  I added 3D Foam Squares to the back of the banner and adhered it to the stamped and dry embossed ivory cardstock and then trimmed the edges.


I used the Cherry Lynn Designs - Graduation Set of dies to create the hat and diploma die cuts with black cardstock.  I added a black enamel dot from the My Mind's Eye - Record It! Charmed Enamel Dots to the center of the hat.  I also added some enamel dots for embellishments from the My Mind's Eye - Necessities Teal Enamel Dots.


I added some 3D Foam Squares to the piece of ivory cardstock, the hat, and the diploma to add some dimension to the card.


The card base is a black A2 top folding card.  Both of these new stamp sets will be great to create quick and easy graduation cards with wonderful sentiments and Scriptures.

Please be sure to visit all of the blogs for today's blog hop!

Sharon Johnson (The Stamp Simply Blog)


Heidi Blankenship *you are here :)

     
All of the supplies used to create the card are listed and linked below and can be found over at The Stamp Simply Ribbon Store.

Thanks so much for stopping by today!

Much love, hugs, and blessings,
Heidi


Supplies
Stamps:  Stamp Simply Clear Stamps - Graduation Sentiments SS-029
Paper:  Authentique - Dapper, Cardstock - Black, Ivory
Ink:  Memento Tuxedo Black Ink, VersaMark Ink
Dies:  Cherry Lynn Designs - Graduation Set 
Accessories:  Darice Graduation Hat Background Embossing Folder, Stampendous Super Fine Embossing Powder - Detail White, My Mind's Eye - Record It! Charmed Enamel Dots (black on hat), My Mind's Eye - Necessities Teal Enamel Dots, EK Success Powder Tool, Scrapbook Adhesives by 3L EZ Runner, 3D Foam Squares, Heat Tool 

Saturday, February 17, 2018

Tonic Studios and Neat & Tangled Collaboration Blog Hop - You Make Life Sparkle Card

Hello everyone!  I'm sorry I have been mia for awhile.  I haven't been feeling the best for a few weeks so I took some time away.  Hopefully I will be able to do a post soon with a little bit of a life update.  So watch for that post coming soon.  But, for today I am so happy to be sharing a very colorful and sparkly card with you.  All this past week Tonic Studios and Neat & Tangled have been doing a collaboration blog hop.  Both teams have been creating fantastic projects so if you missed any of the days I encourage you to visit both of the blogs.  Also, be sure to leave comments on the company blogs for a change to win a fabulous prize. 

YouMakeLifeSparkleCardHeidiBlankenship560-022018-1

Here is the card I designed for the collaboration.  I have a full step-by-step tutorial with photos over on the Tonic Blog.  Love the beautiful rainbow of colors and all of the sparkles on this card.

YouMakeLifeSparkleCardHeidiBlankenship560-022018-10

Thanks so much for stopping by today and I hope you enjoyed my project share.  I had so much fun playing with all of the fantastic Neat & Tangle products along with the Tonic Studios products!

Hope you have a wonderful weekend!

Heidi 


Supplies
Stamps:  Neat & Tangled Dazzling Clear Stamp Set
Paper:  Strathmore Mixed Media Paper 400 SeriesHammermill Paper - Color Copy Digital Cover 100lb (Copic friendly)
Ink/Markers:  Tim Holtz Distress Oxide Inks - Picked Raspberry, Wilted Violet, Peacock Feathers, Twisted Citron, Ranger Jet Black Archival Ink, VersaMark InkNuvo Aqua Flow - Sping Meadows 893n - Lilac Blossom, Soft Rose, Fresh Green Nuvo Aqua Flow - Winter Skies 891n - Indigo Dawn, Azure Blue Nuvo Aqua Flow - Summer Holiday 892n - Red Apple, Aqua Splash Nuvo Aqua Flow - Autumn Woodland 890n - Evergreen Fern Nuvo Brush Script - Vivid Kaleidoscope 114n - 137 Tropical Aqua Nuvo Brush Script - Pretty Pastels 112n - 132 Ballet Pink, 133 Soft Sky Nuvo Brush Script - Bright Florals 111n - 128 Pale Lilac, 129 Deep Rose Nuvo Brush Script - Mandala Infusion 113n - 134 Sapphire Blue
Dies:  Mixed Edge Rectangle Layering Basic Die Set 1457e,  Neat & Tangled Dazzling - Nice and Neat Dies
Accessories:  Nuvo Glimmer Paste - Moonstone 953n Nuvo Glitter Embossing Powder - Gold Enchantment 596n  Nuvo Glitter Drops - White Blizzard 758n Nuvo Crystal Glaze 947n Neat & Tangled Nesting Hexagons - Simply StencilNuvo Light Mist Spray Bottle 849n V Blade Trimmer 159e Essentials Easy Clean Mat 14" x 14" 1514e Tangerine Die Cutting & Embossing Machine 138e, White Craft Foam, Scotch Foam Tape, Scor Tape, Heat Tool, Palette Kinfe    


Friday, March 3, 2017

Stamp Simply Spring Release Blog Hop

Hello everyone and happy Friday!  Today, all of the designers from The Stamp Simply Ribbon Store are participating in a Stamp Simply Spring Release Blog Hop.  I'm excited to share one of the New Stamp Simply Spring Release Stamp Sets and a Coordinating Die Set.  But before I get to my projects I want to share a video by Darsie Bruno.  Darsie, has a wonderful video showing all of the New Stamp Sets and Die Sets. She also shares some beautiful projects she created with the new stamp sets and dies.


So what do you think?  I love all of the projects Darsie shared!  Especially the lavender rose card and the tulip box card--those two are my favorites.  I love all of the new stamp sets!  They are filled with so many wonderful sentiments and verses.  Love the rose and tulips images too and the coordinating dies.  I think its fantastic how all of the stamp sets mix and match too.


Here is the card I designed using the New Thinking of You Rose SS-015 stamp set and the Rose SS-DIE002 coordinating die.  I stamped all of the roses onto a piece of Ranger Watercolor paper using VersaMark Ink and then I heat embossed all of the image with Ranger Super Fine White Embossing Powder.  I stamped and embossed another rose image on a separate piece of watercolor paper.  I did a very light watercolor using Tim Holtz Distress Ink.  For the rosebuds I used Worn Lipstick and Mustard Seed.  For the stem and leaves I used Cracked Pistachio.


I let some of the watercolor go outside of the embossing and then I add more water to have the colors fade out to white.


I used the coordinating die to die cut the rose that was on the separate piece of paper.  I stamped the sentiment on to a piece of Vellum using VersaMark Ink and then I heat embossed the sentiment using Ranger Super Fine Detail Gold Embossing Powder.  I wrapped the vellum around the center of the watercolor piece and I taped it on the backside.  Then, I added  3D Foam Squares to the die cut rose and added that to the card front.  Next, I added a bow with some  May Arts - Metallic Gold String and a few Melissa Frances White Pearls.  For a little added sparkle and shine I added Zig Wink of Stella Clear Glitter Brush Pen and Ranger Glossy Accents to the die cut rose.


Here is a close up of the bottom half of the card.  You can click on all of the images to enlarge them and see more detail.


I added a white panel of paper on the inside of the card and I stamped the rose image with Spun Sugar Distress ink and then I heat embossed the sentiment in gold.


To finish off the card I added the watercolor panel to a pink A2 top folding card base.

Please be sure to visit all of the blogs in the link list below for more inspiration and to see more projects made using the Stamp Simply Spring Releases.


Thanks so much for stopping by today and I hope you enjoy the blog hop!

Hugs & Smiles,
Heidi


Supplies
Stamps:  Stamp Simply Clear Stamps - Thinking of You Rose SS-015
Paper:  Ranger Watercolor, Vellum, Cardstock - White, Pink
Ink:  VersaMark Ink, Tim Holtz Distress Ink - Spun Sugar, Worn Lipstick, Mustard Seed, Cracked Pistachio
Dies:  Stamp Simply Steel Dies - Rose SS-DIE002
Ribbon:  May Arts - Metallic Gold String
Accessories:  Ranger Super Fine Detail Gold Embossing Powder, Ranger Super Fine White Embossing Powder, Melissa Frances White Pearls, Zig Wink of Stella Clear Glitter Brush Pen, Ranger Glossy Accents, Scrapbook Adhesives by 3L E-Z Runner, 3D Foam Squares, Heat Tool, Paint Brush

Thursday, December 31, 2015

Seasons Givings Blog Hop Year 4


Hello everyone and Happy New Year!

Welcome to the Seasons Giving Blog Hop 
Year 4!

I want to say a HUGE Thank You to all of my loyal blog readers/followers!  Thank you so much for your support, friendship, and wonderful comments throughout the year!!  I truly appreciate all of you! 

This Blog Hop is for YOU!

Every single blog listed is hosting a Giveaway!  All you have to do is leave a comment--it's that easy.  :)

The entire link list for the blogs is listed below.

This year I have a bunch of Tonic Studios goodies for my giveaway and I also have a handmade piece of jewelry that I designed.


These are the Tonic Studio goodies you will receive:

Assortment of Nuvo Pure Sheen Glitter - 6 Bottles
Assortment of Nuvo Crystal Drops - 6 Bottles
Nuvo Glue Pen
Craft Tacky Glue with Extra Fine Precision Tip
Funky Glue Stick - Goes on Purple Dries Clear
It's Your Big Day Indulgence Chalkboard Die & Stamp Set 1099E
Tim Holtz Mini Rotary Cutter
Tim Holtz Mini Rotary Perforator


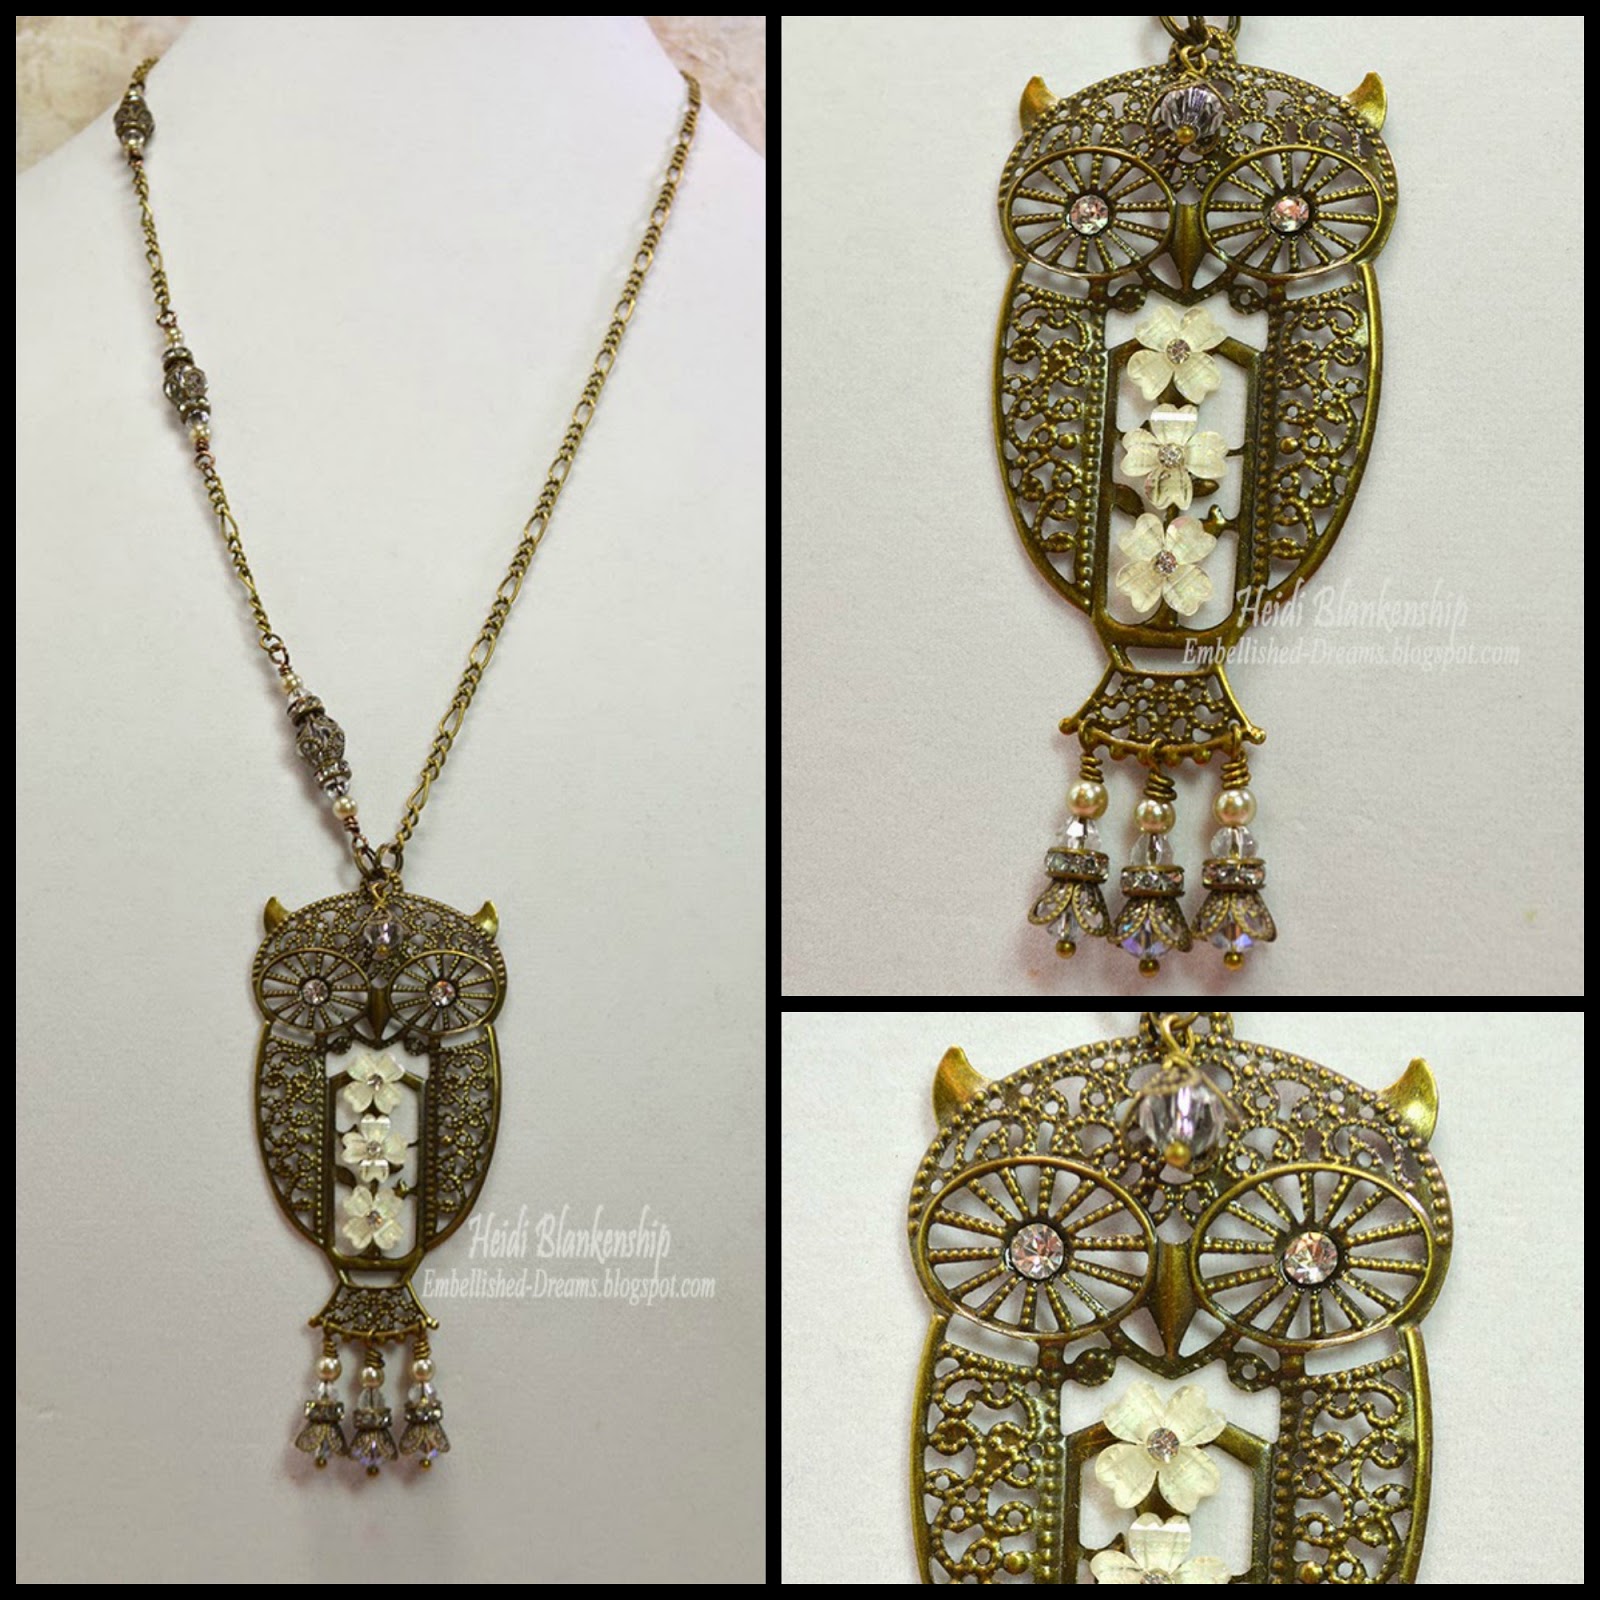
Here is the Athena Owl Necklace.  
This is a beautiful bronze filigree owl with clear flat back crystals for the eyes, tiny white resin flowers down the center and champagne pearls with crystal bead dangles.  

The giveaway will be open until January 5th at midnight (CST).  I will use Random.org to pick the winner and I will post the winner on January 6th.  Please make sure I will have a way to contact you--a link back to a blog, email, Google+, Facebook--just some way to contact you if you win.  The winner will have 48 hrs to reply or another winner will be chosen.

Although it is not required for the giveaway I would love it if you would like to subscribe to my blog (there are a few options in the sidebar), or follow me on 

Have fun on the Blog Hop!!  Remember each blog is hosting a giveaway so be sure to visit them all!!

Happy New Years!!!


Monday, March 30, 2015

Ken Oliver Crafts & Stencil Girl Blog Hop Winners!

Hello everyone!  Thank you all so much for the wonderful comments about my mixed media canvas from the Ken Oliver Crafts and Stencil Girl Blog Hop that was last week!  What a fabulous blog hop filled with so much creative inspiration!


Today, I get to announce the Winners from my blog.  Each person will receive 1 Pack Ken Oliver Crafts 6x6 Papers(24 pieces).  There will also be grand prizes announced on Ken Oliver's Blog and also the Stencil Girl Blog so be sure to check those out and see if you are a winner!

I used Random.org number generator to pick all of the Winners.

Winner #1
SuprFoxDesigns said...
This is such a pretty piece and thanks for the step by step- gorgeous work!
March 23, 2015 at 10:26 AM 

Winner #2
PK Sews said...
Heidi, your creation is gorgeous! I love the delicate red flowers especially. Thanks for sharing!
March 23, 2015 at 5:27 PM

Winner #3
Jean Bullock said...
this is gorgeous, Heidi. Thanks for the great tutorial. So good to know that Stick It works on canvas too. The gilding looks fab.
March 25, 2015 at 11:12 PM

Winner #4
Such a stunning work of art, Heidi! Love that crackle paste so much ;)
March 29, 2015 at 8:47 PM

Winner #5
Karen Hasheck said...
Gorgeous project- loving the colors and the stencils! Can't wait to play with your techniques!
March 23, 2015 at 12:08 PM

Winner #6
Dottie said...
What a fun product...Color Burst Inks. They look like so much fun to play with. And the stencils are really so versatile especially the Nosegay. Thanks for sharing your delightful creation.
March 25, 2015 at 5:41 AM 

A HUGE CONGRATS to all of the Winners!!
If you see your name listed here please email me at Floralfantasy@charter(dot)net so I can get your contact information and have your prize sent out.

If you missed the blog hop but would still like to check out the artwork you can click HERE to see my blog post and you can click HERE for a complete link list of all the Designers and Style Contributors who participated.

Thanks so much for stopping by today!
I hope you all have a wonderful and creative day!

Hugs & Smiles,
Heidi


Sunday, March 22, 2015

Day One Stencil Girl and Ken Oliver Crafts Blog Hop


Hello everyone!  Today, is the first day of the Stencil Girl and Ken Oliver Crafts Blog Hop.  Designers and Style Contributors from both teams have come together to create some fabulous projects using products from both companies.  We hope to inspire you!


For my project I designed a 8 x 10 mixed media canvas board and I have a tutorial to share with you.


First I applied a layer of white gesso to the canvas.  Once that was dry then I used the 6 x 6 Rembrandt's Words Small Stencil and added a layer of the crackle texture paste.


Once the crackle texture paste was dry then I misted the entire canvas with water and sprinkled a little bit of the Ultramarine Blue Color Burst on to the canvas.  Here you can see the Color Burst already starting to activate with the water.


I used a large watercolor brush and kept adding more water to move the Color Burst around the canvas until I achieved a look I liked.  If you get more than you would like in one spot you can use a paper towel to lift up a little of the color.  Set this aside to dry or you can use a heat tool.


Sorry, I know it's a little hard to see exactly what I am doing in this picture from all of the texture paste lol.  Here I am using the 9 x 12 Nosegay Stencil and adding a layer of the crackle texture paste.


After the crackle texture paste was dry then I started to watercolor the flowers using Color Burst.  I used Alizarin Crimson for the flowers.  Here you can see a close up of the Color Burst as soon as I applied it to the crackle texture paste.  I love how it fills in all the little cracks and makes the flowers really pop.  I mixed a few colors of the Color Burst to create a darker green.  I used Pthalo Green, Alizarin Crimson, Ultramarine Blue, and Lemon Yellow.


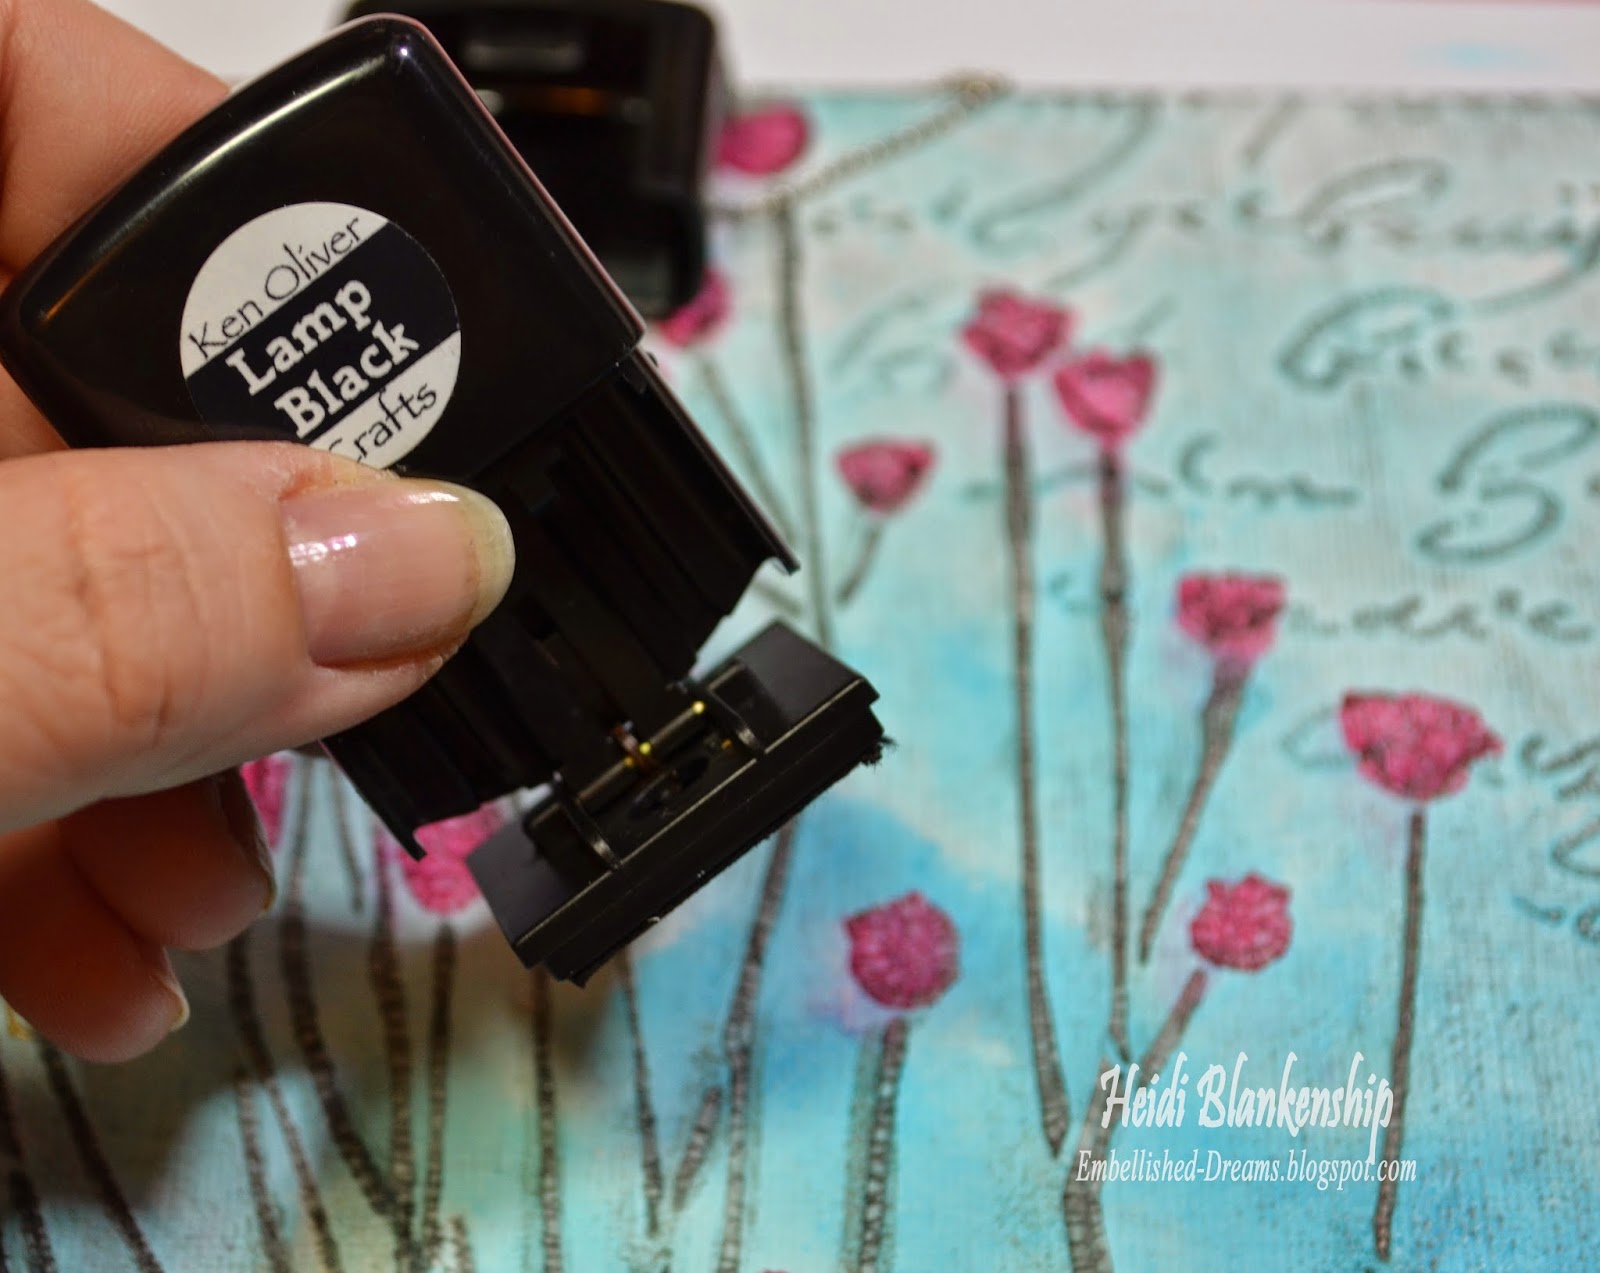
Next I used the Lamp Black Click It Ink to go over the entire canvas board.  Doing this really adds a lot of depth and dimension to the canvas and it picks up all of the little cracks in the texture paste.


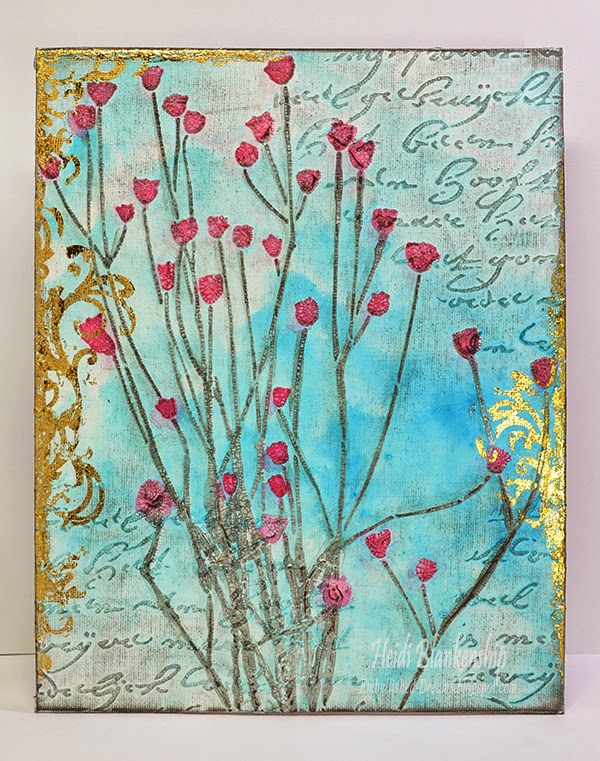
To finish off the canvas I created some die cuts using Stick It and the die template from Tonic Studios.  I removed the backing on the Stick It and applied it to the canvas.  Then I added the gold foil on top of the adhesive and rubbed it to to transfer the foil.  I thought this would add a nice decorative element and gold foil it very hot right now.


Here is a close up of some of the flowers with the gold foil along the edge.


I added a few bits of the gold foil along the edges of the canvas.


I hope you enjoyed the tutorial.  Please be sure to visit the blogs listed below to see what the Designers and Style Contributors have created to share with you.

Heidi Blankenship-You are here :)

Thank you so much for visiting our blogs today and I hope that you'll be inspired to create something with Stencil Girl Products and Ken Oliver Crafts! We have a crafty haul of prizes from Ken Oliver up for grabs, just leave a comment below and you'll be eligible to win!

Winners will be randomly selected from our blogs, just leave a comment to become eligible for a prize. It's that easy!

We'll list the daily winners in the comments sections of our respective blogs so watch for the winners names.  

Here's what we're giving away!
12 Daily Prizes - 1 Pack Ken Oliver Crafts 6x6 Papers(24 pieces).
2 Grand Prizes on Friday- 1 Complete Set of Color Burst (6 Colors); 1 Complete Set of Click It Ink Pads (6 Colors); 1 Set Pegz Alphabet Stamp Set;
Leave a comment on each StencilGirl Talk post and the team members posts to be entered to win a $50 gift certificate from Stencil Girl!
Join us every day this week, you can enter every day...

Thank you again and

GOOD LUCK!  

Hugs & Smiles,
Heidi


LinkWithin

Related Posts Plugin for WordPress, Blogger...