Tuesday, September 15, 2015

JustRite Papercraft New Christmas Release - Day One - Multi-Step Poinsettia

Hello everyone!  What an exciting day!  Do you see the announcement yesterday that JustRite Papercraft is back?  If you missed it you can click HERE to check out the details.  Today, is the first day of the New Christmas Release with JustRite Papercraft and I think you are going to love this new stamp set--I know it's one of my favorites!


Here is the CR-02187 Multi-Step Poinsettia Clear Stamp Set.  Multi-step stamping is so on trend right now and the layered images turn out so beautiful.  You can download a printable PDF of the JustRite Multi-Step Poinsettia Tip Sheet.


Here is a look at the card I designed using the CR-02187 Multi-Step Poinsettia Clear Stamp Set from JustRite Papercraft.  This stamp set is so easy to use and I love how the poinsettias look.  For the base of the poinsettia I used Worn Lipstick Distress Ink.  Then for the second step I used  Memento Ink Angel Pink and for the third step I used Victorian Velvet Distress Ink.  For the centers I originally used Wild Honey Distress Ink but then I wanted to add some gold so I went over the centers with VersaMark Ink and added the Ranger Super Fine Detail Gold Embossing Powder and heat embossed using my heat tool.  To create the green leaves I used Memento Inks - Pistachio and Bamboo Leaves.  For the pine sprigs I used Memento Ink - Olive Grove.  After I was done stamping the main image I decided I wanted to add a few touches of gold.  I stamped the flourish stamps using VersaMark Ink and then added the Ranger Super Fine Detail Gold Embossing Powder and heat embossed using my heat tool.


Here is a close up of the poinsettias.


Both of the die cuts were created using Spellbinders Labels Thirty-Nine.  I used Memento Ink - Tuxedo Black to stamp the sentiment.  For some added dimension I used white craft foam in between the layers of die cuts.  To finish off the card I added a few white pearls.


White cardstock was used for the base of the card and I added Memento Ink - Angel Pink around the outer edges so the colors would match perfectly.  This is a A2 top folding card.

Please be sure to check out all of the Design Team Members in the link list below to see what projects they have created to share with you.


I know everyone on the JustRite Papercraft Design Team is so excited that we are back and we are ready to get this next chapter started and hopefully inspire you along the way.

Thanks so much for stopping by today!

Hugs,
Heidi


Supplies
Stamps:  JustRite Papercraft CR-02187 Multi-Step Poinsettia
Paper:  Cardstock - White
Ink:  Distress Inks - Worn Lipstick, Victorian Velvet, Wild Honey; Memento Inks - Angel Pink, Pistachio, Bamboo Leaves, Olive Grove, Tuxedo Black; VersaMark Ink
Dies:  Spellbinders Labels Thirty-Nine
Accessories:  Ranger Super Fine Detail Gold Embossing Powder, White Pearls, White Craft Foam (fun foam), Scor-Tape, ATG, Heat Tool

Monday, September 14, 2015

Exciting News to Share!!! JustRite Papercraft is BACK!!!

Hello everyone!  I am SO very excited to share with you that JustRite Papercraft is back and under new management!!  I am honored to be a part of the Design Team and I can't wait to get this new chapter started!


To celebrate the online store reopening JustRite is having a fabulous say on Spellbinders dies and introducing some new products to the store.

Click HERE to check out the Spellbinders die sale!

Plus check out the New products at the store in Mixed Media


and


Be sure to stop back tomorrow for the start of the New Christmas Release and Tutorial Tuesday!

Thanks so much for stopping by today!

Heidi

Friday, September 11, 2015

The Stamp Simply Store - Golden Autumn Thank You Card

Hello blogging friends!  Today, is my day to post for The Stamp Simply Ribbon Store.  I have an Autumn thank you card to share with you that is quick and easy to create and full of beautiful colors with a touch of gold.


Here is the card I designed.  I used the JustRite Papercraft Autumn Swirls Background with VersaMark Ink and then I added Ranger Detailed Gold Embossing Powder and heat embossed with a heat tool.  The gold embossing will create a resist on the paper.  I applied Spiced Marmalade, Peeled Paint, Aged Mahogany Tim Holtz Distress Inks to the piece of embossed paper to create the beautiful colors.  These colors blend together so beautifully.  I don't used sponges to apply ink, instead I used cotton balls and apply the ink in a circular motion.  I think the cotton balls gives a softer more blended look.  I used the  Stamp Simply Clear Stamps - Many Thanks stamp set for the sentiment and then I die cut the paper using Spellbinders Die - Labels Forty-four.  I used Memento Espresso Truffle ink to stamp the sentiment.


Here is a close up of the background and the sentiment.  I just love home these colors look together!


To finish off the card I added a few Petaloo Botanica Sugared Minis - Mocha and some Seam Binding Mimi Brown for a bow.  I love how the flowers look like they were dipped in sugar. :)

I hope you enjoy today's card.
Thank you so much for stopping by!


Please be sure to check out The Stamp Simply Ribbon Store for all of the fantastic paper crafting products and the Blog for inspiration from the Design Team.

I hope you have a wonderful weekend!

Hugs & Smiles,
Heidi


Supplies
Paper:  Ivory, Brown

Thursday, September 10, 2015

ButterBeeScraps September Challenge

Hello everyone!  During the month of September ButterBeeScraps is having a challenge and all of the Design Team Members are playing along with the challenge and sharing some creative projects that hopefully inspire you.  Would you like to play along in the challenge?  You can click HERE to find out all of the details.  Each week on of the Design Team Members is posting a project for the challenge.  Last week, Monique, owner of ButterBeeScraps posted her project (you can click HERE to see it) and this week is my turn to post a project.

The challenge is to pick one item from the store and use it in three different ways.  You can bend it, shape it, cut it, paint it or whatever you would like to do.


For the challenge I used the SILVER FLOWER METAL FILIGREE EMBELLISHMENT (#282-P) and I designed a card and matching gift tag.


I started by creating the three dimensional flower.  I used three of the SILVER FLOWER METAL FILIGREE EMBELLISHMENT (#282-P) pieces.  The first one I flattened.  For the second one I cut in between each of the flower petals and then bent some of them up and then curled the tips to shape them.  On the third piece I cut in between each petal and then I curled the sides in.


Here is a close up of the second flower piece.


Here is a close up of the third flower piece--this is the center of the flower.  Once this piece was glued in place then I bent each petal in towards the center.


Here is a close up of the finished flower.


To create the border in the card I cut off all of the petals on the metal flower.


After I cut, glued and shaped all of the pieces I used a combination of Martha
Stewart Antique Silk (pink) Paint, Lumiere Pearl Magenta to paint all of the metal pieces.  I used the small petal pieces to create a border and added some white flat back pearls in between each piece.  I also added some white crochet lace trim under the metal border.  I used Stamp Simply Clear Stamps - Birthday Blessings with Memento Black Ink for the sentiment.  I added some white pearl stamens to the center of the flower and then add the flower to the card front.


Here is another close up of the flower.


Here is a look at the bottom half of the card.  I used A4
Embossing Folder - Rosalyn from Tonic Studios and then I used a Faber Castele Lavender Gelato to add some color and make the embossing pop.  To add a little bit of sparkle I went over the embossed areas with Zig Wink of Stella Clear Glitter Brush Pen.


I used pink cardstock for the card base.


To create the tag I used Tonic Studios I Miss You Topper Inner Die Set 173E and A4
Embossing Folder - Rosalyn.  I went over the embossed area with the same color Gelato and Wink of Stell pen.  The sentiment is from the Stamp Simply Clear Stamps - Birthday Blessings.  


To create the tiny little flowers I cut the centers from three of the SILVER FLOWER METAL FILIGREE EMBELLISHMENT (#282-P)'.


To finish off the tags I added some pearls and white crochet lace trim.

I hope you enjoyed my challenge projects and I hope you will play along with the challenge!

Thanks so much for stopping by today!

Heidi


ButterBeeScraps: SILVER FLOWER METAL FILIGREE EMBELLISHMENT (#282-P)
Stamps:  Stamp Simply Clear Stamps - Birthday Blessings
Paper:  Cardstock - White, Pink
Ink/Paints:  Memento Black Ink, Faber Castele Lavender Gelatos, Martha
Stewart Antique Silk (pink) Paint, Lumiere Pearl Magenta, Zig Wink of
Stella Clear Glitter Brush Pen
Dies/Folders:  Tonic Studios I Miss You Topper Inner Die Set 173E, A4
Embossing Folder - Rosalyn
Ribbon:  White Lace Trim
Accessories:  White Flat Back Pearls, White Pearl Stamens, Foam Tape,
Ranger Multi Medium Matte, Hot Glue, Baby Wipes

Wednesday, September 9, 2015

Exciting News! Meet the Jewel Creatives

Hello everyone!  I have some exciting news to share with you--starting October 1st the Jewel Creatives will be back sharing beautiful projects with weekly inspiration on the Jewel Blog for 

Meet the Jewel Creatives!


Darsie Bruno, Jewel Creative Sparkle Guide
Heidi Blankenship (that's me!), Jewel Creative Sparkle Team Coordinator
Judy Hayes, Jewel Creative Sparkle Guide

I was so honored when Julianna contacted me and asked if I would be the Jewel Creative Sparkle Team Coordinator!  I am excited for this new adventure and I hope to inspire you with creative projects not only in jewelry but also with lifestyle projects and home decor.  If you would like to check out the Jewel Creatives Bios you can click HERE.  You can also click HERE to check out the Jewel Blog and while you are there don't forget to sign up for the Newsletter Subscription. 

Thanks so much for stopping by today!

Heidi


Friday, September 4, 2015

The Stamp Simply Ribbon Store - Birthday Wishes Card with Tutorial

Hello blogging friends!  Today, is my day to post for The Stamp Simply Ribbon Store.  I have a beautiful birthday card to share with you and a tutorial with another idea on how to use the DecoArt Metallic Lustre.


Here is the card I designed.  I love how soft and pretty looking the card is and the gold adds a touch of elegance to it.  I have shared a couple of different projects using the DecoArt Metallic Lustre.  It is very easy to use and there are so many different techniques it can be used for.  For today's card I used the DecoArt Metallic Lustre with a stencil. 


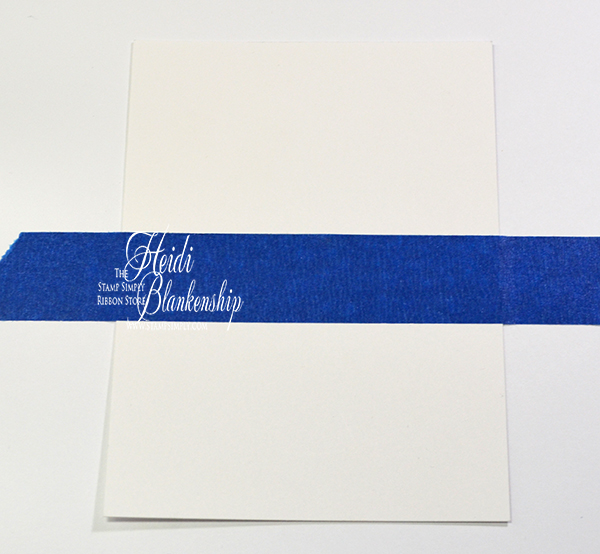
I only wanted to top half of my paper to be stenciled so I added a piece of painters tape across the middle.  If you don't have painters tape you can lay a piece of scrap paper down and be sure to hold it in place or tape it down.  


Using a Imagine Crafts Sponge Dauber dab the sponge in to the DecoArt Metallic Lustre - Gold Rush.  Spray a little bit of water on to a craft sheet and dab the dauber in to the water.  Doing this will soften up and thin out the DecoArt Metallic Lustre and allow you to use it with a stencil.  You could apply it without adding the water but it will be a lot thinker and it won't be as easy to stencil with it.


Place the Prima Flourish Stencil over top of the paper and use the Imagine Crafts Sponge Dauber with DecoArt Metallic Lustre - Gold Rush to dab on the beautiful gold.


Once the stencil was removed I added a little more of the DecoArt Metallic Lustre - Gold Rush to soften up the edges.


Here is a look at the paper once the stenciling was done.  I love all of the gold shimmer from the DecoArt Metallic Lustre - Gold Rush.  It is so easy to use and it is easy to clean up too.  I just used a baby wipe to remove the access from the stencil.


I added some 1.5" Delicate Vintage Lace by May Arts with some May Arts 5/8" Adhesive Rosettes - White.  Love this rosette trim with the adhesive!  Next I added a loopy bow using May Arts Metallic Gold String and then I added a Prima Serenade Turquoise Flower to the center of the bow.  I also added a few Melissa Frances White Pearls.


Check out the beautiful font on the sentiment!  The Birthday Wishes sentiment is from the Stamp Simply Clear Stamps - Birthday Blessings.  I used VersaMark Ink and Ranger Super Fine Detail Gold Embossing Powder to heat emboss the sentiment.


Here is another look at the finished card.  The card base is a light aqua and it is an A2 top folding card.  This card was really quick and easy to create and the look of it could simply be changed up by using a different stencil and sentiment.  If you haven't tried the DecoArt Metallic Lustre I really encourage you to give it a try--there are so many fun techniques it can be used for and the metallic shimmer is so beautiful!

Thank you so much for stopping by today and I hope you enjoyed the tutorial!


Please be sure to check out The Stamp Simply Ribbon Store for all of the fantastic paper crafting products and the Blog for inspiration from the Design Team.

I hope you have a wonderful weekend!

Hugs & Smiles,
Heidi


Supplies
Stamps:  Stamp Simply Clear Stamps - Birthday Blessings
Paper:  White, Light Aqua
Ink:  VersaMark Ink
Ribbon:  May Arts 5/8" Adhesive Rosettes - White, 1.5" Delicate Vintage Lace by May Arts, May Arts Metallic Gold String
Accessories:  Prima Flourish Stencil, DecoArt Metallic Lustre - Gold Rush, Ranger Super Fine Detail Gold Embossing Powder, Prima Serenade Turquoise Flowers, Melissa Frances White Pearls, Imagine Crafts Sponge Dauber, Water Bottle, Heat Tool, Painters Tape

Monday, August 31, 2015

ButterBeeScraps - Butterfly Beaded Dangle Necklaces

Hello everyone!  Today, I have some pretty butterfly beaded dangle necklaces to share with you.  


I designed three butterfly dangle necklaces that are all very similar in style--just different colors and a few different beads.  I used BRONZE BUTTERFLY METAL FILIGREE EMBELLISHMENT (#638-B).  I used a metal hole punch to create the holes at the top and bottom of the butterflies.  All of the butterflies were bronze and then I applied Krylon White Flat Spray Paint.  I used Steel Wool (#0000) to buff off some of the paint to reveal the metal.  Once I achieved the desired look then I sealed each piece with Krylon Crystal Clear Sealer.  


Here is a close up of the pink butterfly dangle necklace.  For this necklace I used BRONZE BUTTERFLY METAL FILIGREE EMBELLISHMENT (#638-B) and I added SS16 LIGHT ROSE FLAT BACK GLASS RHINESTONES, S12 LIGHT ROSE FLAT BACK GLASS RHINESTONES for the body of the butterfly.  For the beaded dangle I used BRONZE BALL END HEAD PINS, BRONZE FILIGREE BEAD CAPS (#CAP046-B), 6X8MM ROSE PINK PEARLIZED FACETED GLASS ABACUS BEADS, and 4X6MM ROSE PINK PEARLIZED FACETED GLASS ABACUS BEADS.  I also used a couple bronze flower spacers beads from my own stash.  


Here is the second necklace I designed. 


Here is a look at the third necklace.


Here is a close up.  For this last necklace I used the bronze butterfly and then added SS16 AQUAMARINE FLAT BACK GLASS RHINESTONES, SS12 AQUAMARINE FLAT BACK GLASS RHINESTONES for the body of the butterfly.  To create the dangle I used CLEAR RHINESTONE AND BRONZE RONDELLE SPACER BEADS – 6MM (#BD006-B/CL), BRONZE BALL END HEAD PINS, and BRONZE FILIGREE BEAD CAPS (#CAP052-B).  I also used a Aqua Tear Drop Bead and Aqua Seed Beads from my own stash.

These necklaces were quick and easy to create.  Don't forget to check out ButterBeeScraps
for all of your metal embellishments, filigree, beads and jewelry findings.  
While you are there hop on over to the ButterBeeScraps Blog and check out all of the fantastic projects from the Design Team.

Thank you so much for stopping by today and I hope you enjoyed this jewelry piece.

 Hugs & Smiles,
Heidi


Supplies
ButterBeeScraps:  BRONZE BUTTERFLY METAL FILIGREE EMBELLISHMENT (#638-B), CLEAR RHINESTONE AND BRONZE RONDELLE SPACER BEADS – 6MM (#BD006-B/CL), SS16 CLEAR AB FLAT BACK CRYSTAL RHINESTONES, SS12 CLEAR AB FLAT BACK CRYSTAL RHINESTONES, SS16 AQUAMARINE FLAT BACK GLASS RHINESTONES, SS12 AQUAMARINE FLAT BACK GLASS RHINESTONES, SS16 LIGHT ROSE FLAT BACK GLASS RHINESTONES, SS12 LIGHT ROSE FLAT BACK GLASS RHINESTONES, BRONZE BALL END HEAD PINS, BRONZE FILIGREE BEAD CAPS (#CAP046-B) *pink necklace, BRONZE FILIGREE BEAD CAPS (#CAP052-B) *aqua and clear AB necklace, 8X12MM CLEAR AB FACETED GLASS TEARDROP BEADS, 4X6MM CLEAR AB FACETED GLASS ABACUS BEADS, 6X8MM ROSE PINK PEARLIZED FACETED GLASS ABACUS BEADS, 4X6MM ROSE PINK PEARLIZED FACETED GLASS ABACUS BEADS
Other Supplies
Bronze Flower Spacers, Aqua Tear Drop Bead, Aqua Seed Beads, Bronze Chain, Lobster Clasp, Krylon White Flat Spray Paint, Krylon Crystal Clear Sealer, Steel Wool (#0000), Glossy Accents
Tools
Beadalon:  Round Nose Pliers, Bent Nose Pliers, Flush Cutter
Bead Landing:  Metal Hole Punch


Friday, August 28, 2015

The Stamp Simply Ribbon Store - Most Wonderful Christmas Watercolor Card

Hello blogging friends!  Today, is my day to post for The Stamp Simply Ribbon Store.  I have a beautiful watercolor Christmas card to share with you along with a tutorial.


Here is the card that I designed using the Penny Black Clear Stamp - Most Wonderful.  For this card heat embossed the Christmas sentiment and snowflakes and then did a pretty simple watercolor background with Tim Holtz Distress Inks.


To start I used the Penny Black Clear Stamp - Most Wonderful with VersaMark ink and stamped the image on to Ranger Watercolor Paper (smooth side).  Then I added Stampendous Super Fine Embossing Powder - Detail White and heat embossed with a heat tool.  Once the heat embossing was done then I used painters tape to hold my paper in place.  The painters tape is optional--I just like using it to hold my paper in place when I am watercoloring and it seems to help the paper from warping.  I applied water over the entire surface.  Then I started added color with the lightest first--which is the Tim Holtz Distress Ink - Tumbled Glass.  Next I started adding Salty Ocean.  I also added more water to blend the colors.  Once I was happy with how the background looked then I used the heat tool to dry the paper.


I wanted to intensify the colors so I added more of the Tumbled Glass and Salty Ocean but on this second layer I used less water.  Then I added Chipped Sapphire for a third color.  I used the heat tool to dry the paper in between the layers of paint.  Doing this will intensify the colors and add more depth to the background.


Here is a close up after the paint was dry and I removed the painters tape.  I used Spellbinders Celebrations Die - Pierced Rectangles to die cut the watercolor image.


Here is a close up of the Christmas sentiment and snowflakes.  I added Ranger Glossy Accents and Stampendous Crystal Glitter - Ultra-Fine Translucent to the snowflakes.


I used light blue for the card base and then I added a white mat and a bow with the May Arts 3/8 Double Faced Satin Spring 2015. Next I added a navy blue cardstock mat with the die cut watercolor piece on top and added Scrapbook Adhesives by 3L 3D Foam Squares in between the layers.

Thank you so much for stopping by today and I hope you enjoyed the tutorial!


Please be sure to check out The Stamp Simply Ribbon Store for all of the fantastic paper crafting products and the Blog for inspiration from the Design Team.

I hope you have a wonderful weekend!

Hugs & Smiles,
Heidi


Supplies
Stamps:  Penny Black Clear Stamp - Most Wonderful
Paper: Ranger Watercolor Paper, Cardstock - Navy, Light Blue, White
Ink: VersaMark, Tim Holtz Distress Inks - Tumbled Glass, Salty Ocean, Chipped Sapphire
Dies:  Spellbinders Celebrations Die - Pierced Rectangles
Ribbon:  May Arts 3/8 Double Faced Satin Spring 2015
Accessories:  Stampendous Super Fine Embossing Powder - Detail White, Stampendous Crystal Glitter - Ultra-Fine Translucent, Ranger Glossy Accents, Scrapbook Adhesives by 3L 3D Foam Squares, E-Z Runner, Heat Tool

Wednesday, August 26, 2015

Joy Clair - Hugs and Smiles - Guest Designer

Hello everyone!  Today, I have another Guest Designer post for the New Releases for Joy Clair. They have a wonderful New Release and a great line up of Guest Designers so I hope you will join us this week.  Be sure to check out the Joy Clair Blog each day for Giveaways! 

Today, the stamp set that we are featuring is called, Hugs and Smiles Clear Stamps.


This is the card I designed using the Hugs and Smiles Clear Stamps.  I have to say I think this is my favorite stamp set in this release.  I started out with a piece of Strathmore Mixed Media paper and I heat embossed the floral image using VersaMark ink, white embossing powder and a heat tool. I used Kuretake Gansai Tambi Watercolors to paint the image and the background.  I used my heat tool several times during the painting and added layers of paint.  With watercolor if you wanting to create some depth you need to make sure the paint is dry before you add another layer. Once the entire piece was dry then I mixed some of the white paint with water and tapped on my brush to add the tiny paint splatters.


Here is a close up.


For the sentiment I used StazOn Jet Black ink.


I trimmed down the watercolor piece and added some craft foam to the back.  Then I placed it on a white A2 top fold card base.  To finish off the card I added some sequins for a little bit of sparkle.

Please be sure to visit the Joy Clair Blog to see all of the New Releases and for a chance to win some stamps!  Also please be sure to visit the link list below with some wonderful Guest Designers.


I will be back on Thursday with another card to share with you from the Joy Clair New Release.

Thanks so much for joining me today!

Hugs & Smiles,
Heidi

Supplies
Paper:  Strathmore Mixed Media, White Cardstock
Ink:  VersaMark Ink, Jet Black StazOn
Paint:  Kuretake Gansai Tambi Watercolors
Accessories:  White Embossing Powder, Sequins, White Fun Foam, Heat Tool


LinkWithin

Related Posts Plugin for WordPress, Blogger...