Wednesday, July 31, 2013

JustRite Papercraft New Release Day Four - Christmas Background Stamps

Hello everyone!  Welcome to day four of the New Releases for JustRite Papercraft!  What do you think of the New Releases?  Are you loving them?  I know I am! ;-) 


For today's New Release the Design Team will be sharing projects with two New Christmas Background stamps.  Here is the CL-04715 Holly Frame Background Stamp and this is the one that I used on my card.


Here is the card I designed using CL-04715 Holly Frame Background Stamp.  I also used CR-04595 Christmas Vintage Lables Four for the sentiment.  I stamped the image using gold pigment ink and used gold embossing powder.  For the coloring I used Distress Markers and then did a watercolor wash.


Here is a close up of the embossing and watercolor wash.  I love the soft colors.  


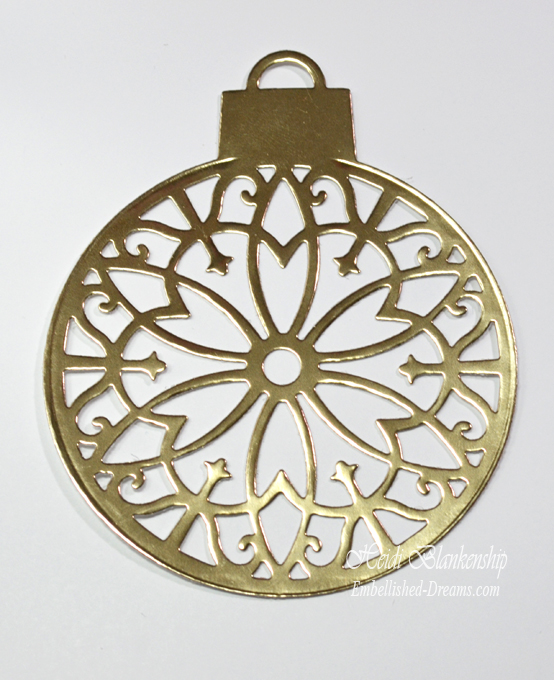
Here is a close up of the sentiment.  I used CR-04595 Christmas Vintage Lables Four for the sentiment.  To create the little cluster with the ornament, rose and holly I used S4-114 Standard Circles LGS5-185 Build A WreathS4-405 Mix-N-Match Ornaments die templates.  For the ornament and holly I used Gold Mirror Mirri paper and then I lightly sanded the holly leaves. 


I love how this card turned out with the non-traditional Christmas colors and the soft shabby chic look.

Please be sure to visit each of the Design Team Members in the link list below.


Thanks so much for stopping by today!

Hugs & Smiles,
Heidi

Supplies
Stamps:  JustRite Papercraft CL-04715 Holly Frame Background Stamp, CR-04595 Christmas Vintage Lables Four
Paper:  DiscountCardstock.com Simply Smooth Ivory, Gold Mirror Mirri, Pink Lemonade
Ink:  Gold Pigment Ink; Ranger Distress Markers-Pine Needles, Fired Brick
Dies:  Spellbinders Paper Arts® S4-114 Standard Circles LG, S5-185 Build A Wreath, S4-405 Mix-N-Match Ornaments
Accessories:  Paper Rose, Gold Embossing Powder, Scrapbook Adhesives by 3L® 3D Foam Squares,
E-Z Runner Permanent Strips-Refillable Dispenser 49'

Tuesday, July 30, 2013

JustRite Papercraft New Release Day Three - Filigree Corner Dies

Hello blogging friends!  Welcome to day three of the New Releases from JustRite Papercraft!

Today, we have another beautiful new release designed by Becca Feeken for  JustRite Papercraft.  Check out these gorgeous AG-03950 Filigree Corner Dies!  Becca also has a stamp set that is being released today so be sure to hop on over to the JustRite Inspiration Blog and check it out.


Here is the card that I designed using the new AG-03950 Filigree Corner Dies from JustRite Papercraft.  For the base of the card I used Vista Metallic and then some vintage sheet music.  I also used Vista Metallic to die cut the filigree corners and S4-409 Gold Majesty Circles.  


Here is a close up of the AG-03950 Filigree Corner Dies.  


I edged the majesty circle with a gold metallic pen.  I used a sentiment from CR-04635 Festive Poinsettia stamp set in the upper corner with gold pigment ink and gold embossing powder.  For the ornament I used CL-04660 Vintage Christmas Ornaments stamp set and S4-401 2013 Heirloom Ornaments die template.  I stamped the image on to Champagne Metallic paper, heat embossed it and then die cut it.  I added White/Blue Roses to the center with some gold fern leaves and I also added some pearls.

Please be sure to visit the JustRite Inspiration Blog and all of the Design Team Members in the link list below.  


Thanks so much for stopping by today!  I hope you have a wonderful and creative day!

Hugs & Smiles,
Heidi

Supplies
Stamps:  JustRite Papercraft  CL-04660 Vintage Christmas Ornaments, CR-04635 Festive Poinsettia (sentiment)
Paper:  DiscountCardstock.com Champagne Metallic, Vista Metallic; Vintage Sheet Music
Ink:  Gold Pigment Ink
Dies:  JustRite Papercraft Custom Dies AG-03950 Filigree Corner Dies; Spellbinders Paper Arts® S4-401 2013 Heirloom Ornaments, S4-409 Gold Majesty Circles
Accessories:  Gold Embossing Powder, Heat Tool, White Pearls, Blue Pearls, Gold Fern Leaves, Metallic Gold Pen, White/Blue Roses, Scrapbook Adhesives by 3L® 3D Foam Squares, E-Z Runner® Permanent Strips-Refillable Dispenser 49' 

Monday, July 29, 2013

JustRite Papercraft New Release Day Two

Hello everyone and welcome to day two of the New Releases from JustRite Papercraft!  


Today's stamp set is one that I think you are going to love!  Doilies are so Hot right now--check this out!!  Look at all that doily goodness!!  This SW-04700 Dainty Doilies stamp set was designed by Samantha Walker for JustRite Papercraft.  I love all of the doily images and you can mix and match them to create your own unique doilies.  Plus the stamps match S5-205 Delicate Doilies die template set that was also designed by Samantha Walker for Spellbinders Paper Arts®.


Here is the card that I designed using SW-04700 Dainty Doilies stamp set and S5-205 Delicate Doilies die template set.  I randomly stamped the doilies onto the Kraft paper using Donna Salazar Mixed Media Inx Jasmine and set aside to dry.  Then I created three die cuts using the S5-205 Delicate Doilies die template set.  I used E-Z Runner® Permanent Strips-Refillable Dispenser 49' to adhere all of the mats together and I used S6-001 5x7 Matting Basics A and  S6-002 5x7 Matting Basics B die templates to create the mats.  Then I added the doily die cuts to the top of the card and trimmed off the excess.  Next I added Vivid Pink Seam Binding across the top of the card and added a bow.  Then I added a cluster of flowers using WOC Flowers from Really Reasonable Ribbon.  For the flower cluster I used Chrysanthemums Mixed Pink/White 10 pcsCosmos Daisy Stem Flowers Pink/White 50 pcs and Sweetheart Blossom 20pcs 2-Tone Pink.


I stamped another doily image using Memento Angel Pink ink and then I stamped the sentiment using Memento Rich Cooca ink.  The sentiment is from SW-04420 For All You Do Vintage Labels Three stamp set.  Then I used the S5-205 Delicate Doilies die templates to cut/emboss the image.  I used 3D Foam Squares to pop up the sentiment.


Please be sure to visit each of the Design Team Members listed in the link list below.  I know they have created some fabulous projects to share with you!


Thank you so much for stopping by today!
Hugs & Smiles,
Heidi

Supplies
JustRite Papercraft SW-04700 Dainty Doilies, SW-04420 For All You Do Vintage Labels Three (designed by Samantha Walker)
Paper:  DiscountCardstock.com Simply Smooth White, Kraft
Ink:  Imagine Crafts/Tsukineko Memento Angel Pink, Rich Cocoa; Donna Salazar Mixed Media Inx Jasmine
Dies:  Spellbinders Paper Arts®, S5-205 Delicate Doilies, S6-001 5x7 Matting Basics A, S6-002 5x7 Matting Basics B
Accessories:  Really Reasonable Ribbon Vivid Pink Seam Binding, WOC Flowers - Chrysanthemums Mixed Pink/White 10 pcs, Cosmos Daisy Stem Flowers Pink/White 50 pcs, Sweetheart Blossom 20pcs 2-Tone Pink; Scrapbook Adhesives by 3L® 3D Foam Squares, E-Z Runner® Permanent Strips-Refillable Dispenser 49'

Sunday, July 28, 2013

JustRite Papercraft New Release - Lacey Tiers Dies

Hello blogging friends!  Today, starts a week filled with New Releases from JustRite Papercraft and I hope you enjoy the New Releases as much as I do!


The New Release that I am sharing with you today is AG-04395 Lacey Tiers Dies this is a set that was designed by Becca Feeken for JustRite Papercraft.  This is a beautiful die template set that can be used and layered in so many ways and totally reflects Becca's elegant style.


Here is a Christmas ornament that I designed using AG-04395 Lacey Tiers Dies from JustRite Papercraft and S4-401  2013 Heirloom Ornaments die template from Spellbinders Paper Arts®.  I have a full step-by-step tutorial to share with you on how to create this Christmas ornament.


To start I applied 6'' x 12'' Adhesive Sheets from Scrapbook Adhesives by 3L® to the back of two pieces of Gold Mirror Mirri paper from DiscountCardstock.com.


Then I used the decorative circle from the AG-04395 Lacey Tiers Dies and the largest die template in the S4-401  2013 Heirloom Ornaments set.


Look how perfectly these two die templates match up!  I placed the decorative circle die template inside the ornament die template and used some tape to hold them in place.  Then I used the Artisan X-plorer™ to create the die cuts.


This is what the die cut shape will look like.  Be sure to cut two of these ornaments.


Next, I used the ornament die by itself to cut a piece of white lace material.  The white lace material is placed in between the two Christmas ornament die cuts.


This is what the ornament looks like once all three pieces are adhered together.  I put the piece of red paper in the background so you could see the lace.


Here is another close up where you can see the lace.  I added white and ivory pearls and an ivory rose with gold fern leaves.  I also added Pssst! Sheer Shimmer Spritz Sparkle from Imagine Crafts/Tsukineko to the rose.  I used a brush to apply the shimmer.


Here is a close up of the rose.  Check out all of the shimmer--love it!


I used a piece of 3/8" Ivory Satin with Gold Metallic Trim Ribbon from  Really Reasonable Ribbon to create a hanger for the ornament.  I hope you enjoyed the tutorial and will give these ornaments a try!

Please be sure to visit each of the Design Team Members in the link list below to see what they have created to share with you.


Thanks so much for stopping by today!

Hugs & Smiles,
Heidi

Supplies
JustRite Papercraft AG-04395 Lacey Tiers Dies (Designed by Becca Feeken)
Paper:  DiscountCardstock.com Gold Mirror Mirri
Spellbinders Paper Arts®:  Artisan X-plorer™, S4-401  2013 Heirloom Ornaments
Accessories:  Scrapbook Adhesives by 3L® 6'' x 12'' Adhesive Sheets; Really Reasonable Ribbon 3/8" Ivory Satin with Gold Metallic Trim Ribbon; Imagine Crafts/Tsukineko Pssst! Sheer Shimmer Spritz Sparkle; White Lace Material, White & Ivory Pearls, Ivory Rose, Gold Fern Leaves, Hot Glue

Saturday, July 27, 2013

Ruffle Beaded Cuff Bracelet

Hello everyone!  Today, is my day to post over on the Positively Me Blog and I have a ruffle beaded cuff bracelet to share with you using the Jewel Loom™.

RuffleBeadedCuff-1

To see more pictures and find out all of the details please click HERE.  
I hope you will hop on over to the Positively Me Blog check it out and leave me a little love! ;-)

Huge & Smiles,
Heidi

Supplies
Beadalon® Jewel Loom™,  Black Nymo® Nylon ThreadHard Beading Needles #10,
Artistic Wire® 18 mm Silver Mesh Clasp
Blue Moon Beads® Black Seed Beads 6/0
ButterBeeScraps' Metal Flower Filigree
Large Bling, White Ruffle Trim

Friday, July 26, 2013

Paris Trinket Box

Hello blogging friends!  How are you all doing?  It sure has cooled off in MN the past couple of days, but I'm not complaining lol!  The cooler weather is a nice change, as long as we don't all of a sudden jump into Fall.  This next week is going to be a busy one!  Our youngest son is going to be in his first play and they have two performances everyday.  It's pretty exciting as this is his first play and he had a lead roll.  Plus we have the County Fair and when your from a small town that's a pretty big thing lol!  Besides the 4th of July it's probably the biggest event of the summer.  ;-)  It's going to be busy week on my blog too with a New JustRite Papercraft Release--starting on Sunday!

Today, I have a beautiful altered box to share with you.


This is the view of the top of the box.  I painted the wood box with an antique white paint.  Then I used Liquitex Light Modeling Paste with some Antique Linen Ink Refill to tint the modeling paste and stencils for the top and sides of the box.  I added lace around the heart and then I created the banners for the top.  To create the banners I used SW-04415 Bunting and Buttons Dies from JustRite Papercrft and  Premium Craft Foil from Spellbinders Paper Arts®.  I stamped the word Paris with metal stamps on the craft foil banner die cuts.  I also used felt to create the scalloped banner die cuts.  I added gesso, pearls, Champagne Crushed Glass GlitterPssst! Sheer Shimmer Spritz Gold and White Seam Binding (tea dyed).  The vintage image is one that I found online and printed off.


Here is a close up of the banner.  I also added a metal crown and rhinestones.


I created a cameo and flower cluster down in the bottom corner.  The Small Pink CameoSmall Bronze Cameo FrameClear SS10 Pointy Back Crystal Rhinestones and Leaf Filigrees are all from ButterBeeScraps.  For the roses I brushed on Pssst! Sheer Shimmer Spritz Gold and I love how they shimmer!!  I also lightly misted the entire box with the spritz.  


Going all around the box I added Venise Lace.  I used four different styles of the lace trim.  To finish it off I added a beautiful and fluffy bow made with tea dyed Seam Binding and a large gem.

I had so much fun create this decorative box and I love how it turned out!

Thanks so much for stopping by today!

Hugs & Smiles,
Heidi


Supplies
JustRite Papercrft:  SW-04415 Bunting and Buttons Dies
Spellbinders Paper Arts®:  Premium Craft Foil
Really Reasonable Ribbon:  White Seam Binding (tea dyed)
The Rubber Cafe:  Liquitex Light Modeling Paste, Champagne Crushed Glass Glitter
ButterBeeScraps:  Leaf Filigrees, Small Pink Cameos (#CAM35-PK), Small Bronze Cameo Frame (#F835-B), Clear SS10 Pointy Back Crystal Rhinestones
Imagine Crafts/Tsukineko:  Pssst! Sheer Shimmer Spritz Gold
Ranger:  Antique Linen Ink Refill
Simply Paveena:  Venise Lace
Stencils, Pearls, Felt, Metal Crown, Large Crystal, Metal Stamps, Wood Box, Printed Image

Tuesday, July 23, 2013

Exciting News To Share!! ButterBeeScraps' Design Team!!

Hello blogging friends!  I have some very exciting new to share with you today!!  Monique Mason, owner of ButterBeeScraps' Artistic Treasures on Zibbet has asked me to join her New Design Team!!  Here is the announcement that Monique posted on YouTube.
  

I am so honored to be a part of the New ButterBeeScraps' Design Team!!
I will be joined by Amador and Pea both amazingly talented designers from YouTube!!

Amador who is Amadoreros on YouTube and you can click HERE to check out Amador's channel.  

Pea who is Whimsicalendeavors on YouTube and you can click HERE to check out Pea's channel.

You can also click HERE for a link to my YouTube channel.

Click HERE for a link to the New ButterBeeScraps' Design Team channel on YouTube.
Click HERE for a link to Monique's channel for ButterBeeScraps' on YouTube.
AND
Click HERE for a link to check out ButterBeeScraps' on Zibbet!

This will be something new to me to enter the world of YouTube!  I have done a few videos in the past but it has been awhile.  I just hope I can keep up with Monique, Amador and Pea!!  LOL!  

I hope that you will visit ButterBeeScraps' on Zibbet and check out all of the Fabulous products Monique offers in her shop.  If you love metal filigree pieces, charms and embellishments this is the shop to check out!! Also please check out all of the YouTube channels and be sure to subscribe to the New ButterBeeScraps' Design Team channel and to all of the Design Team Members.  You won't want miss out on seeing the beautiful design work by the team!  Look for the Design Team to start sharing projects in September.  I will be doing a little of both---sharing here on my blog and on YouTube.  Wish me luck LOL! ;-)


These are some of the projects I have designed using some of the metal filigree pieces from ButterBeeScraps'.

Monique also started a New Facebook page for ButterBeeScraps' Artistic Treasures.  You can click HERE for a link to the New FB Page and I hope you will LIKE the New FB Page too!! ;-)

You can also check out my Facebook page for Embellished-Dreams Designs and I will be sharing my design work there too.

Ok, I know this post is heavy on the links but I don't want you to miss out on any of the fantastic products and design work from the New Design Team!! ;-)

I want to say a Huge Thank You to Monique!!  I can't wait to get started creating!
Also a Huge Congrats to Amador and Pea!!!
I am looking forward to working with and getting to know everyone.

Thanks so much for stopping by today!

Hugs & Smiles,
Heidi

Thursday, July 18, 2013

Estate Sale Vintage Dress and Hilarious Hoarders Video Revisited

Hello blogging friends!  I don't have any artwork to share with you today but I can say I am officially done with CHA artwork!!  Such a wonderful feeling to have all of the projects completed and in the mail! ;-)

Last week I got a phone call from my aunt Gail and she was at an estate sale.  She found this beautiful vintage dress and it was only $12.00!!  She described it to me and said she thought it would look great on my dress form.  So I got over to the sale right away.  I bought the dress and a bag full of old wooden spools.  We had a fun time looking around!


Here is a picture of the dress before I washed it.  The dress is so delicate so I washed it by hand. 


Here is a close up of the before.  I think the people might have been smokers because the dress was yellowed and as soon as the fabric hit the water it didn't smell very good.  I was a little worried that the smell might not come out but after four washes the water was clear and the dress didn't smell.  


Here is an after picture and the dress is a pretty light ivory now.  ;-)


I LOVE how pretty my dress form is now with this beautiful vintage dress!!!
It makes me Happy!! ;-)
A Huge Thanks to my aunt Gail for a Fabulous estate sale find!!!

The other day a dear sweet friend of mine Wendy Weixler shared a video on Facebook and she tagged several friends--myself included.  Maybe you have already watched this video but if not you HAVE TO SEE IT!!!  This will totally make your day and put a smile on your face!!  Linda, the lady in the video is Hilarious!!!  Her video has been viewed almost 20,000 times and she just posted it a couple of days ago. 


Let's Go Shopping!!!

LOL!!  I hope this video gave you a good laugh!!

Have a Wonderful Day and Happy Crafting!!

Hugs & Smiles,
Heidi

Tuesday, July 16, 2013

Altered Metal Filigree Necklace using Stamper's Big Brush Pens and Gesso

Hello everyone!  I have another Guest Designer post over on the Faber-Castell Design•Memory•Craft Blog and I hope you will hop on over there, check it out and leave me a little love. ♥


I have a full step-by-step tutorial showing how I altered and added color to the bronze metal filigree pieces.
Click HERE to visit the Design•Memory•Craft Blog.

Thanks so much for stopping by today!
I hope you have a wonderful and creative day!!

Hugs & Smiles,
Heidi


Saturday, July 13, 2013

Spellbinders Shape It Up Sneak Peek and Giveaway Day Three

Hello blogging friends!  Today, is day three of the Spellbinders Shape It Up Sneak Peek and Giveaway.  I have a couple of projects to share with you using the NEW E3D-010 Roman Romance 3D M-Bossabilites folders and I have a full step-by-step tutorial. 


Supply List:
Cross Promotional Partners
Other Products
Paper:  DiscountCardstock.com Simply Smooth White, Teal
Accessories:  Simply Paveena Venise Lace Trim; Really Reasonable Ribbon Bliss Pearls; Hot Glue


To start die cut a piece of simply smooth white cardstock using Nestabilities™ Card Creator S6-001 5x7 Matting Basics A.  Then lightly mist the front and back of the cardstock with water.  Doing this will loosen the fibers in the paper and allow for a very deep and crisp emboss.  Set aside. *Tip-add 1-2 drops of Dawn dish soap to the water this will condition and loosen the fibers.


To create a letterpress affect start to apply the Turquoise Gem Versa Magic™ ink directly to the 
M-Bossabilites folder starting at the top (hinge side).   Apply the ink about half way down the folder.


Now switch colors of ink.  Using the Aquatic Splash Versa Magic™ ink start applying ink in the middle and continue to the bottom of the folder.  *Tip-using this particular folder you will want to do the direct ink technique-apply ink directly from the ink pad to the folder.  There are several layers of dimension to this folder and applying the ink directly will give a better ink coverage than a brayer.


Place the 5x7 die cut of simply smooth white cardstock in to the folder and run it through the Grand Calibur® Machine to emboss.  The embossing sandwich for the 3D M-Bossabilities™ is a little different than the regular embossing sandwich—B • Embossing Plate, M-Bossabilities Folder with paper inside and D • Adapter Plate on top.


I absolutely love the look of the letterpress with the 3D M-bossabilites!  The embossing is so crisp and doing the letterpress with this folder gives the embossing the look of venise lace.  I also love how the embossed pattern fades out toward the bottom.  To finish of the embossed piece I stamped a sentiment from 
CR-04350 Special Gifts Labels Twenty-Nine stamp set from JustRite Papercraft®.


To assemble the card I used a piece of teal cardstock scored and folded for the base.  Then I used E-Z Runner® Permanent Strips-Refillable Dispenser-49' from Scrapbook Adhesives by 3L® to adhere the pieces together.  I added a piece of white venise lace trim along the side and then I added a few pearls to the embossed area and by the sentiment.


When using the 3D M-bossabilites try to explore beyond.  Think out of the box and look at different ways to use them.  The 3D M-bossabilities are not just for paper crafting.


Here is a second project that I designed using Premium Craft Foils from Spellbinders with the E3D-010 Roman Romance 3D M-Bossabilites™ Folder.  I embossed the foil and then cut out parts of it and used it to alter a wooden box transforming it from simple to stunning.  


For Contest Rules click Here 

To Enter Contest click Here

Thank you so much for stopping by my blog today!  I hope you are enjoying the Spellbinders Shape It Up Sneak Peek and Giveaway.  Please be sure to visit Linda Lucas to see the beautiful project she created to share with you.  For more chances to win please visit the other Design Team Members listed in the link list below.

Day 1

Day2

Don't forget to enter the contest!!

Questions? calexander@spellbinders.us No entries will be accepted at this email address.


LinkWithin

Related Posts Plugin for WordPress, Blogger...