Showing posts with label Clear Color Real Brush Pens. Show all posts

Wednesday, September 28, 2016

Simon Says Stamp - Handwritten Floral Greetings Watercolor Card

Hello everyone!  Today, I have a floral watercolor card to share with you using one of the stamp sets from a Simon Says Stamp Card Kit of the Month.  The kits are so much fun to receive and they are filled with all kinds of crafty goodness.  The kits always have a stamp set, pattern paper, and cardstock and then they have extra goodies such as dies, embellishments, and inks just to name a few.  There is also an inspiration sheet with colored photos of cards made using the kit.  The card kits are also very reasonably priced and you have the option to sign up for a subscription or check them out each month.  But I can tell you this--a lot of times the kits sell out so if its something you want don't wait lol.  I started getting the kits for something fun and different to do and now I look forward to them every month.


I stamped the flowers and leaves from the 101627 Handwritten Floral Greetings clear stamp set from Simon Says Stamp onto Strathmore Mixed Media paper using VersaMark Ink.  The I added NUVO Embossing Powder - 602N Glacier White from Tonic Studios and used my heat gun to melt the powders and emboss the images.  


Here is a close up of the flowers.  I used Zig Clean Color Real Brush Pens to watercolor the images.  I think these pens are so fun and easy to use and you can use them with or without water.  For this card I blended the colors with water.  On the background I started with a blue in the upped left corner and then I added a very light yellow and pink to the bottom right corner.  The closer I got to the middle of the card the more water I used to blend and achieve the very light colors.  If you are new to watercolor you might want to start out with embossed images as they can be easier to work with. The raised embossed areas help to keep the color in the lines (if that is the look you want) and also the embossed areas resist the watercolor.  After I was done with the watercolor I took a paint brush and added clean water droplets over the entire piece.  I let the water sit for a few seconds and then I used a paper towel to blot off the water.  Doing this removes some of the watercolor.  It also adds texture and interest to the background piece.


I also used some watered down wicker white acrylic paint and added little paint splatter on the background.  


To create the pretty pink die cut thanks I used a piece of white cardstock and I applied VersaMark Ink directly to the paper.  Then I added NUVO Embossing Powder - 605N Ballerina Pink and used a heat gun to melt the powders and emboss the paper.  Next I used the Painted Thanks Wafer Die from Simon Says Stamp and die cut the word using the Tangerine Die Cutting Machine from Tonic Studios.  Then I added more of the VersaMark Ink and embossing powder and heat set the word die.  I repeated this step one more time to build up the embossing powder.  Doing this adds dimension to the die cut.  I keep the embossed paper to use on another project.


Here is another look at the die cut word.  I really like the added dimension from the embossing powder.  To finish off the die cut I added Glossy Accents from Ranger on to the die cut and then I added NUVO Pure Sheen Glitter 711N Candy Pink on the bottom half.  I set the piece aside to dry.  Once the Glossy Accents was dry then I used Multi Medium Matte Adhesive from Ranger to adhere the die cut to the card front.
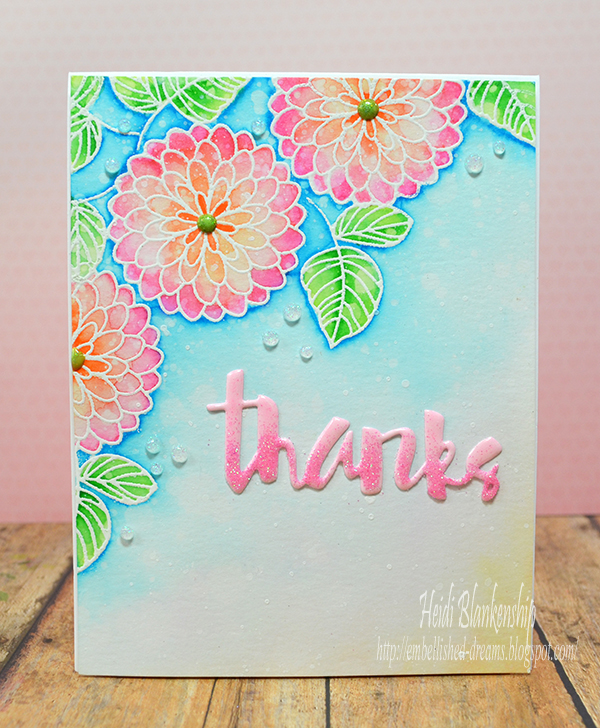

Using Scor-Tape I added a piece of white craft foam to the back of the watercolor panel and adhered that to an A2 top folding card base.  To finish off the card I added NUVO Crystal Drops - 669N Gloss Apple Green to the center of the flowers and  NUVO Glitter Drops - 758N White Blizzard for little accents.  The crystal and glitter drops dry pretty quickly but you want to make sure you don't lay anything on top of the card for 24 hours so the drops can cure and harden.  If you love the look of enamel dots the crystal and glitter drops are a fun alternative for your projects.

Thank you so much for stopping by today!
I hope you have a wonderful day!

Hugs & Smiles,
Heidi


Are you interested in the products I used?  I have all of the supplies listed and linked below.
Compensated affiliate links are used when possible.  Products with an asterisk (*) were provided by a store or the manufacturer.
The Stamp Simply Ribbon Store = TSSRS
Tonic Studios = TS
Simon Says Stamp = SSS
Amazon = AZ

Supplies
Stamps:
Simon Says Stamp - 101627 Handwritten Floral Greetings
Paper:
Strathmore - Mixed Media (AZ)
Cardstock - White Hammermill Color Copy Digital Cover, 80 lb (AZ)
Ink/Markers:
VersaMark Ink (TSSRS) (SSS) (AZ)
Zig Clean Color Real Brush Pens (SSS) (AZ)
Dies:
Simon Says Stamp - Painted Thanks Wafer Die SSSD111546
Accessories:  
*Tonic Studios NUVO Embossing Powder - 602N Glacier White (SSS) (AZ) (TS)
*Tonic Studios NUVO Embossing Powder - 605N Ballerina Pink (SSS) (AZ) (TS)
*Tonic Studios NUVO Pure Sheen Glitter 711N Candy Pink (AZ) (TS)
*Tonic Studios NUVO Crystal Drops - 669N Gloss Apple Green (SSS) (AZ) (TS)
*Tonic Studios NUVO Glitter Drops - 758N White Blizzard (SSS) (AZ) (TS)
*Tonic Studios Tim Holtz Tonic Guillotine Comfort Paper Trimmer 160E (SSS) (AZ) (TS)
*Tonic Studios Tangerine Die Cutting Machine (TS)
Ranger Multi Medium Matte Adhesive (SSS) (AZ)
Ranger Glossy Accents (AZ) (TSSRS) (SSS)
Quilled Creations Precion Tip Empty Applicator Bottle 317 (SSS) (AZ)
Scor-Tape (SSS) (AZ) (TSSRS)
Wagner Heat Gun (AZ)
White Craft Foam (SSS) (AZ)
FolkArt Wicker White Acrylic Paint (AZ)
Paint Brush


Wednesday, June 22, 2016

Pink Ink Stamps - On the Boardwalk


Hello everyone!  Today, is my day to post for Pink Ink Stamps and I have a fun summertime card to share with you using a couple of the Pink Ink Stamps.  


 To Start I stamped the On the Boardwalk image onto Strathmore Mixed Media paper with Ranger Jet Black Archival ink.  Then I used Zig Clean Color Real Brush Pens to color all of the images. Some of the image were just colored with the pens and on some of them I did some blending of the color with water.  I used two different paint brushes for the blending--round 8 and liner 2.  


After all of the images were colored then I did a little bit of shading at the bottom and I also colored the sky.  To achieve the look of clouds in the sky first I added the color and then I used a heat tool to speed up the drying time.  Next I added just plain water in the shape of a cloud in the sky.  I let the water sit for a few seconds and then I blotted the area with a paper towel.  Doing this pulled up the water in that area and leaving the appearance of a cloud.  


I added some red and white twine and an ice cream cone charm which I thought would be a fun little embellishment and it worked perfectly for the summertime theme of the card. 


I wanted to add some sparkle and dimension to the card so I went over some of the areas with the Zig Wink of Stella Clear Brush Pen.  Then I applied Glossy Accent to some of the images.  I also added the sentiment right under the boardwalk image.   


I used two of the dies from the Tonic Studios Mixed Rectangles Layering Die Set to cut and emboss the two rectangle shapes.  I used scor-tape to apply white craft foam to the back of the image and give it a little dimension.  Then I adhered everything to a red A2 card base.

This is such a fun summertime image!  It would be great for a birthday card, a day at the carnival or just a fun summertime thinking of you card.

Thank you so much for stopping by today!  I hope you are enjoying your summer and staying cool!

Heidi


To find the Pink Ink products used please visit Ellen Hutson LLC: 

10123C Good Old Summertime.

You can also visit Pink Ink's website to find a local store near you that carries our stamps, or to order wholesale.

Other Products Used:
Paper:  Strathmore Mixed Media, Cardstock - Blue, Red
Ribbon:  Red and White Twine
Accessories:  Paint Brushes Round 8, Liner 2, ButterBeeScraps - Fun In The Sun Charms (ice cream cone charm), Ranger Glossy Accents, White Craft Foam, Scor-Tape

Tuesday, May 24, 2016

Tonic Studios - Dreams, Wishes & Fairy Kisses Card and Tutorial

Hello blogging friends!  Today, I have a pretty Springtime and glittery fairy card to share with you.  I am loving all the pretty little fairies in the Fairy Reflections Die and Stamp Collection.  As an added bonus there is also a coordinating paper pack.


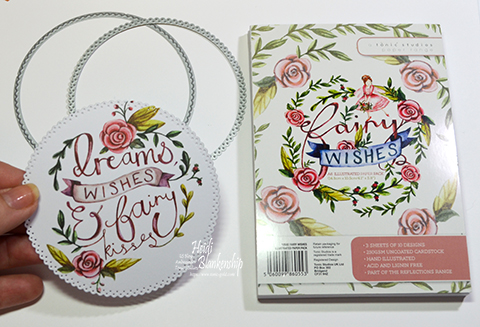
Here is a look at the card I designed using the fairy 1306E Aurora Reflections Stamp and 1206E Aurora Reflections Die Set.  I also used 483E Scalloped Circles Layering Die Set, 524E Pinhole Circle Die Set,112 0E Filigree Flourish Die Set, and 1055E Fairy Wishes Illustrated Paper Pack.


To start I stamped the 1306E Aurora Reflections Stamp using VersaMark ink on to Strathmore mixed media paper.  Then I added 600N Embossing Powder - Classic Gold and used my heat to to melt and heat set the powders.  I used Zig Clean Color Real Brush Pens to watercolor the image.  The colors are listed below in the supplies.


Next I die cut the fairy shape using the silhouette die from the 1206E Aurora Reflections Die Set.  No fussy cutting!  The die cuts that fairy shape perfectly.


I used one of the sentiments from the 1055E Fairy Wishes Illustrated Paper Pack.  To die cut and add some details to the dies cut shape I used the 483E Scalloped Circles Layering Die Set and 524E Pinhole Circle Die Set.  When using these dies you will want to die cut the scalloped circle first and then you can match up the pinhole circle die to add the detail.  For all of the die cutting I used the  147E Tangerine Machine and Bag Set and I also used the 160E Tim Holtz - 8" Comfort Guillotine/Trimmer to cut all of my paper pieces.


I used the NUVO 203N Glue Pen Medium and 705N US Pure Sheen Diamond Glitter to add some sparkle to the fairy and the flowers in the die cut sentiment.


For some finishing touches on the fairy and sentiment die cuts I added some 651N Crystal Drops Gloss - White to look like some white pearls.


I also used the 112 0E Filigree Flourish Die Set to cut a couple of floral flourished to add on the bottom and right side of the card.  I used the same Strathmore mixed media paper and  Zig Clean Color Real Brush Pens to color the die cuts.  I used a sheet of pattern paper from the Simple Stories Color Vibe 6 x 6 Paper Pad and added that to a pink cardstock base.  I also added some green May Arts ribbon and sequins from Cartwright Sequins & Beads.


I love all the sparkle from the glitter and sequins.


Thanks so much for joining me today and I hope you enjoyed the card tutorial.

Hugs & Smiles,
Heidi


Supplies
Tonic Studios USA
Stamps:  1306E Aurora Reflections Stamp
Dies:  1206E Aurora Reflections Die Set, 483E Scalloped Circles Layering Die Set, 524E Pinhole Circle Die Set,112 0E Filigree Flourish Die Set
NUVO:  600N Embossing Powder - Classic Gold, 651N Crystal Drops Gloss - White, 705N US Pure Sheen Diamond Glitter
Paper Range:  1055E Fairy Wishes Illustrated Paper Pack
Adhesive:  NUVO 203N Glue Pen Medium, 419E Craft Tacky 120ml
Tools:  147E Tangerine Machine and Bag Set, 160E Tim Holtz - 8" Comfort Guillotine/Trimmer, 819 - 107E Time Holtz Titanium Shear
Other Supplies
Paper:  Strathmore Mixed Media Paper, Simple Stories Color Vibe 6 x 6 Paper Pad, Cardstock - Pink
Ink/Markers:  Versa Mark Ink, Zig Clean Color Real Brush Pens - Flesh Color, Mustard, Pale Pink, Light Pink, Light Carmine, Wine Red, Geranium Red, Orange, Yellow, Light Green, Olive Green, Oatmeal, Middle Brown, Haze Blue (All colors in set of 60 markers except Haze Blue)
Ribbon:  May Arts Ribbon Sampler - Spring Green
Accessories:  Foam Squares, Cartwright Sequins & Beads - 4mm Medium Pink, 3mm Gold Flower, 3mm Moonshine

Saturday, April 16, 2016

Dreamy Faux Watercolor - Different Product to Achieve the Same Look

Hello everyone!  Yesterday, I shared a blog post for The Stamp Simply Ribbon Store and a technique I am calling Dreamy Faux Watercolor.


Here is a second look at the card I posted.  I also included a tutorial on how to achieve this look.  If you missed the post and tutorial you can click HERE to check it out.

In the tutorial I showed how to do this technique using Tim Holtz Distress Inks.  But I know not everyone has distress inks so I took some other products (inks, markers, paint) that I had in my stash to show you how you can achieve the same look using different products.  I also want to say this is not a technique that I came up with people have been doing this for years in traditional watercolor and I first learned to do this technique several years ago when I was taking some watercolor classes.  But watercolor has become so popular in paper crafting over the last year or two so I wanted to share how this technique could be done using other products.  As far as the name of the technique--something I just came up with.  The finished piece looks kind of dreamy to me with the water droplets and the faux watercolor part--well that's just because it's not true watercolor lol.


Sorry I know this picture isn't very big in the post but you can click on the image to enlarge it and see more details.  This is a BEFORE picture to show you how all of the flowers looked once the color was added.  The first picture is Distress Inks (the same inks I used in the tutorial).  For the second flower I used Zig Clean Color Real Brush Pens.  On the third flower I applied Memento Dye Inks.  For the forth flower I used Spectrum Aqua Markers and for the fifth and final flower I used Kuretake Gansai Tambi Watercolor.

The Distress Inks and the Memento Dye Inks were both applied the same way layering three different colors of ink and I used a cotton ball to apply the ink.

For the Zig Clean Color Real Brush Pens and the Spectrum Aqua Markers you have two different options for applying the color.  You can apply the color to the paper directly from the pen/marker or you could scribble the color on to a craft mat or acrylic block and add the color with a brush--just like if you were going to watercolor it.  For both of the examples I colored directly on to the paper with the pens/markers and I used three different colors for each.  If you choose to paint the color on then you would take out the faux part of the technique--but it's really up to you and how you want to do this technique.  :)

For the last flower I did used the Kuretake Gansai Tambi Watercolor and these are traditional watercolor so there is no faux part here I had to watercolor to add the color to the image but I thought people might like to see the comparison to the other products.


Once again don't forget you can click on the image to enlarge it.  :)  As you can see from the picture I added the different color mediums to the top part of the paper to do the water droplets.   I thought this would also be a good comparison.  So this is the AFTER picture--once the clear water was added and blotted off.  I wanted to show you that this technique can be achieved with different products.  I also want to encourage you to use what you have in your own stash.  Yes, some of the colors look a little different and with some of the products you will be able to blot off more of the color for a softer look and some of the colors will be more vibrant.

But the main thing is to have fun!  Experiment with what you have and don't be afraid to try new things.  Oh and one more thing I just wanted to add--I get asked by a lot of people what kind of paper I used for watercolor techniques.  I have several brands of paper but for paper crafting and especially if I am going to be stamping on the paper my all time favorite is Strathmore Mixed Media Paper from the 400 Series.  It is heavy weight and ultra smooth so it is perfect for stamping on.  Most of the big box stores carry it and I know several online places sell it too and you can buy the pads in a few different sizes.  I usually wait until it goes on sale and then I buy the 11 x 14 pad and cut the paper down to whatever size I need.

I hope you enjoyed this comparison with the different products and I hope you will give this technique a try.  Don't forget if you missed the tutorial on the Dreamy Faux Watercolor you can click HERE for all of the details.

Thanks so much for stopping by today!  Let me know in the comments if you give this technique a try and leave me a link to your project--I would love to see it!  I hope you have a fantastic weekend and have fun creating!

Hugs & Smiles,
Heidi


Monday, February 29, 2016

JustRite Papercraft - Meadow Circles Hello Watercolor Card

Hello blogging friends!  Today, I have another watercolor card to share with you.  I am loving doing the watercolor cards so I hope you re getting some inspiration from them as well.  :)


For this card I started with a piece of Strathmore Mixed Media paper.  Then I used some of the stamps from the CR-05032 Meadow Circles Clear Stamps along with VersaMark ink and Tonic Studios - NUVO Glod Embossing Powder and a heat tool to heat set the images.  Then I used several colors of the Zig Clean Color Real Brush Pens - Light Blue, Cobalt Blue, Pale Green, May Green, Light Green, Persian Green, Turquoise Green pens,  I started by going from the lightest blue, then in to the green and then finished with the blue greens.  Once the watercolor was dry I used a paint brush with clean water to add water droplets.  I let the water droplets sit for a few seconds and then blotted with a paper towel.  I used the heat to to dry the paper and repeated the water droplets a few times until I was happy with the look of the background.


After the watercolor piece was all dry then I used the NUVO Medium Glue Pen to add adhesive on the flower and leaves inside the circle images.  For the flower I used NUVO Sheer Glitter Turquoise and for the leaves I used NUVO Sheer Glitter Olive Green.  Once the glue had a few minutes to set and dry I removed the excess glitter.  For some embellishments I added some Cartwright Sequins - 8 mm, 10 mm, Bahama Blue SC Iris, 3 mm Gold Flowers, 4 mm Gold.  I used Ranger - Multi Medium Matte to adhere the sequins.


To finish off the card I used VersaMark ink to stamp the hello sentiment from the CR-05032 Meadow Circles Clear Stamps and then I used the same gold embossing powder and heat set the sentiment.  Then I cut a flag tail on one end of the paper and adhered it to the from of the watercolor piece.  I used white craft foam and scor-tape to adhere the watercolor base to a white cardstock mat and then to the aqua card base.

I just love the look of watercolor with the water droplets!

Thanks so much for stopping by today for another card share and I will have another project coming real soon!

Have a fantastic day!

Hugs & Smiles,
Heidi

Supplies

Stamps:  JustRite Papercraft CR-05032 Meadow Circles Clear Stamps
Paper:  Strathmore Mixed Media, CS - White, Aqua
Ink/Markers:  VersaMark Ink, Zig Clean Color Real Brush Pens - Light Blue, Cobalt Blue, Pale Green, May Green, Light Green, Persian Green, Turquoise Green
Accessories:  Tonic Studios - NUVO Glod Embossing Powder, NUVO Sheer Glitter Turquoise, NUVO Sheer Glitter Olive Green, NUVO Medium Glue Pen, Cartwright Sequins - 8 mm, 10 mm, Bahama Blue SC Iris, 3 mm Gold Flowers, 4 mm Gold, Ranger - Multi Medium Matte, White Craft Foam, Scor-Tape, Heat Tool, Paint Brush, Paper Towel

Sunday, February 28, 2016

JustRite Papercraft - Doodled Birds Banners Shape Card

Hello Blogging Friends!  I have a quick and cute card share for today.


For today's card I used the largest banner die in the  DIE-05020 JustRite Stitched A2 Banners and Rectangles die set to create the base for a fun little shape card.  Check out these doodled birds--they are so cute!  This is one of those fun stamp sets that just makes you smile.  I used light yellow cardstock for the base of the card.  


I used the smaller banner die in the DIE-05020 JustRite Stitched A2 Banners and Rectangles set to cut a piece of Strathmore Mixed Media paper and then I stamped the images from the CR-05030 Doodled Birds Clear Stamps using Ranger - Jet Black Archival Ink.  I used Zig Clean Color Real Brush Pens - Light Pink, Pink, Pale Green, Light Green, Yellow, Lemon Yellow, Bright Yellow, Orange, and Light Blue to color the images and background.  I wanted to add a little sparkle to the card so I used Ranger - Glossy Accents and Stampendous - Multi Ultra Fine Crystal Glitter.


I used scor-tape and white craft foam to adhere the watercolor piece to the card front.  

I hope you enjoyed today's card and for more inspiration don't forget to check out the JustRite Blog and the JustRite Facebook page.

Thanks so much for stopping by and Happy Sunday!

Hugs & Smiles,
Heidi


Supplies
Stamps:  JustRite Papercraft CR-05030 Doodled Birds Clear Stamps
Paper:  Strathmore Mixed Media, CS - Light Yellow
Ink/Markers:  Ranger - Jet Black Archival Ink, Zig Clean Color Real Brush Pens - Light Pink, Pink, Pale Green, Light Green, Yellow, Lemon Yellow, Bright Yellow, Orange, Light Blue
Dies:  DIE-05020 JustRite Stitched A2 Banners and Rectangles
Accessories:  Ranger - Glossy Accents, Stampendous - Multi Ultra Fine Crystal Glitter, White Craft Foam, Scor-Tape, Paint Brush

Saturday, February 27, 2016

JustRite Papercraft - Watercolor Floral Silhouettes - You Are Amazing Card

Hello everyone!  I hope you are all having a wonderful weekend.  Thank you all so very much for all of your sweet comments, thoughts and prayers for my husband and myself.  He is doing great and back to work.  :)  I have been starting to feel a little better too and I can tell the meds are starting to work.  I am still having pain but it is no where near as bad as it was.  But I have to be careful and not over do it--if I do too much then my arm starts to really hurt. So I do a little and then take a break and then come back to it in a bit.  But I am very thankful my husband is doing great and I am getting better too.  We truly appreciate all of your thoughts and prayers!!

I have several projects that have actually been done for a couple of weeks but with everything going on and not feeling well I have fallen behind so you will probably be seeing several projects in the next few days--as long and my hand and arm are ok to type.  :)


Today, I have a pretty watercolor card to share with you using some of the new stamp releases from JustRite Papercraft.  I love this new stamp set--the flowers are so fun and kind of remind me of a combination of whimsical dandelions and elegant Queen Ann's Lace.  I think these image could be used for fun and playful cards--like this watercolor card or if they were embossed in a metallic color they could be very elegant.  I used the CR-05029 Floral Silhouettes One Clear Stamps with VersaMark ink for the background and heat embossed using Tonic Studios - NUVO White Embossing Powder.  Then I used the Zig Clean Color Real Brush Pens - Light Carmine, Orange, Pale green, Light Green, Light Blue, and Cobalt Blue to watercolor the flowers and the background.  For the paper I used Strathmore Mixed Media, this is my favorite paper to use when I am stamping and doing watercolor.  The paper is ultra smooth so you get a nice crisp stamped image every time, since it is for mixed media it can handle the water and the paper is 140 lbs so it is a nice heavy paper.


After the watercolor was dry I used a paintbrush with clean water to add the water drops and then blotted them off with a paper towel.  I added a few white flat back pearls to the center or some of the flowers and then scattered a few more on the card.  I used  Ranger - Multi Medium Matte to adhere the pearls, it is a really good and strong liquid adhesive.  For the sentiment I used one of the stamps from the CR-05028 Chrysanthemums Clear Stamps set and stamped in on to pink cardstock.  I stamped it with VersaMark ink and then used more of the Tonic Studios - NUVO White Embossing Powder to heat set the sentiment.  Then I used one of the dies from the DIE-05001 JustRite Snowflake and Tag Dies.  To adhere the tag die cut I added some white twine, wrapped it around the card base a couple of times and tied a bow.


I used Scor-Tape and white craft form to adhere the watercolor piece to the pink cardstock base.

Thanks so much for joining me today and I hope you liked the card share!

To see more cards and inspirations from the Design Team don't forget to check out the JustRite Blog and the JustRite Facebook Page.

Hugs & Smiles,
Heidi


Supplies:
Stamps:  JustRite Papercraft CR-05029 Floral Silhouettes One Clear Stamps, CR-05028 Chrysanthemums Clear Stamps
Paper:  Strathmore Mixed Media, CS - Pink
Ink/Markers:  VersaMark Ink, Zig Clean Color Real Brush Pens - Light Carmine, Orange, Pale green, Light Green, Light Blue, Cobalt Blue
Dies:  DIE-05001 JustRite Snowflake and Tag Dies
Ribbon:  White Twine
Accessories:  Tonic Studios - NUVO White Embossing Powder, Ranger - Multi Medium Matte, White Flat Back Pearls 4 mm, 6 mm, Heat Tool, White Craft Foam, Scor-Tape

Sunday, December 6, 2015

Tonic Studios Chalkboard Die & Stamp Sets - Card Share

Hello blogging friends!  Today, I have two cards to share with you using a couple of the New Chalkboard Die and Stamp Sets from Tonic Studios.  There are three sets in this collection -- Birthday Wishes, It’s Your Big Day, and Special Occasion.  These sets are prefect for card making and all of your DIY projects.


Here is a look at the first card I designed.  I used the 1099E It's Your Big Day Indulgence Chalkboard Die & Stamp Set and 485E Mixed Oval Layering from Tonic Studios.  The card base in an A2 top folding card.  I die cut the sentiment and decorative oval using white pearl shimmer paper and then I die cut the label and oval shape using black cardstock.  


I rubbed a little White Pigment Ink on to the black label and then buffed off the excess ink with a paper towel.  Doing this gives the black paper a chalkboard look.  I used the Nuvo 203N Nuvo Glue Pen Medium to adhere the sentiment to the label shape.  Then I used a couple of pieces of craft foam as backing for the label and decorative oval shape.  I used the Nuvo 650N Crystal Drops Gloss - Ebony Black to embellish around the edges of the card.  The crystal drops look similar to pearls or enamel dots.


To finish off the card I added a few Wild Orchid Craft Flowers.


It's Your Big Day Card
Tonic Studios:
1099E It's Your Big Day Indulgence Chalkboard Die & Stamp Set, 485E Mixed Oval Layering, Nuvo 650N Crystal Drops Gloss - Ebony Black, Nuvo 203N Nuvo Glue Pen Medium, 422E Funky Tape Runner
Other Supplies:
Paper:  Cardstock - White, White Pearl Shimmer, Black
Ink:  White Pigment Ink
Accessories:  Craft Foam, Wild Orchid Craft Flowers


Here is a look at the second card I designed.  For this card I used 1098E Special Occasion Indulgence Chalkboard Die & Stamp Set and 484E Mixed Rectangles Layering Die Set.  To start I stamped the sentiments twice on to white paper with VersaMark Ink and then heat embossed with Ranger Super Fine Detail Gold Embossing Powder.  


I fussy cut one set of the sentiments--the top and bottom pieces of the sentiment.  Then I layered the pieces using Foam Squares.  To add a bit of color I used Zig Clean Color Real Brush Pens to do a light watercolor wash and color the tiny images--heart, flower and butterfly.  I layered the label shape on to the decorative vine label.  I also used the Zig Clean Color Real Brush Pens on the tiny vines.  To embellish the card I added pink and aqua rhinestones.


I used the 484E Mixed Rectangles Layering Die Set to die cut a couple of layers of white, and aqua cardstock and then layered everything on to an A2 top folding card.

This week Create & Craft USA will be featuring Tonic Studios Chalkboard Die & Stamp Sets so be sure to check it out!

Thanks so much for stopping by today!

Hugs & Smiles,
Heidi


Special Occasion Card
Tonic Studios:
1098E Special Occasion Indulgence Chalkboard Die & Stamp Set, 484E Mixed Rectangles Layering Die Set, 422E Funky Tape Runner
Other Supplies:
Paper:  Cardstock - White, Green, Aqua, Pink
Ink/Markers:  VersaMark Ink, Zig Clean Color Real Brush Pens - Light Pink, Cobalt Blue, Persian Blue, Pale Green, Light Green
Accessories:  Ranger Super Fine Detail Gold Embossing Powder, Pink and Aqua Rhinestones, Craft Foam, Foam Squares, Watercolor Brush, Heat Tool


LinkWithin

Related Posts Plugin for WordPress, Blogger...