Friday, April 30, 2010

Heartfelt Creations - Celebrate Card

Hello! Today I have another sample card using Heartfelt Creations images. I used the Bold Celebrate 1381C and a star image from the Patriotic Phrases HCPC1791 stamp set from Heartfelt Creations to design this card.
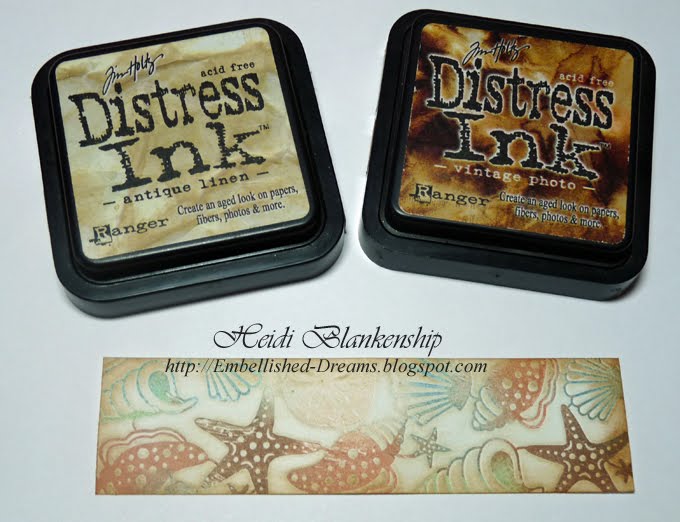
I started by randomly stamping the image of the star onto white cardstock using three colors of Distress Ink, Spiced Marmalade, Peeled Paint, Broken China.Next I applied Iridescent Gold Glimmer Mist from Tattered Angels onto the cardstock. Since the Distress Ink is a dye base ink and can bleed and run once it is wet I misted the paper with the Glimmer Mist and then right away I placed a Kleenex on top of the paper and went over it with the brayer. Doing this will pick up the excess and leave a nice overall glimmer to the paper. The ink did bleed a tiny bit but just enough to give the stars kind of a glowing look.I stamped the word Celebrate onto white cardstock using Peeled Paint and Broken China inks. Then I used the Long Classic Rectangle Large S4-142 die template from Spellbinders™ to make a diecut.Next I created some star diecuts and a scalloped rectangle using the Wizard™ and Stars Five S4-092 and Long Classic Scalloped Rectangles Large S4-143 die templates from Spellbinders™. I used Core'dinations paper from the Roy G. Biv Collection and then I sanded all of the diecuts.Once I had all of the pieces cut/embossed I assembled the card as shown in the picture. I used E-Z Runner® (31') to assemble the card and 3D Foam Squares to add some dimension. Both products are from SCRAPBOOK ADHESIVES By 3L™.Here is a close-up.I also added a few rhinestones in the corners. This would make a great BDay card for a boy/man or also an any occasion card for whatever you might be celebrating.

Supplies~
Stamps~Heartfelt Creations-Bold Celebrate 1381C, Patriotic Phrases HCPC1791
Paper~Core'dinations-Roy G. Biv Collection Orange, Blue; Georgia Pacific-White
Ink~Ranger-Distress Ink Spiced Marmalade, Peeled Paint, Broken China
Other~Spellbinders™-Wizard™, Long Classic Rectangle Large S4-142, Long Classic Scalloped Rectangles Large S4-143, Stars Five S4-092; Tattered Angels-Iridescent Gold Glimmer Mist; Joann's-Blue Rhinestones, SCRAPBOOK ADHESIVES By 3L™-E-Z Runner® (31'), 3D Foam Squares; My Stash-Sanding Block, Kleenex, Brayer

Thank you so much for stopping by today and I hope you have a Fantastic Friday!!

Hugs & Smiles,
Heidi

Wednesday, April 28, 2010

JustRite Stampers - What's New Pink Tulip Card

Hello! Today I have a quick, simple and pretty Spring card to share with you. But before I get started I just wanted to let you know the Welcome Spring 20% Off Selected Items Sale at JustRite Stampers will be coming to a close very soon! But you still have a couple of days to take advantage of the sale--the sale ends April 30th!Here is the card I created using one of the stamp sets from the Welcome Spring 20% Off Selected Items Sale at JustRite Stampers. The stamp set is called Tiny Words Centers & Borders Set, it includes 10 Centers and 10 Interchangeable Borders and it fits the 1-3/16'' Wood Stamper.To start I stamped the sentiment onto white cardstock and cut/embossed the circle using Standard Circles Large S4-114 Die #2 die template from Spellbinders™. Before removing the cardstock I used the die template as a stencil and inked through with pink ink. Then I cut/embossed a scalloped circles for the mat using Big Scalloped Circles Small S4-250 Die # 3 die template from Spellbinders™ and added 3D Foam Squares from SCRAPBOOK ADHESIVES By 3L™ and layered the two pieces together.For the next step I used the Tulips Pendant S4-209 die template from Spellbinders™ to cut/emboss a pendant diecut using Core'dinations White Wash cardstock and then I sanded it. I also used a piece of Pretty Pink cardstock from WolrdWin to cut/emboss a second pendant. Then I added a light pink ribbon to the pendant diecut and applied it to a piece of white cardstock. I used 3D Foam Squares from SCRAPBOOK ADHESIVES By 3L™ to adhere the pink tulip pieces. As you can see from the picture I used one of the small 3D Foam Squares on the larger tulip and then cut the 3D Foam Square in half for the middle size tulip and quartered it for the smallest tulip. By adding the 3D Foam Squares you can really add some dimension to your projects. I used one of the accent pieces from the Tulips Pendant S4-209 die template from Spellbinders™ to make a couple of little tulip diecuts. I inked the die template with two colors of ink for the Reverse Stencil Technique and then ran the paper and die template through the Wizard™ as usual. Once all of the pieces were cut I started to assemble the card. I used E-Z Runner® (31') from SCRAPBOOK ADHESIVES By 3L™ to adhere all of the layers together.For a finishing touch I added a few tiny pearls.

Supplies~
Stamps~JustRite Stampers-Tiny Words Centers & Borders Set, 1-3/16'' Wood Stamper
Paper~Core'dinations-White Wash Collection (White/Green); WorldWin-Pretty Pink; Georgia Pacific-White
Ink~Tsukineko-Memento Tuxedo Black; Martha Stewart-Pink Dahlia, Bamboo
Other~Spellbinders™-Wizard™, Tulips Pendant S4-209, Standard Circles Large S4-114 Die #2, Big Scalloped Circles Small S4-250 Die # 3; Joann's-Light Pink Ribbon, Pearls; SCRAPBOOK ADHESIVES By 3L™-3D Foam Squares, E-Z Runner® (31'); My Stash-Sanding Block

The sun is shinning and it has warmed up a bit today but we are supposed to have rain for the next few days. I know we need the rain but I hate it when it's cold and gloomy. It was kind of a sad day in our house, we discovered that Teddy my youngest son's hamster died. My little guy is so sad... it's hard being little and having to go through these life experiences for the first time. We had to have a little hamster funeral and say some prayers as I am sure many moms have done this with their children. But my little guy did smile when he thought about Teddy being up in heaven and running in a giant hamster wheel and having lots of treats. *wink*

Thanks so much for stopping by today! I hope you can take a little creative time for yourself--enjoy!

Hugs & Smiles,
Heidi

Tuesday, April 27, 2010

Heartfelt Creations - Wrenhaven-n-Rosses Card

Hello! I have been working on a few sample cards for Heartfelt Creations and today I have a Mother's Day card to share with you. Mother's Day will be here before we know it!I love the stamped image on this card! The image is Wrenhaven 528G and the sentiment it Mini Message Cursive Set 1189S both from Heartfelt Creations. I started by stamping the image onto Pure Luxury Pure White cardstock by Gina K. Designs with brown ink and then I started to color the image with Copic markers. I colored the roses and then the leaves with the Copic markers as shown in the picture.Next I colored the lilacs using five different colors from a pale lavender to a blue with Copic markers.These are the colors I used for the birdhouse.In this next picture I used YR24 and E15 to color the roof. For the chimney I used YR24, E15 and just a little touch of R17. For the birds I used YR21, YR24, E15 and R17. To fill in the background I used Y00 and E000.After I had the image colored I wanted to diecut it using the Labels Ten S5-022 die template from Spellbinders™. I did the Reverse Stencil technique with the die template. To do this you just simply ink the inside of the template with a chalk or pigment ink and then run the paper and die template through the Wizard™ as usual to cut/emboss.I used Chestnut Roan ink from ClearSnap to do the Reverse Stencil and here is the result, a nice crisp colored edge.Next I want to share a little tip with you that I use for some of my sentiments. Here is the sentiment Happy Mother's Day the way it originally stamps. I wanted to use this sentiment on one of the Labels Eight S5-019 die template from Spellbinders™ but it wouldn't fit.Now here is the sentiment after I made two little cuts and this way it will fit the Labels Eight S5-019 die template. If you cut in straight lines you will still be able to line up the stamp perfectly and you can see this if you look back at the first picture of this stamp. Here you can see the sentiment on the Labels Eight S5-019 die template. I also did the Reverse Stencil technique on the label and I added one of the Fancy Tags S4-235 die templates from Spellbinders™. To add some dimension I used 3D Foam Squares from SCRAPBOOK ADHESIVES™ By 3L. I also added some ribbon and buttons.
Supplies~
Stamps~Heartfelt Creations-Wrenhaven 528G, Mini Message Cursive Set 1189S
Paper~WorldWin-Pretty Pink, Light Racy Raspberry; Daisy Bucket-Shabby Green Door On The Wings of a Dream Damask; Gina K. Designs-Pure Luxury Pure White
Ink~Tsukineko-Memento Rich Cocoa; Ranger-Distress Ink Antique Linen; ClearSnap-Chestnut Roan
Other~Spellbinders™-Wizard™, Labels Ten S5-022, Labels Eight S5-019, Fancy Tags S4-235; Copic Markers-as shown in the pictures; Creative Impressions-Light Pink Ribbon; Joann's-Ivory Buttons; SCRAPBOOK ADHESIVES™ By 3L-3D Foam Squares, E-Z Runner® (33')

To see more inspiration with the Heartfelt Creations products you can visit the Heartfelt Creations Blog and Designers. I have a link list in my side bar for all of the Heartfelt Creations Designers.


Thank you for stopping by! I hope you have a Wonderful Day!

Hugs & Smiles,
Heidi

6 Day Celebration with Crafty Secrets and over $500.00 in BLOG CANDY GIVEAWAYS!!!

Good morning! This is just going to be a quick post to let you know about the week long celebration Crafty Secrets Heartwarming Vintage is having for National Scrapbooking Day!! Each member of our Design Team is taking turns hosting a $50.00 Gift Certificate Giveaway (plus free S&H) on their blogs.

This is the schedule to enter to win a Gift Certificate on the DT Ladies Blogs during this week. Be sure to enter each day on the different blogs and increase your chance to win!

Enter Mon April 26: Deborah March (winner announced Sat May 1st)
Enter Tue April 27: Pam Hooten (winner announced Sat, May 1st)
Enter Wed April 28: Michele Kovack (winner announced Sat, May 1st)
Enter Thurs April 29: Julie Campbell (winner announced Sat, May 1st)
Enter Friday April 30: Marisa Grosson (winner announced Sat, May 1st)


The rest of our Design Team will post their Giveaway Sat, May 1st and announce their draw dates. You can enter one time on each blog for 10 total chances!

Enter Sat May 1st: Vicki Chrisman
Enter Sat May 1st: Heidi Blankenship
Enter Sat May 1st: Linda Duke
(check out Linda's adorable card)
Enter Sat 1st: Melissa Phillips
Enter Sat 1st: Flo Teixeira (from France)

Thank you so much for stopping by today and Good Luck!!

I will be back a little later today to share some art with all of you! ;-)

Hugs & Smiles!
Heidi

Saturday, April 24, 2010

Heartfelt Creations - Lighthouse Shore Card

Hello! It is such a Beautiful Day!! The sun is shinning and it's warm but not hot and there is a little bit of a breeze. Today I have a lighthouse card to share with you using images from Heartfelt Creations. For the front of the card I used Lighthouse Shore 542G and Grace & Freedom 533D stamps from Heartfelt Creations. I stamped the images onto Pure Luxury Pure White cardstock from Gina K. using brown ink and then colored with Copic markers. The lighthouse image was stamped onto a 4 x 4 piece of cardstock. These are the Copic markers I used to color the Lighthouse Shore 542G image. These are the Copic markers I used to color the Grace & Freedom 533D seagull image. After I had the coloring done then I cut the image out.To create the background I used the Sea Scape Impressabilities™ I2-1016 from Spellbinders™ and Chestnut Roan, Bisque, Blush Rose, Surf Chalk Inks from ClearSnap to do a letterpress technique. To do the letterpress technique with the Impressabilities™ you simply apply ink directly to the Impressability™, add cardstock on top and run through the Wizard™ with the tan embossing mat. The pressure from the Wizard™ presses the ink into the cardstock creating the letterpress effect.Next I applied Antique Linen ink over the entire piece and then I inked the edges with Vintage Photo ink.Once all of the pieces were done I started to assemble the card. I used a chocolate brown mat for each of the seashell letterpress panels and also behind the lighthouse image and I used a piece of ivory cardstock for the background. I used Crafty Power Tape from SCRAPBOOK ADHESIVES™ By 3L to adhere my card.I also added a couple of flourish diecuts to the sides of the lighthouse image. The diecuts were made using Doodle Parts S4-121 die templates from Spellbinders™ and I also added the seagull. I used 3D Foam Squares from SCRAPBOOK ADHESIVES™ By 3L on the flourishes and seagull to add a little dimension.Here is a close-up of the seagull.Here is the inside of the card with the sentiment, God of the Seagull 1210D and I stamped the image of the seagull, Grace & Freedom 533D with a lighter brown ink in the background.You can also visit Heartfelt Creation Blog and Website to see more beautiful card and scrapbook page designs.

Supplies~

Stamps~Heartfelt Creations-
Lighthouse Shore 542G, Grace & Freedom 533D, God of the Seagull 1210D
Paper~Gina K.-Pure Luxury Pure White; The Paper Company-Brown, Ivory; Core'dinations-the Chocolate Box (Brown/Green)
Ink~Tsukineko-Memento Rich Cocoa, Versa Magic Aloe Vera; ClearSnap-Chestnut Roan, Bisque, Blush Rose, Surf; Ranger-Distress Ink Vintage Photo, Antique Linen
Other~Spellbinders-Wizard™, Doodle Parts S4-121, Sea Scape Impressabilities™ I2-1016; Copic Markers-as shown in the pictures; SCRAPBOOK ADHESIVES By 3L-Crafty Power Tape 81', 3D Foam Squares

Thank you for stopping by today and I hope you have a Wonderful weekend!!

Hugs & Smiles!
Heidi

Thursday, April 22, 2010

Crafty Secrets - Happy Birthday Card - National Scrapbook Day

Today I have a quick birthday card to share with you. This past weekend we celebrated with a surprised birthday party for one of my aunts, she just turned 50. It was a lot of fun to see and get together with our family. Here is one of the cards that I made for her. The base of the card is from Core'dinations Black Magic Hocus Pocus paper pad and I lightly sanded the edges. For the mat I used a piece of designer paper from DCWV 8 x 8 The Sweet Stack with Glitter.I love this image of these ladies celebrating a birthday! The images is from Crafty Secrets Girlfriends Images & Journal Note. The sentiment is a quote from Lucille Ball--The secret of staying young is to live honestly, eat slowly and lie about your age. The image has a pink mat behind it and then I also added a couple of flourishes with rhinestones. The flourishes were made using the Floral Accent S4-199 die templates from Spellbinders™.I stamped the Happy Birthday sentiment from the Cupcake Party Stamp Set from Crafty Secrets on a tag. To create the tag I used the Fancy Tags S4-235 die template from Spellbinders™ and then I cut/embossed a second tag in black and layered the two tags. I also added a few rhinestones in the corners and on the tag and used 3D Foam Squares from SCRAPBOOK ADHESIVES™ by 3L to add some dimension to the image and tag.

Supplies~
Stamps~Crafty Secrets-Cupcake Party
Paper~The Paper Company-White, Black; Core'dinations-Black Magic Hocus Pocus ; DCWV-8 x 8 The Sweet Stack with Glitter
Ink~Tsukineko-Memento Tuxedo Black
Other~Crafty Secrets-Girlfriends Images & Journal Note; Spellbinders™-Wizard™, Fancy Tags S4-235 , Floral Accents S4-199; My Mind's Eye-Black Lush Rhinestones; SCRAPBOOK ADHESIVES™ by 3L-3D Foam Squares

I also wanted to let you know that next week Crafty Secrets is having a week long celebration April 26th - May 1st for National Scrapbook Day!! There will be many samples that the Crafty Secrets Design Team will be sharing for loads of inspiration, some really Fantastic Prize Giveaways and a Design Team Challenge!! I hope you will join in the Fun!!!

Thank you so much for stopping by today and I hope you are having a wonderful week!!

Hugs & Smiles,
Heidi

Tuesday, April 20, 2010

JustRite April Release Blog Hop

Good morning! Today is the April Release Blog Hop for JustRite! There are Five NEW Stamp Sets from JustRite and I can't wait to see what the ladies on the JustRite Blog Team have been busy creating with all of these fabulous new stamps!!

I also wanted to let you know that now you can Pre-Order your JustRite Stamps on the JustRite Stampers Website! Here are the details about the Pre-Ordering.
New JustRite Easy Pre-Ordering – JustRite bills pre-orders when it ships!

· If any of your items are not in stock we will create a backorder. We will only bill you for items as they ship.

· We will bill you your entire shipping charge on your first order and we will pay all the additional shipping charges on any backorders.

· If you would like your order held until it can ship complete, Please write “Ship Complete” in order Special Instructions.

· PayPal orders require immediate billing (This is a Pay Pal Business Policy, not a JustRite Policy).


Here is a link list for all of the JustRite Designers in the Blog Hop. I hope you can take a little time to visit each of the blogs and leave a little love (comment) for each of the designers. We always appreciate and love your comments!

For today's project I created a scrapbook layout using the NEW Let's Celebrate stamp set from JustRite. I created a fun and bright colored page to remember our day spent at the circus. This stamp set is so adorable and perfect for the little people in our lives. This set can be used for several occasions, a birthday invitations, party favors, a trip to the zoo, the circus and to make some really fun cards to let kids know they are doing a great job--these are just a few ideas! The set includes 4 Centers and 4 Interchangeable Borders and fits the 2'' Square Stamper. The images in this set are so cut and fun to color.To start creating the layout I stamped the image of the elephant with the border and colored with Copics. Then I used the Classic Squares Large S4-126 and Classic Squares Small S4-128 die templates from Spellbinders™ to cut/emboss the square for the image and also to create the mats. For the title on the page I used the Curlz Uppercase Font 95pt and Times New Roman Lowercase Font 95pt from JustRite. I stamped the title in black, cut/embossed the circle using Standard Circles Large S4-114 die template from Spellbinders™ and then airbrushed with Copic
markers. I also stamped, colored with Copics and cut out one of the elephants to add to the title.To create the date I used the numbers from the Curlz Uppercase Font Set 50pt.Here is a close-up of another little elephant. They are so cute and work perfectly with the circus pictures.To add the names I used the Curlz Uppercase Font 50pt and Times New Roman Lowercase Font 50pt. I wanted the layout to be fun and brightly colored so I added all of the star diecuts in bright colors using the Stars Five Die S4-092 from Spellbinders™ and for all of the circles I stamped, cut/embossed the diecuts and then airbrushed with Copic markers.

Supplies~
Stamps~JustRite-Let's Celebrate, Times New Roman Lowercase Font Set 95pt, 50pt, Culrz Uppercase Font Set 95pt, 50pt, 2'' Square Stamper, 2-3/8'' x 5-1/2'' Rectangular Stamper
Paper~Fancy Pants-Summer Soiree Glimmer; The Paper Company-Red, Orange, Yellow, Blue, White
Ink~Tsukineko-Memento Tuxedo Black Ink
Other~Spellbinders™-Wizard™, Classic Squares Large S4-126 Die #4, #5, #6, Classic Squares Small S4-128 Die #5, #6, #7, Standard Circles Large S4-114 Die #2, #3, #6, Stars Five S4-092 #1, #2, #3, #4, #5; Copic-Airbrush System, Markers-R29, R81, YR04, Y11, Y15, Y19, Y38, Go3, G28, B39, B66, E000, C1, T5

Thank you so much for stopping by today and I hope you enjoy the JustRite April Release Blog Hop!!

Hugs & Smiles,
Heidi

LinkWithin

Related Posts Plugin for WordPress, Blogger...