Sunday, June 30, 2013

Special Day Wedding Card

Hello everyone!  I have a card and a quick post to share with you tonight.  


This is another one of the wedding cards that I made but this sentiment could also be used for a birthday or anniversary too.  To create the background I used E3D-003 Delightful Daisies M-bossabilities™ folder, Delicata Golden Glitz ink and a brayer.  Using the brayer apply the ink to the folder, put paper inside folder and emboss.  Then I very lightly added some Espresso Truffle ink to the flowers and butterfly.


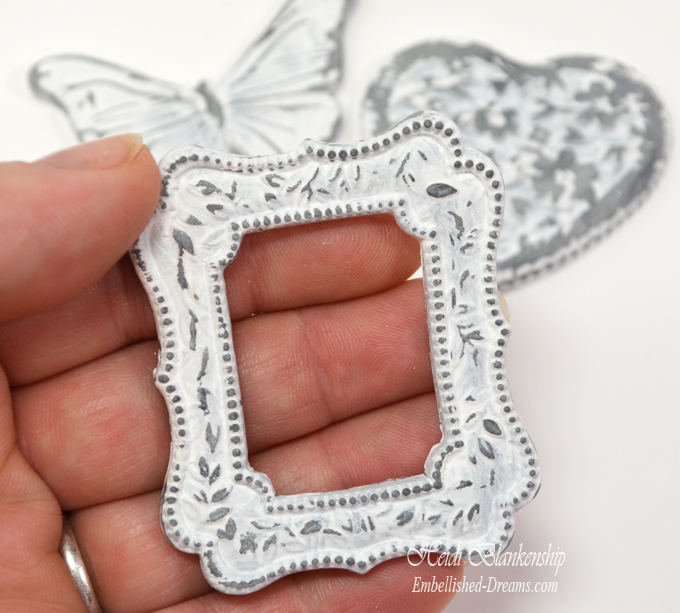
I added metal filigree flowers and a butterfly from ButterBeeScraps to the flower centers and on top of the embossed butterfly.  


Using Simply Smooth Ivory paper I cut/embossed the label shape using S5-025 Labels Seventeen die template.  Then I stamped the sentiment from the CR-04580 Birthday Vintage Lables Four stamp set.  I also added some pearls and Double-faced Satin Ivory Ribbon for embellishments.


I hope you all had a wonderful weekend!!

Thanks so much for stopping by today!
Hugs & Smiles,
Heidi


Supplies
Stamps:  JustRite Papercraft® CR-04580 Birthday Vintage Lables Four
Paper:  DiscountCardstock.com Simply Smooth Ivory, Pearl Metallic
Ink:  Imagine Crafts/Tsukineko Memento Tuxedo Black, Espresso Truffle, Delicata Golden Glitz
Dies/Folders:  Spellbinders Paper Arts® Grand Calibur® Machine, S6-001 5x7 Matting Basics A, E3D-003 Delightful Daisies M-bossabilities™, S5-025 Labels Seventeen
Accessories:  Really Reasonable Ribbon Double-faced Satin Ivory Ribbon; Scrapbook Adhesives by 3L® 3D Foam Squares, E-Z Runner® Permanent Strips-Refillable Dispenser-49'; ButterBeeScraps Metal Filigree Flowers, Buttefly; Recollection Pearls, Brayer

Saturday, June 29, 2013

JustRite Papercraft New Release Holiday Magic

Hello everyone!  Today, some of the JustRite Papercraft Design Team Members are sharing one of the New Release Stamp Sets from Samantha Walker for  JustRite Papercraft®.


Here is the SW-04610 Holiday Magic stamp set from JustRite Papercraft®.  This is a really fun Christmas set with great images and wonderful sentiments.


Here is the card that I designed.  I stamped the image of the star with Versa Magic Aloe Vera ink.  Then I stamped the Believe sentiment using School House Mix'd Media ink.  I added clear embossing powder and embossed the image using a heat tool.  Then I used the S4-388 Stately Circles die template to cut/emboss the decorative circle shape.


Here is a close up of the stamped image and sentiment.


To create the matting and the shaped card I used Really Red and Herbal Garden papers from 
DiscountCardstock.com and S4-389 Adorning Squares and LF-018 Grand Decorative Labels One die templates from Spellbinders Paper Arts®.  For a little bit of sparkle I added some clear and red bling.

Please be sure to visit each of the JustRite Papercraft Design Team Members in the link list below to see what they have created to share with you.


Thank you so much for stopping by today!

Hugs & Smiles,
Heidi

Supplies
Stamps:  JustRite Papercraft® SW-04610 Holiday Magic
Paper:  DiscountCardstock.com Simply Smooth White, Really Red, Herbal Garden
Ink:  Imagine Crafts/Tsukineko Versa Magic Aloe Vera; Donna Salazar Mix'd Media Inx School House
Dies:  Spellbinders Paper Arts® Grand Calibur® Machine, S4-389 Adorning Squares, S4-388 Stately Circles, LF-018 Grand Decorative Labels One
Accessories:   Scrapbook Adhesives By 3L® 3D Foam SquaresE-Z Runner® Permanant Strips-Refillable Dispenser-49'; Bling, Clear Embossing Powder, Heat Tool

Friday, June 28, 2013

JustRite and Samantha Walker Blog Hop Day Two

Hello everyone!  Today, is day two of the JustRite and Samantha Walker Blog Hop.  Design Team Members from both teams are playing along in the hop and we will be showcasing Samantha Walker's JustRite line of stamps.


Here is the card that I designed using Samantha Walker's SW-04105 O Holy Night  stamp set from JustRite Papercraft®.


Here is the SW-04105 O Holy Night stamp set.


I used Vista Metallic paper and S5-178 Arched Windows One to die cut the window shape.  Then I used silver metallic ink and silver embossing power to stamp and heat emboss the images from the SW-04105 O Holy Night stamp set from JustRite Papercraft®.  I layered the arched window on to the sky metallic paper and I used S6-004 5x7 Detailed Scallops to create that die cut.  I also die cut a few flourishes from  Samantha Walker S5-145 French Frills die templates and added them along the side.  I used 3D Foam Squares from Scrapbook Adhesives By 3L® for some added dimension. 


At the top of the card I created a little flourish cluster and added Kaisercraft Denim Pearls.


At the bottom of the card I added a Silver Metal Filigree Piece from ButterBeeScraps and a Mod Melts Fleur De Lis from Mod Podge® and I added a pearl to the center.


Love what you see?  You're in luck!  Samantha's JustRite Stamp Sets and Die Sets 
will be on sale for 25% off today through 6/30!
Just click HERE to get yours!
Of course we know you want to know more about the prize!


Just enter through the Rafflecopter widget for your chance to win!


Please be sure to follow along the blog hop and visit each of the Design Team Members.  You will have a chance to win some fantastic prizes and be inspired by fabulous projects!


Thanks so much for stopping by today!
Hugs & Smiles,
Heidi

Supplies
Stamps:  JustRite Papercraft® SW-04105 O Holy Night
Paper:  DiscountCardstock.com Simply Smooth White, Sky Metallic, Vista Metallic
Ink:  Metallic Silver
Dies:  Spellbinders Paper Arts® Grand Calibur® Machine, S6-001 5x7 Matting Basics A, S6-004 5x7 Detailed Scallops, S5-178 Arched Windows One, Samantha Walker S5-145 French Frills
Accessories:  Really Reasonable Ribbon Kaisercraft Denim Pearls; Mod Podge® Mod Melts; ButterBeeScraps Silver Metal Filigree Piece; Scrapbook Adhesives By 3L® 3D Foam Squares, E-Z Runner® Permanant Strips-Refillable Dispenser-49'; Rhinestone, Silver Embossing Powder, Heat Tool

Thursday, June 27, 2013

Happily Ever After Wedding Card

Hello everyone!  I know it has been a few days since my last post but my little fingers have been busy creating projects for CHA!  Nothing I can share with you just yet but I will say I am loving a lot of new products! ;-)  Today, I have a wedding card to share with you.  Over the next few days you will be seeing a couple more wedding cards--it's that time of the year.  


Here is the card that I designed.  I used Simply Smooth Ivory and  Mountain Rose Metallic papers from  DiscountCardstock.com.  I used E3D-006 Framed Labels Eighteen 3D M-bossabilities™ folder to create the beautiful crisp emboss on the Mountain Rose Metallic paper.


Next I did the direct ink technique and lightly rubbed the Brilliance Platinum Planet ink from Imagine Crafts/Tsukineko over all the embossed area.  I absolutely love how this turned out!  So beautiful and soft looking.


Next I used Simply Smooth Ivory paper and Momento Tuxedo Black ink to stamp the sentiment from the CR-03825 Ever After Antique Labels One stamp set from JustRite Papercraft®.  I also stamped the little flourish heart shaped accents in the corners.  I used 3D Foam Squares from Scrapbook Adhesives by 3L® for a little added dimension.  Then I added some Cream Seam Binding and Kaisercraft Plum Pearls from Really Reasonable Ribbon.  The beautiful Ivory Venise Lace Trim and Ivory Roses are from Simply Paveena.  I also brushed a little Pssst! Sheer Shimmer Spritz Sparkle on to the label and the roses.  Just a little tip--If you only have a little bit of the shimmer spritz in the bottle dip a paint brush into the bottle to pick up the shimmer spritz and brush it on to your flowers.  They will be SO shimmery!


Here is a close up of the rose so you can see all of the shimmer.  I love how the roses sparkle!


Just in case you missed it today over on the JustRite Inspiration Blog the JustRite Design Team Members  are teamed up with Samantha Walker's Design Team Members and they are having a Blog Hop!  Today (6/27) is day one.  I am in the Blog Hop for the second day which is tomorrow (6/28).  Hop on over the the JustRite Inspiration Blog so you can check it out!  Plus you have a chance to wins some Fabulous Prizes!!

Thank you so much for stopping by today!
I hope you are having a wonderful week!!

Hugs & Smiles,
Heidi

Supplies
Stamps:  JustRite Papercraft® CR-03825 Ever After Antique Labels One
Paper:  DiscountCardstock.com Simply Smooth Ivory, Mountain Rose Metallic
Ink:  Imagine Crafts/Tsukineko Brilliance Platinum Planet, Momento Tuxedo Black, Pssst! Sheer Shimmer Spritz Sparkle
Dies/Folders:  Spellbinders Paper Arts® Grand Calibur® Machine, S6-001 5x7 Matting Basics A, E3D-006 Framed Labels Eighteen, S4-310 Labels Eighteen
Accessories:  Really Reasonable Ribbon Cream Seam Binding, Kaisercraft Plum Pearls; Simply Paveena Ivory Venise Lace Trim, Ivory Roses; Scrapbook Adhesives by 3L® 3D Foam Squares, E-Z Runner® Permanent Strips-Refillable Dispenser-49'

Saturday, June 22, 2013

Light Blue and Turquoise Affinity Band Bracelet with Pearls and Shells

Hello everyone!  Today, is my day to post over on the Positively Me Blog for Julianna Hudgins Design Team.  I have a beautiful light blue and turquoise affinity band bracelet with pearls and shells to share with you.  I used Julianna's  Jewel Loom™ from Beadalon®  and beads from Blue Moon Beads® to create this bracelet.


I just love how this bracelet turned out!  I think it is perfect for summer with the light blue and turquoise colors and the pearls and shells.  It reminds me of the ocean.


To see more pictures and find out all of the detail please click HERE to hop on over to the 
Positively Me Blog.

Thank you so much for stopping by today!  If you have any projects using the Jewel Loom™ please share a link or post them on Facebook--I know Julianna would love to see what you are creating!!

Hugs & Smiles,

Heidi

  Supplies
  Beadalon® Jewel Loom™,  White Nymo® Nylon ThreadHard Beading Needles #10,
  Artistic Wire® 18 mm Silver Mesh Clasp
  Blue Moon Beads® Light Blue Seed Beads 6/0, Turquoise Opaque Seed Beads 10/0, Natural Elegance Pearls and Shells Bead Mix

Friday, June 21, 2013

Faber-Castell Design•Memory•Craft Guest Designer Post--Tinted Gesso for a Perfect Color Match and Adding Texture

Hello blogging friends!  Today, I have another Guest Designer post over on the 


Here is the card that I designed.  I hope you will hop on over to the 
Faber-Castell Design•Memory•Craft Blog and check out the full step-by-step tutorial on how to tint gesso for a perfect color match and adding texture and leave me a little love--click HERE to visit the blog.  ♥

Thanks so much for stopping by today!

Hugs & Smiles,
Heidi


Thursday, June 20, 2013

Blue Cameo Necklace and Matching Earrings

Hello everyone!  It's another beautiful day in MN and I have lots of flowers to plant so this is going to be a quick post.  I know it seems so late to be planting flowers but the weather has not been the best for the past few weeks.  We have had so much rain that it was almost impossible to plant anything.  As soon as it started to dry up we got our veggie garden planted so now we have to get the flowers in.  

For today's project I have a beautiful blue cameo necklace and matching earrings to share with you.


For the chain part of the necklace I used a mix of pearl rosary chain, black filigree pieces and silver link chain.  I like to mix and match the different metals when I make jewelry.


For the beady dangles on the necklace I used a combination of deep dark blue to match the cameo, black, silver and pearl.  


For the earrings I used the black filigree pieces and made little beady dangles with pearls, dark blue and silver beads with a silver bead cap.


All of the supplies to create the necklace and earrings are from Cousin®.

I love the color combination and the romantic look of the cameo and filigree pieces.

Thanks so much for stopping by today!

Hugs & Smiles,
Heidi


Wednesday, June 19, 2013

Martha Stewart Silicone Molds - Faux Shabby Metal Embellishments

Hello blogging friends!  Just a quick post today--but I have some fun embellishments so share with you!  You know I love all things shabby and I also love being able to create my own embellishments.


I made some clay embellishments a while back using some Martha Stewart silicone molds, silver clay and gesso.  Follow the baking instructions on the packaging.  I wanted the embellishments to look like faux shabby metal pieces with the paint chipping off.  


Here is what the pieces looked like after they were baked. To get the look of the faux shabby metal pieces I applied 2-3 coats of gesso and then I lightly sanded each piece.


This is one of the frames.


The floral heart.


A butterfly.


A small flower.


I absolutely love how these turned out!!

Quick and easy--beautiful and shabby!!

I hope this inspires you to create some fun embellishments.
Thanks so much for stopping by today!

Hugs & Smiles,
Heidi

Sunday, June 16, 2013

Guest Designer Post for Faber-Castell Design•Memory•Craft

Hello everyone!  Happy Father's Day!  
I want to say a special Happy Father's Day to my Dad, my Husband, my Grandpa and my Uncles---they are all wonderful men and and great Dad's and I am so very lucky to have them in my life!!  Love you all!!

Today is my Guest Designer post day over on the Faber-Castell Design•Memory•Craft Blog.  I am also the Featured Designer and they have a short Q & A if you would like to get to know a little more about me.  


Here is the Father's Day card that I designed for my husband and I also have a full step-by-step tutorial on the Faber-Castell Design•Memory•Craft Blog.  So if you would like to find out how I created the background on the card, all of the details/supplies and to see more photos you can click HERE to hop on over to the Faber-Castell Design•Memory•Craft Blog and I hope you will leave me a little love. ;-)

Thanks so much for stopping by today!

I hope you have a Beautiful Day!!

Hugs & Smiles,
Heidi

Thursday, June 13, 2013

Really Reasonable Ribbon June Blog Hop


Hello blogging friends!  Today, is the Really Reasonable Ribbon Blog Hop for the month of June.  The RRR Design Team Members and Special Events Design Team Members will be showcasing the Monthly Ribbon Club.


This month there is a fabulous assortment of blue, yellow, green and pink ribbons included in the June Ribbon Club.   This ribbon assortment is prefect for all of your fun summer projects!  Click HERE for more details on how you can sign up for the Monthly Ribbon Club.

If you are following the order of the blog hop you should have just come from Judy's Blog. If not and you just happened to pop in for a visit please click HERE to start the blog hop at the Really Reasonable Ribbon's Ramblings! Blog.


Here is the card that I designed using the Really Reasonable Ribbon June Ribbon Club.  I used the light blue satin ribbon with metallic silver edges and white crochet lace trim to create a shabby double loop ribbon flower and I have a tutorial to share with you on how to make the flower.


To start I cut a total of 14--2 inch long strips of ribbon.  Then I folded them in half to create a loop and added a dab of hot glue to hold in place.  Then I made two cuts in each piece of ribbon creating three loops.


I cut out a circle from cardstock to use as my base.  Then I started adding the ribbons.  As I added the ribbons I off set them to give the flower a fuller look.


Continue to add the ribbons until you have all 14 ribbon loops glued on.


Next I added some of the white crochet lace trim.  For the center I used a ribbon buckle and a light blue large flat back pearl.  Once the flower was done then I just fluffed it up with my fingers.  Doing this loosens up the fibers in the ribbon and gives it a shabby look.  I know a lot of ladies that make handmade flowers also like to use the eyelash trim and when the flowers are made this way the fibers almost give the appearance of the eyelash trim.  


For the embossed background I used S6-001 5 x 7 Matting Basics A die template and E3D-006 Framed Labels Eighteen and the Grand Calibur® Machine from Spellbinders Creative Arts®.  Then to assemble the card I used 3D Foam Squares and E-Z Runner® Permanent Strips - Refillable Dispenser - 49' from Scrapbook Adhesives by 3L®.  The cardstock is Sweet Tooth and Sky Metallic from DiscountCardstock.com.


I added some of the white crochet lace trim along the border at the bottom of the card.  Then I added  Lt Pink Roses, leaves and pearls and I brushed Diamond Stickles on to the roses for a little sparkle.


I used CR-04350 Special Gifts Label Twenty-Nine stamp set from  JustRite Papercraft for the sentiment.


I hope you enjoyed this tutorial on how to create the shabby double loop ribbon flower!

Enjoy the RRR Blog Hop--I know you will find all kinds of inspiration!


Now to continue in the Blog Hop you need to hop on over to Jenn's Blog and check out her fantastic project!

Thank you so much for stopping by today and I hope you enjoy the Really Reasonable Blog Hop!! Don't forget to visit the RRR Store and check out all of the beautiful ribbons, lace and trims!
I hope you have a wonderful and creative day!

Hugs & Smiles,
Heidi

Supplies
Paper:  DiscountCardstock.com Sweet Tooth, Sky Metallic
Accessories:  Scrapbook Adhesives by 3L®  3D Foam Squares, E-Z Runner® Permanent Strips - Refillable Dispenser - 49';  Recollections Pearls; Lt Pink Roses; Lt Blue Lg Flat Back Pearl, Ribbon Buckle, Leaves; Ranger Diamond Stickles


LinkWithin

Related Posts Plugin for WordPress, Blogger...