Sunday, February 12, 2012

Quick and Easy Vintage Valentine and a Crafty Valentine Project to do with Your Kids

Hello blogging friends! Today, I have a couple of fun and quick Valentines to share with you and also something crafty and fun that you can do with your kids.


These are two of the Valentine projects I designed using Vintage Valentine Download E-Kit from Crafty Secrets. This kit is full of sweet little vintage Valentine's for kids and adults, tags, images and background paper. I used two of the tags from the Valentine tag and coupon sheet in the kit. I don't have a 12 x 12 printer so here is a little tip you can use for printing the coupon sheet. Open up the image in your photo shop program and crop the image down the middle, save one half and then crop it again and save the other half. You will end up with two images each having four tags and two coupons and then set you printer so the images fit the page 8-1/2 x 11 and print. Hope this helps! ;-)

For the candy bag I used one of the tags from Vintage Valentine Download E-Kit from Crafty Secrets and I used the Distrezz-it-All from Zutter to distress the edges. Then I used Scrap Happy Sheer Glue and applied it to the roses on image and added Diamond Clear Glitter from The Rubber Cafe.


Here is a close up of the pretty sparkling roses.


This is the mini bag of chocolate candy that is behind the tag--yummy!


I created this sweet little rose using the S5-086 Bitty Blossoms and S5-105 Floral Tags die sets from Spellbinders. The S5-086 Bitty Blossoms is one of Donna Salazar's New Die Releases and I think it's going to be a favorite!! Donna just recently posted some new videos and in one of them she showed using the Distrezz-it-All to distress the die cuts from the S5-086 Bitty Blossoms and make these pretty little shabby roses. Click HERE to see the video. Once I rolled and glued the flower then I added ink the the rose and leaves and also added more glitter.


For the top I made a tag using S5-105 Floral Tags and S5-084 Girlie Grunge Labels. I added color using a Dark Pink and Dark Green ink from Clearsnap and Old Paper and Spun Sugar Distress Inks from Ranger. I also distressed the tag and added some glitter.


The tag was SO quick and easy!! The image is also from the Vintage Valentine Download E-Kit. Print, cut, punch holes and use Pink Seam Binding from Really Reasonable Ribbon to secure the heart shaped sucker and tie in a bow.


This is a fun project you can make with your kids. We made these heart shaped crayons today and our youngest son is going to give them with his Valentine's. All you need is crayons old or new (we used new ones), a silicone muffin mold and an oven. Peel the paper off of the crayons (*hint--have the adult take a knife and slice down the middle of the crayon just enough to cut the paper and it will peel off a lot easier). Next break up the crayons (3-4 pieces) and place a mixture of colors in each heart shape. We picked 7 crayons for each shape and then after breaking them up added the pieces. You will want to place the lighter colors in first so they will show up in the front and try to stay away from gray, brown and black colors because you could end up with a muddy looking crayon. Make sure you have the silicone mold on a cookie sheet and bake at 250 degrees for 10 minutes, remove from oven and let cool--about 45 minutes and then pop the crayons out of the mold.

Thank you so much for stopping by today! I hope you have a wonderful day!!

Hugs & Smiles,
Heidi


Supplies
Crafty Secrets: Vintage Valentine Download E-Kit
Paper: Discount Cardstock Simply Smooth Ivory, Frosted Pink Prismatic, Herbal Garden Medium Prismatic
Ink: Clearsnap Dark Pink, Dark Green; Ranger Old Paper, Spun Sugar Distress Inks
Dies: Spellbinders Grand Calibur S5-086 Bitty Blossoms, S5-084 Girlie Grunge Labels, S5-105 Floral Tags
Accessories: Really Reasonable Ribbon Pink Seam Binding; The Rubber Cafe Scrap Happy Sheer Glue, Diamond Clear Glitter; Scrapbook Adhesives By 3L 3D Foam Squares; Zutter Distrezz-it-All; Mini Bag of Chocolates & Heart Suckers

Thursday, February 9, 2012

Vintage Street Market Valentine Challenge Day Five!

Hello everyone today is Day Five of the VSM Valentine Challenge!

I made a couple of fun Valentine projects to share with you. Our challenge was to use a goodie bag with an assortment of vintage Valentine pieces, Family Fun, and Craft Pantry Staples~ Tinted Tape, Bingo Craft Cards, and Red & Pink Twirly Twine.

I used one of the Bingo Craft Cards to make a Valentine's card and it can also double as a mini wall hanging for a fun home decor` piece. I also used the brother and sister from Family Fun. I twisted the Red & Pink Twirly Twine to make the hanger and then I used the vintage pink crepe paper to make little rolled roses and added a ruffle to the bottom of the Bingo Craft Card.

For my second project I decorated the top of a heart shaped box of chocolates for Valentine's Day. It just wouldn't be Valentine's Day without a little chocolate! ;-) I used the red heart shaped doily, pink ribbon, pearls, vintage sticker, paper rose, rhinestone and pink crepe paper from the fun little bag of vintage Valentine goodies. I added some glitter to the doily and the edge of the ruffle for a little sparkle.

Thank you so much for stopping by today! I hope you enjoyed all of the projects the DT Members created for the VSM Valentine Challenge and were inspired to create some fun Valentine's for a special someone in your life! Please hop on over to the Vintage Street Market Blog to find out all of the details and see more picture of my projects.

Hugs & Smiles,

Heidi


Supplies
Vintage Street Market: Goodie bag with an assortment of Vintage Valentine pieces, Family Fun, and Craft Pantry Staples~ Bingo Craft Cards, and Red & Pink Twirly Twine.
Accessories: The Rubber Cafe` Scrap Happy Sheer Glue, Diamond Clear Glitter; Scrapbook Adhesives by 3L 3D Foam Squares


New Release Stamp Set from JustRite Stampers - Cast All Your Cares Card

Good morning blogging friends! Well, I am a day late with this post--lol. I thought I would be able to get in done yesterday but I had some other projects that I had to finish up first. I have a card to share with you today using one of the New Releases from JustRite Stampers.


To create this card I used CR-03630 Cast All Your Cares stamp set from JustRite Stampers.

The CR-03630 Cast All Your Cares stamp set is a clear stamp set that includes seven stamps--four sentiments, a frame, a border and a floral stamp. The stamp set coordinates with S4-301 Labels Sixteen, E8-002 Classic Bracket Edgeabilities and E8-008 Classic Edges Two die templates from Spellbinders.


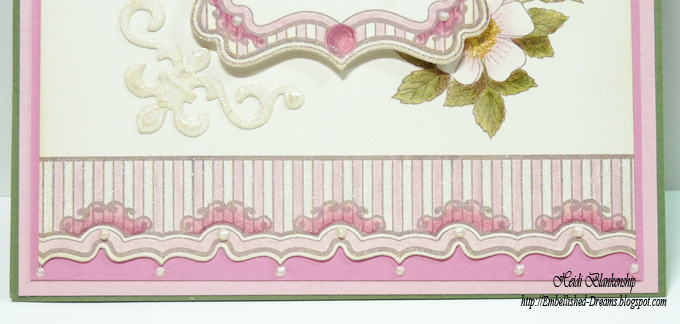
Here is a close up of the center image of the card. I stamped the floral image in the center of the label with Antique Linen. It's very light in the pictures but it is visible IRL. Then I colored the frame and the floral images using Prismacolor Colored Pencils. I used S4-301 Labels Sixteen for the frames sentiment and S5-042 Fleur de Lis Accents as accent pieces around the frame.


Here is another close up picture. I added used Scrap Happy Sheer Glue and Diamond Clear Glitter for a little sparkle. Then I added cream pearl dots using a Cream Pearl Paint Pen. All of this products are from The Rubber Cafe.


I used E8-008 Classic Edges Two die templates to cut/emboss the bottom edge of the paper to match the stamped border. I used Prismacolored Pencils to color the border and then I added more glitter and pearl paint dots.


All of the cardstock is from Discount Cardstock and these are the colors I used--Simply Smooth Ivory, Frosted Pink Prismatic, Razzleberry Light Prismatic, Herbal Garden Medium Prismatic.

Thank you so much for stopping by today!! I hope you have a Fantastic Day!!

Hugs & Smiles,
Heidi


Supplies
Stamps: JustRite Stampers CR-03630 Cast All Your Cares
Paper: Discount Cardstock Simply Smooth Ivory, Frosted Pink Prismatic, Razzleberry Light Prismatic, Herbal Garden Medium Prismatic
Ink: Tsukineko Memento Rich Cocoa Ink; Ranger Antique Linen Distress Ink; Prismacolor Colored Pencils
Dies: Spellbinders Grand Calibur, S4-301 Labels Sixteen, E8-008 Classic Edges Two, S5-042 Fleur de Lis Accents
Accessories: The Rubber Cafe Scrap Happy Sheer Glue, Diamond Clear Glitter, Cream Pearl Paint Pen; Scrapbook Adhesives by 3L 3D Foam Squares

Tuesday, February 7, 2012

VSM Vintage Valentine DT Challenge and 3-Day Sale at Really Reasonable Ribbon!!

Hello blogging friends! I am sorry I have been MIA for a few days--I think CHA kind of wiped me out!! I have just been having a heck of a time getting back on track. I don't have any artwork to share with you today but I do have two announcements from a couple of my favorite companies to share with you.


The first one is Vintage Street Market is having a
Vintage Valentine Design Team Challenge.


It started yesterday (2/6) and goes through February 10th! Five DT Members are doing the challenge and we were all given the same products to work with so it should be fun to see what everyone comes up with.

Click HERE to see the fun products we get to work with and Click HERE to check out the Vintage Street Market Blog so you can see all of the Vintage Valentine projects the DT Members create.


I Love RRR

The second announcement is Really Reasonable Ribbon is having a 3-Day Sale!!!

Now through midnight EST on Thursday, 2/9 they will be having a terrific SALE going on.

The more you buy, the more you save!!
Order subtotals from $.01 to $39.99 SAVE 10% using code CREATE10.
Order subtotals $40 and up SAVE 15% using code CREATE15.

Click HERE for all of the details and a great savings!!

Thanks so much for stopping by today! Please stop back tomorrow and I will have a card to share with you. I hope you have a wonderful and creative day!!

Hugs & Smiles,
Heidi

Tuesday, January 31, 2012

Silver & Black Goddess

Hello Blogging Friends! Today, is going to have to busy another quick blog post. Maybe when I get back home I can do another post with more details on this project.


This is a Goddess wall hanging that I designed using one of the New Releases from Spellbinders, LF-013 Jewel Goddess.


I also used S5-086 Bitty Blossoms to create the rose and


S5-100 Jewel Feathers to create the foil peacock feathers.


I also added a few jewelery findings, rhinestones, glitter and mica flakes.

Thank you so much for stopping by! I am sorry about the short and quick blog posts but things have been a little crazy with CHA the past couple of days--crazy in a good way--LOL!! I love being able to see friends and enjoy our time together.

Hugs & Smiles,
Heidi

Supplies
Stamps: Crafty Secrets Artsy Banner
Paper: Discount Cardstock Really Red; Royal & Langnickel Engraving Art Silver Foil
Ink: Clearsnap Frost White ColorBox; Ranger Distress Ink Fired Brick
Dies: Spellbinders LF-013 Jewel Goddess, S4-363 Jewel Fantisies, S5-086 Bitty Blossoms, Foil
Accessories: Embossing Powder Brilliant Red Sparkle; Jewelery Findings; The Rubber Cafe Scrap Happy Sheer Glue, Patriot Red, Terrifically Teal, Diamond Clear You're So Fine Glitter; Red Rhinestones; Tulle; Hot Glue Gun

Sunday, January 29, 2012

Journey Tag

Good morning blogging friends!Today is the first day of CHA!! If I can get an pictures of the event I will try but most of my time is spent working in the Spellbinders booth so I don't have much of an opportunity to get out there and take pictures.


I have a quick project to share with you today. I made a tag using some of the New Releases from Spellbinders--Grand Calibur, S5-099 Jewel Keys, S5-086 Bitty Blossoms, S5-081 Damask Motifs. I think the S5-086 Bitty Blossoms are going to be a new favorite of mine!


For the background I very lightly inked the tag with Distress Inks and then I applied Liquid Laminate and added gold mica flakes. All of the coloring on the tag was done with inks.

Sorry for such a quick post but thank you so much for stopping by today! I hope you have a wonderful and creative day!!

Hugs & Smiles,
Heidi

Supplies
Stamps: Crafty Secrets Artsy Banner
Paper: Discount Cardstock Simply Smooth Ivory; Tag
Ink: Tsukineko Memento Tuxedo Black; Ranger Vintage Photo, Bundled Sage, Victorian Velvet
Dies: Spellbinders Grand Calibur, S5-099 Jewel Keys, S5-086 Bitty Blossoms, S5-081 Damask Motifs
Accessories: Joann's Thin Cork; Beacon Liquid Laminate, The Rubber Cafe Gold Mica Flakes

Saturday, January 28, 2012

String of Hearts Love Card

Good morning blogging friends! Today, I have a quick and easy Valentine's card to share with you.


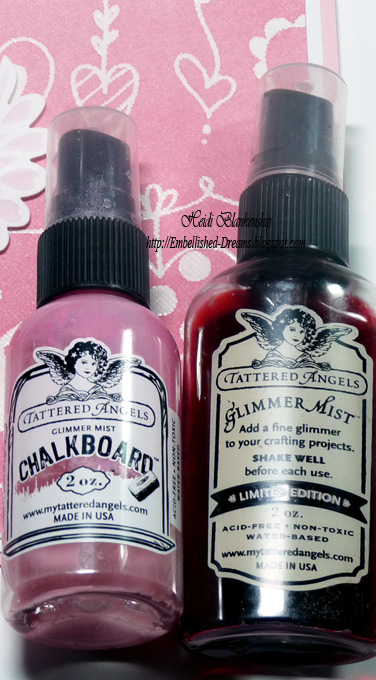
I started with the String of Hearts paper from Discount Cardstock and then added Tattered Angels Glimmer Mist Tutti Fruitti, Chalkboard Cotton Candy to add the color to the paper.


The paper started out white with the embossed pattern of the hearts and when I applied the glimmer mist the embossed is like a resist and doesn't pick up the color.


I used S5-089 Home Sweet Home to cut/emboss the heart and wings and then I added some color with Copic markers. To hang the heart I used Sweetheart Twine from Really Reasonable Ribbon and then added some Diamond Clear Glitter from The Rubber Cafe.

I also stamped the word Love using a stamp from the J-1095 Fabulous Phrases from The Rubber Cafe.

Thank you so much for stopping by today! I hope you have a wonderful day!!

Hugs & Smiles,
Heidi

Supplies
Paper: Discount Cardstock String of Hearts, Simply Smooth White, Frosted Pink Prismatic
Stamps: The Rubber Cafe J-1095 Fabulous Phrases
Ink: Tsukineko Memento Tuxedo Black; Tattered Angels Glimmer Mist Tutti Fruitti, Chalkboard Cotton Candy; Copic Marker R83 Rose Mist
Dies: Spellbinders Grand Calibur, S5-089 Home Sweet Home
Accessories: Really Reasonable Ribbon Sweetheart Twine; The Rubber Cafe Scrap Happy Sheer Glue, You're So Fine Glitter Diamond Clear; Scrapbooks Adhesive by 3L 3D Foam Squares

Friday, January 27, 2012

Lighthouse Layout & Heading to CHA!!

Good morning blogging friends! Today, I have a quick post to share a layout with you. I am taking off today for California--headed to CHA!! I am excited to see friends and all of the fantastic new products!!


This is a pretty simple layout but sometimes I like it when the picture is the main focus of the layout. I used all new products from Spellbinders including--S5-077 Labels Twenty-Five, S5-090 Romantic Rectangles, S5-082 Nautical Frame and Accents, EL-001 Elite (side B) M-Bossabilities Folder.


Here is a close up of the M-Bossabilities. I lightly inked over the embossed area and it really makes it pop!


Here is a close up of the lighthouse. First I die cut the image then I airbrushed it using a Copic marker, added a piece of Kraft paper to the back and to finish it off I lightly inked around the edges.


I printed the journaling and then inked the inside edges of the die cut. I also added Jellie Dots around the picture and some paper flowers and leaves.

Thank you so much for stopping by today!! If you are going to be at CHA please stop by the Spellbinders booth and say hello! I would love to meet you!!! I hope you have a wonderful and creative day!!

Hugs & Smiles,
Heidi

Supplies
Paper: Discount Cardstock Simply Smooth White, Kraft, Blue #67
Ink: Ranger Old Paper, Stormy Sky Distress Ink; Copic Marker E31
Dies: Spellbinders Grand Calibur, S5-077 LablesTwenty-Five, S5-090 Romantic Rectangles, S5-082 Nautical Frame and Accents, EL-001 Elite (side B) M-Bossabilities Folder
Accessories: The Rubber Cafe Scrap Happy Sheer Glue, Root Beer Jellie Dots; Scrapbook Adhesives by 3L 3D Foam Squares; I am Roses Paper Flowers & Leaves

Tuesday, January 24, 2012

Bisque Pottery - Technique Challenge at SCS

Hello blogging friends! Today, I have a card to share with you using a new technique, Bisque Pottery. The technique is from the Try A New Technique Challenge - TLC361 - over at Splitcoaststampers. I don't do challenges very often but after I saw a beautiful card by my sweet friends Debbie Seyer I knew I had to try this technique! Click HERE to check out Debbie's card.


Here is the card that I did with the Bisque Pottery technique. This technique is so easy to do and I LOVE the results!! One of my favorite color combos is White & Ivory. Click HERE to check out all of the details about this technique.


Here is a close up of the background paper. I used Old Paper Distress Ink from Ranger to do the technique. Just simply use your brayer and a light brown or grey color (other colors can be used) to ink on the flat side of an embossing folder, place your paper down on the side of the folder without ink and then emboss as usual. I used the New EL-002 Regal (B side) M-Bossabilities Folder from Spellbinders to emboss my paper.


I used the New S4-353 Labels Twenty-Four, S5-086 Bitty Blossoms and S5-085 Mix'd Media Elements die templates from Spellbinders to create all of the die cuts. I stamped a sentiment from CL-02170 Spread Your Wings from JustRite Stampers onto the Simply Smooth White label using Rich Cocoa ink and then inked the inside edges with Old Paper Distress Ink from Ranger. For the bird I used Simply Smooth Ivory and used the same inks as on the label. I used old book pages to create the flower and leaves and then added some color with Copic markers. I added some ribbon with a bow using Satin with Scalloped Edge Ivory from Really Reasonable Ribbon. I also added You're So Fine Glitter Diamond Clear Cool Highlights from The Rubber Cafe to the bird, rose and leaves for a little bit of sparkle.


For a finishing touch I added some Pearl Jellie Dots from The Rubber Cafe for embellishments.

Thank you so much for stopping by today! Now it's time to go clean off my desk and get back to creating--I am trying to finish up CHA projects. Can't wait to share some of the New products with you!! I hope you have a wonderful and creative day!!

Hugs & Smiles,
Heidi

Supplies
Paper: Discount Cardstock Simply Smooth White & Ivory
Stamps: JustRite Stampers CL-02170 Spread Your Wings
Ink: Ranger Old Paper Distress Ink; Tsukineko Memento Rich Cocoa; Copic Markers YG67 Moss, R83 Rose Mist
Dies: Spellbinders Grand Calibur, S4-353 Labels Twenty-Four, S5-086 Bitty Blossoms, S5-085 Mix'd Media Elements, EL-002 Regal (B side) M-Bossabilities Folder
Accessories: Really Reasonable Ribbon Satin with Scalloped Edge Ivory; The Rubber Cafe Scrap Happy Sheer Glue, You're So Fine Glitter Diamond Clear Cool Highlights, Pearl Jellie Dots; Scrapbook Adhesives by 3L 3D Foam Squares

Monday, January 23, 2012

Red Hearts Valentine's Card

Hello blogging friends! Sorry it has been a few days since my last post, I have been busy working on projects for CHA. I will be at CHA demoing and doing make-n-take in the Spellbinders booth. If you are going to be at CHA please stop by and say hello--I would love to meet you!!

Today, I have a quit post with a Valentine's Day card to share with you.


I embossed the bottom half of the card using EL-007 Elegance (B side) M-Bossabilities Folder from Spellbinders and I took the Festive Berries Distress Ink pad and rubbed it across the embossed area giving it a look of faux letterpress. Then I inked the bottom edges.


Next I stamped the heart image three times creating a border across the top of the card. The stamped image is from I-1135 Lace Set (Heart) from The Rubber Cafe. This set includes four images--Lacy Love, Heart, Butterfly and a Fan.


I added some Pearl Jellie Dots to the centers of the embossed flowers.


I also added some Noelle White Lace Trim and Pink Seam Binding from Really Reasonable Ribbon and a couple of trinket pins and Red Roses from I am Roses.


I used Simply Smooth White, Frosted Pink Prismatic and Really Red cardstock from Discount Cardstock.

Thank you so much for stopping by today!! I hope you have a wonderful and creative day!!

Hugs & Smiles,
Heidi


Supplies
Paper: Discount Cardstock Simply Smooth White, Frosted Pink Prismatic, Really Red
Stamps: The Rubber Cafe I-1135 Lace Set (Heart)
Ink: Ranger Festive Berries Distress Ink
Accessories: Spellbinders EL-007 Elegance (B side) M-Bossabilities Folder; Really Reasonable Ribbon Noelle White Lace Trim, Pink Seam Binding; The Rubber Cafe Scrap Happy Sheer Glue, Pearl Jellie Dots; I am Roses Red Roses, Trinket Pins

Wednesday, January 18, 2012

Vintage Street Market - Valentine's Bingo Card

Good morning blogging friends! Before I get started with my post I want to say a Huge Congrats to all of the New Vintage Street Market DT Members!!

Today, is my day to post over at Vintage Street Market and I have an altered Valentine's Bingo card to share with you.


I embossed a 12 x 2 inch strip of the Red Foil paper from Party Games Paper Sheets & Tags using the Grand Calibur and EL-001 Elite (A side) M-bossabilities Folder from Spellbinders.


I added the pink envelope and the little girl paper doll from the Family Fun Paper Kit. I stamped Be Mine on a lacy die cut using CR-02250 Winter Words, Lady Bug (red) ink and S4-354 Splendid Circles from Spellbinders and tucked it inside the envelope and added a sparkling heart covered in mica flakes and glitter and added a paper rose to the center of the heart and edged the rose in glitter too. To create the heart and rose I used S4-351 Spiral Blossom One and S4-137 Classic Scalloped Heart from Spellbinders. Then I added a little more glitter to the stamped note and the little girl.


I added a Double Ruffles Bright Pink ribbon trim from Really Reasonable Ribbon to the top of the Bingo card and also added some tulle and vintage buttons. I added You're So Fine Glitter to add a little sparkle. **Tip I used Copic markers to change the color of the ruffle ribbon trim and the little girls dress for a perfect match.

To see more picture and find out other details please click HERE to see my post on the Vintage Street Market Blog. Thanks so much for stopping by today!!

Hugs & Smiles,
Heidi

Supplies
Vintage Street Market: Family Fun Paper Kit, Party Games Paper Sheets & Tags, Bingo Card
Stamps: JustRite Stampers CR-02250 Winter Words
Paper: Discount Cardstock Simply Smooth Ivory; Old Book Pages
Ink: Ranger Antique Linen Distress Ink; Tsukineko Memento Lady Bug (Red); Copic Markers R83, E31
Dies: Spellbinders Grand Calibur, S4-354 Splendid Circles, S4-351 Spiral Blossom One, S4-137 Classic Scalloped Heart, EL-001 Elite (A side) M-bossabilities Folder
Accessories: Really Reasonable Ribbon Double Ruffles Bright Pink ribbon; The Rubber Cafe Scrap Happy Sheer Glue, You're So Fine Glitter Diamond Clear Cool Highlights, Patriot Red, Bronze Medal, Martha Stewart Mica Flakes; Vintage Buttons, Tulle; Scrapbook Adhesives by 3L 3D Foam Squares

Tuesday, January 17, 2012

Keep Calm & Create Art Card with New Releases from the Positively Me Collection by Julianna Hudgins from the Spellbinders Blog Frenzy

Hello blogging friends! Hopefully I will actually be able to get this post up today--I am not sure if blogger is having issues or what but it seems to be acting crazy today!! I spent almost an hour and a half trying to upload my photos and now things are jumping all over the place--LOL! I have noticed several people on FB commenting about issues with blogger over the past couple of weeks. Well, whatever it is I hope it gets worked out soon!!

Today, I have a card to share with you that I thought was just perfect timing with CHA right around the corner.


I know several friends (designers) who getting into the crunch time with creating CHA projects, myself included and I thought the sentiment was perfect! ;-) I used JustRite Stampers CR-0225 Just Keep Calm Clear Stamp Set and some of the New Spellbinders Releases. Are you LOVING all of the New Releases? I know I am loving seeing all of the new products!!


To start I used three of the die template from S5-098 Jewel Stones, this is one of the New Releases from the Positively Me Collection by Julianna Hudgins from Spellbinders. You can click HERE to see some of the New Releases from the Positively Me Collection by Julianna Hudgins from the Spellbinders Blog Frenzy. I die cut the jewel shapes using the Grand Calibur and shrink plastic. Then I punched a hole in the top of each piece and used my heating tool to shrink the plastic and an acrylic block to flatten them. Then I used Copic markers and airbrushed the color onto the plastic jewel pieces.


Then I used glitter, jellie dots and mica (see the supply list for all of the links) to embellish each piece and I added Glossy Accents for a beautiful smooth and shiny finish.


Here is a close up of the jewel pieces. I love all of the sparkle!!


This is the scrap paper from when I did the airbrushing. I thought it looked to pretty to just throw away.


I used the hand die template from S5-097 Jewel Treasures to cut/emboss the center of the S5-077 Labels Twenty-Five and then I added the piece of scrap paper with the airbrushing behind the hand. I also added a little glitter to the colored part of the hand.


Like I said I think this is a prefect sentiment for all of us who are busy creating CHA artwork. I love CR-0225 Just Keep Calm New Stamp Set from JustRite Stampers --it is such a fun set!! I also airbrushed the label and added some glitter to the outer edge.


I used the jewel pieces and some beads and jewelry findings to create a charm for the card front.


A couple of close ups.


I used EL-001 Elite (B side) M-bossabilities Folder to create the background and layered the Simply Smooth White, Soot and Blue #67 cardstock. I also added a bow using Peacock Seam Binding from Really Reasonable Ribbon.

Supplies
Stamps: JustRite Stampers CR-0225 Just Keep Calm (Clear)
Paper: Discount Cardstock Simply Smooth White, Soot, Blue #67
Ink: Tsukineko Memento Tuxedo Black; Copic Markers B23, G14, BV55, B04
Dies: Spellbinders Grand Calibur, S5-077 Labels Twenty-Five, Positively Me Collection by Julianna Hudgins S5-097 Jewel Treasures, S5-098 Jewel Stones, EL-001 Elite (B side) M-bossabilities Folder
Accessories: Really Reasonable Ribbon Peacock Seam Binding; The Rubber Cafe Scrap Happy Sheer Glue, You're So Fine Glitter Blue Skies, Diva Pink, Limeade Green, Diamond Clear Cool Highlights, Jellie Dots Pearl, Diva Pink; Martha Stewart Mica Flakes; Ranger Glossy Accents; Scrapbook Adhesives by 3L 3D Foam Squares; Shrink Plastic; Beads & Jewelry Findings

LinkWithin

Related Posts Plugin for WordPress, Blogger...