Spellbinders Paper Arts
Get the Knowledge! Blog Frenzy
July 6 - 14, 2011

Welcome to the sixth day of the Spellbinders Paper Arts Get the Knowledge! Blog Frenzy!
Spellbinders™ Paper Arts’ is absolutely thrilled to bring you one of the most exciting die releases to date! These new collections are some of the most innovative and beautiful die templates in the world. The Get the Knowledge! Blog Frenzy allows you a sneak peek of the products we’re introducing at the Craft and Hobby Association trade show later this month.
• Win today’s new Spellbinders die templates!
• Be eligible to win the Grand Prize by entering each day (see schedule below)!
• One entry per person, per blog please, on the designated days.
• Each blog will accept entries for 48 hours.
• You have from 12:01 a.m. Eastern Standard Time July 11, 2011 to 12:01 a.m. July 13, 2011 enter my contest. See the Official Rules (link to blog post- link coming)
• Today you can enter my contest and Judy Hayes contest.
Thank you, Spellbinders Paper Arts, for sponsoring this contest!
I am thrilled to be sharing two projects with you today using S4-345 Picot Edge Circles Nestabilities® Decorative Element and S4-351 Spiral Blossom One.
For my first project I designed a card.

Look at how absolutely gorgeous this rose is!! As so many of you know spiral or rolled rose have been so popular. They are fun, quick and easy to make but now with the S4-351 Spiral Blossom One die template you can create beautifully detailed edge roses and the die does all the work for you! On my card I create a larger double rose and two rose buds and I have a step-by-step tutorial to share with you.

I started out by using the Grand Calibur™ Machine to cut/emboss all of my die cuts. From the S4-345 Picot Edge Circles I cut/embossed #3 (#1 is the smallest) with Simply Smooth White, #4 with Soot and #1 with Green Crepe. Using the S4-351 Spiral Blossom One die template I cut four die cut shapes with Simply Smooth White cardstock. I used S4-321 Nested Leaves with Green Crepe t0 cut all of the leaves.

To create a two tone rose I inked the inside edge with Spun Sugar Distress Ink. Here is a little tip for inking the spiral blossom, slide the die cut in between two pieces of paper and ink and turn the die cut as you go. It's quick and easy and it will keep you from getting ink on the top of the petals.

Now comes the fun part, creating the flower. Start from the outer edge of the die cut and begin rolling the paper.

Keep rolling the blossom until you reach the larger end of the die cut. I like to roll the blossom pretty tight.

Then let go of the blossom and it will spin back opening up. Then I applied 3-in-1 Advanced Craft Glue from Beacon Adhesives to the bottom of the flower and held in place for just a little bit until the glue could take hold.

To create the next layer of the rose I used a foam pad and the end of my paper piercer to go in a circular motion on the petals. The petals will begin to take shape. If you don't have a paper piercer with a rounded end you can use a stylus, a pen or anything that has a round tip.

Adhere the first blossom onto the second one and begin to roll the flower. For this second layer I applied glue along the inside edge as I rolled.

Here is a picture of the larger rose with two little rose buds. I used the same steps to create the rose buds but I only rolled the first four petals. Then I added the small green crepe die cut from S4-345 Picot Edge Circles to the base of the rose bud and pinched the end. I used a bone folder and paper piercer to shape the petals. So you can see the difference the first rose bud in the picture is just rolled and the second has the petals shaped.

Here is a close up picture of the rose buds.

I inked all of the leaves with Peeled Paint Distress Ink.

For the sentiment I used Cl-02125 Signs of Life stamp set from JustRite Stampers. Then I added Nestabling™ Heart Circles Black Rhinestones. The Nestabling is made to go with S4- Heart Circles but it also works perfectly with S4-345 Picot Edge Circles.

Next I assembled the card as shown. I layered the two S4-345 Picot Edge Circle die cuts using 3D Foam Squares. Then I added the larger rose and the leaves. I added Swirls, Finesse White Pearls from Want2Scrap™ to the bottom and side of the card.

The rose buds were the last pieces I added to the card.


Supplies
Spellbinders: Grand Calibur Machine, S4-345 Picot Edge Circles, S4-351 Spiral Blossom One, S4-321 Nested Leaves
Paper: Discount Cardstock Simply Smooth White, Soot, Green Crepe
Stamps: JustRite Stampers CL-02125 Signs of Life
Ink: Tuskineko Memento Tuxedo Black, Ranger Spun Sugar, Peeled Paint Distress Inks.
Accessories: Want2Scrap™ Nestabling™ Heart Circles Black Rhinestones, Swirls, Finesse White Pearls, Baby Bling White Pearls; Scrapbook Adhesives by 3L™ 3D Foam Squares; Foam Pad, Paper Piercer, Bone Folder; Beacon Adhesives 3-in-1 Advanced Craft Glue
 Shown above is the S4-345 Picot Edge Circles
MSRP: $24.99
DIE SIZES:
2: 1 5/8"
3: 2 3/4"
4: 4"
 Shown above is the S4-351 Spiral Blossom One
MSRP: $19.99
DIE SIZES:
| 4 1/8 x 4 1/4", 5/8" wide strip |
For my second project I altered a candy box.

I layered the S4-345 Picot Edge Circles to give the appearance of doilies and then I added three roses made with S4-351 Spiral Blossom to the center of the box.


Here are a couple of close up pictures so you can see all of the details.

I added 72 Count Red Pearls and Baby Bling LeCreme Pearls from Want2Scrap™ around the edges of the S4-345 Picot Edge Circles.

I trimmed the the outer edge of the box with a lace trim.

Supplies
Spellbinders: Grand Calibur Machine, S4-345 Picot Edge Circles, S4-351 Spiral Blossom, S4-328 Foliage
Paper: Discount Paper Simply Smooth Ivory; Blush Red Dark Prismatic, Herbal Garden
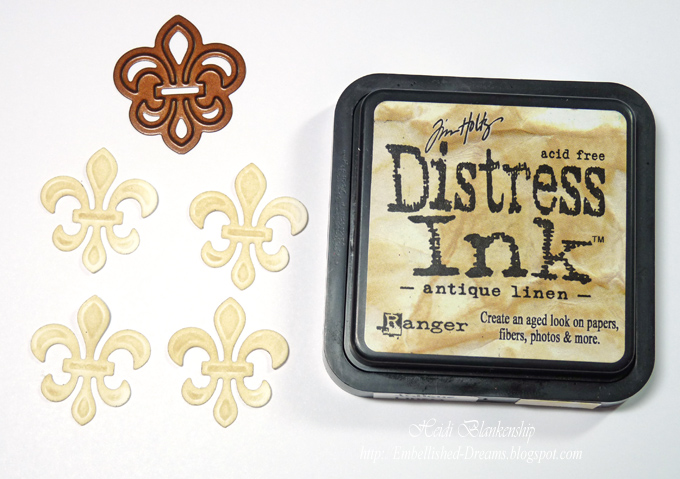
Ink: Tuskineko Memento Rich Cocoa; Ranger Antique Linen, Fired Brick Distress Inks
Accessories: Want2Scrap™ 72 Count Red Pearls, Baby Bling LeCreme Pearls; Prima Lace Trim; Scrapbook Adhesives by 3L™ 3D Foam Squares; Beacon Adhesives 3-in-1 Advanced Craft Glue.
Are you ready for a chance to win the die templates that I've used here today? See the official Spellbinders Paper Arts Get the Knowledge! Blog Frenzy rules.
This contest has now officially ended. Thank you so much for all of your wonderful comments and good luck to all who entered!!
TO ENTER: My contest is open for entries from 12:01 a.m. July 11 2011, to 12:01 a.m. July 13, 2011 Eastern Standard Time.
1) Send your email entry to: (either click the link or type the address into your email program)
2) The subject must be Picot Edge Circles and Spiral Blossom One.
3) Send! Be sure to visit all the Designers on their contest dates:
July 6
July 7
July 8
July 9
July 10
July 11
July 12
July 13
July 14
Daily contest winners will receive an email within 24 hours of the contest’s closing. The winners will have 72 hours to reply to that email to claim prize. If a winner fails to respond within 72 hours, a new winner will be drawn.
To be eligible for the Grand Prize, enter each contest within its designated time period. Use the same email address to send the entry email. The Grand Prize has a retail value of over $1400, and includes the complete Spellbinders line of die templates released at the 2011 Summer CHA show, and a Grand Calibur™ Die Cutting and Embossing Machine!
I love your comments! Unfortunately your comment does not count towards a contest entry, so be sure to enter (above, see To Enter section) and then leave a comment here on my blog!
If you have any questions, please e-mail ContestQuestions@Spellbinders.us
Thank you for visiting and good luck!
Hugs & Smiles,
Heidi