Showing posts with label Martha Stewart. Show all posts

Tuesday, May 5, 2015

Lilac Bouquet Happy Birthday Shaker Card - JustRite Papercraft New May Release

Hello everyone!  Today, is the first day of the May New Release from JustRite Papercraft.  The Design Team has been busy creating some beautiful projects to share with you!


Here is the card that I designed using the new CR-02181 Multi-Step Lilac Bouquet Clear Stamps from JustRite Papercraft.  If you love multi-step stamping then you are going to love this beautiful lilac stamp set!  Lilacs are one of my favorite flowers so I know this is going to be a stamp set that I will use over and over again.


I used the CR-02181 Multi-Step Lilac Bouquet Clear Stamps to create the pretty background for my shaker card.  For the sentiment I used a Happy Birthday stamp from the CR-03815 Large Fancy Sentiments Clear Stamps from  JustRite Papercraft.


I haven't made a shaker card in years but they are back on trend and hotter than ever so I thought this would be a fun and pretty stamp set to create a shaker card with.  I used the S4-489 Labels Forty Seven die template from Spellbinders to create the frame for the shaker.  I started with a piece of white fun foam and I covered the front and back with Ken Oliver Crafts Stick It Adhesive Sheets and then I used the label dies to die cut the frame shape out of the fun foam.  I also applied the adhesive sheets to the purple cardstock and die cut a frame using the same dies.  Lastly I die cut the label shape from a piece of acetate for the window of the shaker.
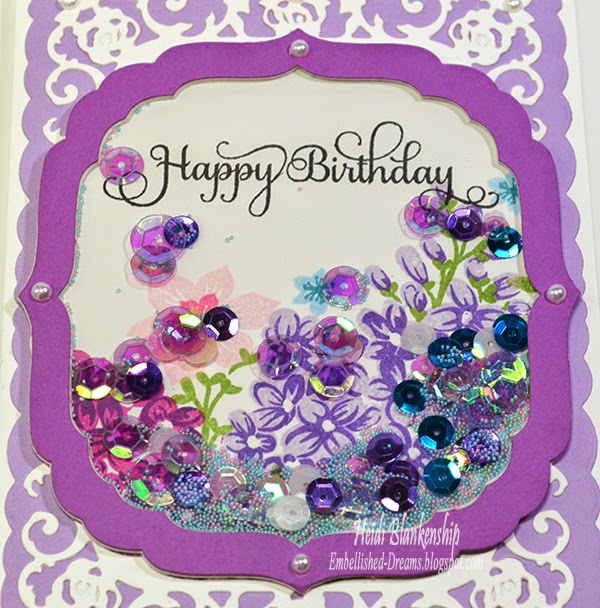

Once all the die cuts were made for the shaker part of the card all I had to do was assemble the pieces.  I placed the acetate on top of the fun foam and then the purple frame on top of the acetate.  Then I turned the piece over and filled it with some Cartwright's Sequins and Martha Stewart Micro Beads-Blue Topaz, Kunzite (pink).  To finish it off I added the stamped die cut to the back.  Making shaker cards with die cuts is easy peasy.  :)


To finish off the card I used the two largest die templates in the S5-230 Romantic Rose set and made a couple of die cuts for the background of the card.  I also added a few white pearls.

Please be sure to visit each of the Design Team Members in the link list to see their beautiful projects.


Thanks so much for stopping by today!
I hope you have a beautiful day!

Hugs & Smiles,
Heidi

Supplies
Stamps:  JustRite Papercraft CR-02181 Multi-Step Lilac Bouquet Clear Stamps, CR-03815 Large Fancy Sentiments Clear Stamps
Paper:  White, Lavender, Purple
Ink:  Imagine Crafts/Tsukineko Memento LuLu Lavender, Grape Jelly, Lilac Posies, Angel Pink, Rose Bud, Summer Sky, Teal Zeal, Bamboo Leaves, Olive Grove, Tuxedo Black
Dies: Spellbinders S4-489 Labels Forty Seven, S5-230 Romantic Rose
Accessories:  Ken Oliver Crafts Stick It Adhesive Sheets, Fun Foam, Acetate, Cartwright's Sequins, Martha Stewart Micro Beads-Blue Topaz, Kunzite (pink), White Flat Back Pearls, Ranger Multi Medium Matte

Monday, September 2, 2013

Autumn Vintage Labels Three Clear Stamp Set-JustRite Papercraft September New Release Day 1

Hello blogging friends!  Today, starts the kick off to a week of New Releases from JustRite Papercraft.  For Day 1 the New Releases include a clear stamp set and a cling background stamp.


For my project I used the CR-04725 Autumn Vintage Labels Three Clear Stamp Set.  I stamped the image using Memento Rich Cocoa ink and colored the image using Copic markers.  Then I used S4-114 Standard Circles LGS4-412 Gold Rounds One Enhancing Elements die templates from Spellbinders® to cut/emboss the die cut shape.  


Here is a close up of the image and the Copic markers I used.  The markers are also listed below in the supplies.  


Here is a close up of the image in the frame.  I also used a sentiment from the same stamp set.  For the frame I started by applying ivory acrylic paint.  Then I added some texture paste.  Once that was dry then I applied Martha Stewart Black Coffee Metallic Glaze over the entire frame and buffed off the excess.  To finish the frame I rubber StazOn Sadle Brown ink pad over the frame to add a little more brown tone and to pick up the detail of the texture paste.


To embellish the frame I added a Large Bronze Metal Filigree piece from ButterBeeScraps to the top center.  Then I used S4-385 Little Leaf Sets and S5-120 Fall Foliage die templates to cut/emboss Spellbinders® Media Mixáge MM1-003 Copper Sheets.  I shaped the leaves and then I added Rub 'n Buff Patina to all of the copper pieces.  I added a little bit of bling for some sparkle.  I also added some metal corner pieces that I had in my stash and applied a little Rub 'n Buff Patina and bling.


Once the frame was done then I added the stamped image with a piece of burlap in the background.  For the hanger I used Artistic Wire Gun Metal 20 Ga.  

Please be sure to visit each of the Design Team Members in the link list below and leave them a little love.


Thank you so much for stopping by today!  I can't wait to hear what you think about the New Releases from JustRite Papercraft.

Hugs & Smiles,
Heidi

Supplies
Stamps:  JustRite Papercraft CR-04725 Autumn Vintage Labels Three Clear Stamp Set
Paper:  DiscountCardstock.com Simply Smooth White
Ink/Paint:  Imagine Crafts/Tsukineko Memento Rich Cocoa, Toffee Crunch, StazOn Sadle Brown; Copic Markers YR14, YR24, YR31, E13, E23, E29, E31, E34; Texture Paste; Martha Stewart Black Coffee Metallic Glaze
Dies:  Spellbinders® Grand Calibur® MachineS4-114 Standard Circles LG, S4-412 Gold Rounds One Enhancing Elements, S4-385 Little Leaf Sets, S5-120 Fall Foliage
Accessories:  Spellbinders® Media Mixáge MM1-003 Copper Sheets; ButterBeeScraps Large Bronze Metal Filigree; Artistic Wire Gun Metal 20 Ga.; Rub 'n Buff Patina; Metal Photo Corners, Burlap, Bling, Frame, Ivory Acrylic Paint, G-S Hypo Cement

Wednesday, June 19, 2013

Martha Stewart Silicone Molds - Faux Shabby Metal Embellishments

Hello blogging friends!  Just a quick post today--but I have some fun embellishments so share with you!  You know I love all things shabby and I also love being able to create my own embellishments.


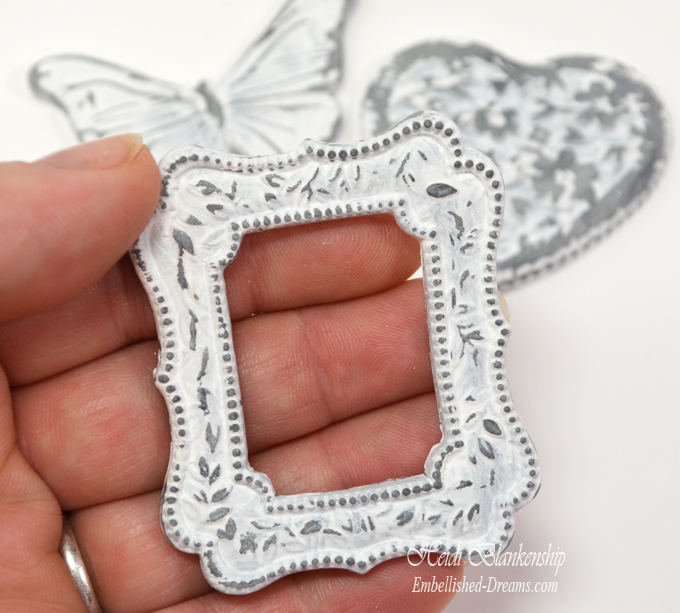
I made some clay embellishments a while back using some Martha Stewart silicone molds, silver clay and gesso.  Follow the baking instructions on the packaging.  I wanted the embellishments to look like faux shabby metal pieces with the paint chipping off.  


Here is what the pieces looked like after they were baked. To get the look of the faux shabby metal pieces I applied 2-3 coats of gesso and then I lightly sanded each piece.


This is one of the frames.


The floral heart.


A butterfly.


A small flower.


I absolutely love how these turned out!!

Quick and easy--beautiful and shabby!!

I hope this inspires you to create some fun embellishments.
Thanks so much for stopping by today!

Hugs & Smiles,
Heidi

LinkWithin

Related Posts Plugin for WordPress, Blogger...