Wednesday, June 25, 2014

ButterBeeScraps - Rose Cameo Card

Hello everyone!  Today, I have a beautiful card to share with you using one of the cameos and some metal filigree pieces from ButterBeeScraps.  


Here is the card that I designed.  I just love the pretty pattern paper from Prima Stationer's Desk 6 x 6 Paper Pad and I wanted to try and match the cameo to the paper.


Here is a before and after of the cameo.  I used Spectrum Noir™ DR7, DG4 markers to color the cameo.  Then I used the Blender to remove a little of the color off of the top.  Doing this creates more depth with the flowers and leaves.  Then I used some sand paper on the edges to distress the cameo just a little.  I glued the cameo in to the Large Bronze Cameo Frames (Item #F094-B).


These are the Spectrum Noir™ markers I used to color the cameo.


I used one of the  Bronze Filigree Embellishment (Item #683-B) and cut it in half and then I glued it in place under the frame.  I used the S4-425 Elegant Ovals to cut/emboss the patter paper.


Here is a close up of the cameo.


I used a deep red cardstock for the base and then I used black cardstock for the decorative mat.  I used S6-001 5 x 7 Matting Basics AS6-010 5 x 7 Heirloom Legacy die templates from Spellbinders Paper Arts® to cut/emboss the shapes.  To finish off the card I added a few SS20 Siam Flat Back Glass Rhinestones and used Vintage Photo Distress Ink to ink the edges of the card.

Thank you so much for stopping by today!

Hugs & Smiles,
Heidi


Supplies
Paper:  Prima Stationer's Desk 6 x 6 Paper Pad-The Stamp Simply Ribbon Store, Cardstock-Black, Kraft, Deep Red
Ink:  Ranger Vintage Photo Distress Ink-The Stamp Simply Ribbon Store
Markers:  Spectrum Noir™ DR7, DG4, Blender-JustRite® Papercraft
Dies:  Spellbinders Paper Arts® S6-001 5 x 7 Matting Basics A, S6-010 5 x 7 Heirloom Legacy,
S4-425 Elegant Ovals
Accessories:  ButterBeeScraps Large Midnight Blue Cameos (Item #CAM24-MD)Large Bronze Cameo Frames (Item #F094-B)Bronze Filigree Embellishment (Item #683-B)SS20 Siam Flat Back Glass Rhinestones, Ranger-Glossy Accents, Sand Paper, Scrapbook Adhesives by 3L™ E-Z Runner® Permanent Strips-Refillable Dispenser 49' 

Monday, June 23, 2014

Royal Medallion Necklace - Spellbinders and A Gilded Life

Hello everyone!  Today, I have a jewelry piece to share with you using one of A Gilded Life medallions from Spellbinders Paper Arts®.


Here is the necklace that I designed using the GL2-008 Royal Medallion by:  A Gilded Life and I just love how this turned out.  The colors are so soft, pretty and very girly.  ;-)


I spray painted the medallion with a flat white paint.  Then I painted the crown and filigree part using light blue and baby pink acrylic paints.  Next I used steel wool to buff the medallion until some of the gold metal was showing.  Then I added a few AB Swarovski crystals.  For the center piece I added a 12 mm AB White Rose from Em's Emporium.  


I added the medallion to some pearl chain and then added a clasp for the necklace.


I hope you like this pretty little jewelry project.  I had so much fun designing it! 

Thanks so much for stopping by today!

Hugs & Smiles,
Heidi

Supplies
Spellbinders Paper Arts® GL2-008 Royal Medallion by:  A Gilded Life
Accessories:  White Spray Paint, Baby Pink and Light Blue Acrylic Paints, Semi Glossy Clear Spray, Steel Wool, AB Swarovski Crystals, Glossy Accents, Em's Emporium 12 mm AB White Rose, Pearl Chain, Clasp, Jump Rings

Sunday, June 22, 2014

Your Dreams Graduation Card

Hello everyone!  I hope you're having a great weekend.  Today, I have another graduation card to share with you.  The card I am sharing today and yesterday's card are from twin sisters who just graduated high school.  This is another CAS (Clean And Simple) card--at least for me it is lol.  It involves just a little bit more then the card I did yesterday--but not too much.


Here is the card that I designed.  I used black cardstock for the base and then I used the S6-001 5 x 7 Matting basics A to cut/emboss the mat.  Before removing the paper from the die template I used Copic marker V17 Amethyst and air brushed through the die using it as a stencil.  Next I used black cardstock and S5-148 Decorative Labels Eight to create the pretty label shape.  Then I used white cardstock and S5-019 Labels Eight to create the basic label shape and layer over the decorative shape.  To create the shoe I used the Silhouette Cameo and the  Fancy Stiletto cut file.  I used black and purple cardstock for the shoe.  


Here is a close up of the shoe.


Here is a little prayer that is on the inside of the card on the left side.  I found the prayer on Pinterest.


Here is the sentiment on the right side of the card.  I used the S6-002 5 x 7 Matting Basics B to cut/emboss the mat and then I air brushed around the edges before removing that paper from the die.


To finish off the card I added some bling.

Thanks so much for stopping by today!

Hugs & Smiles,
Heidi


Supplies
Paper:  Black, White, Purple
Copic Marker:  V17 Amethyst
Dies:  Spellbinders Paper Arts® S6-001 5 x 7 Matting basics AS6-002 5 x 7 Matting Basics B, S5-019 Labels Eight. S5-148 Decorative Labels Eight
Silhouette Cameo:  Fancy Stiletto
Accessories:  Scrapbook Adhesives by 3L™ 3D Foam SquaresE-Z Runner® Permanent Strips-Refillable Dispenser 49', Bling

Saturday, June 21, 2014

Give Your Dreams Wings Card

Hello Blogging Friends!  Today, I have a CAS (Clean And Simple) card to share with you.  


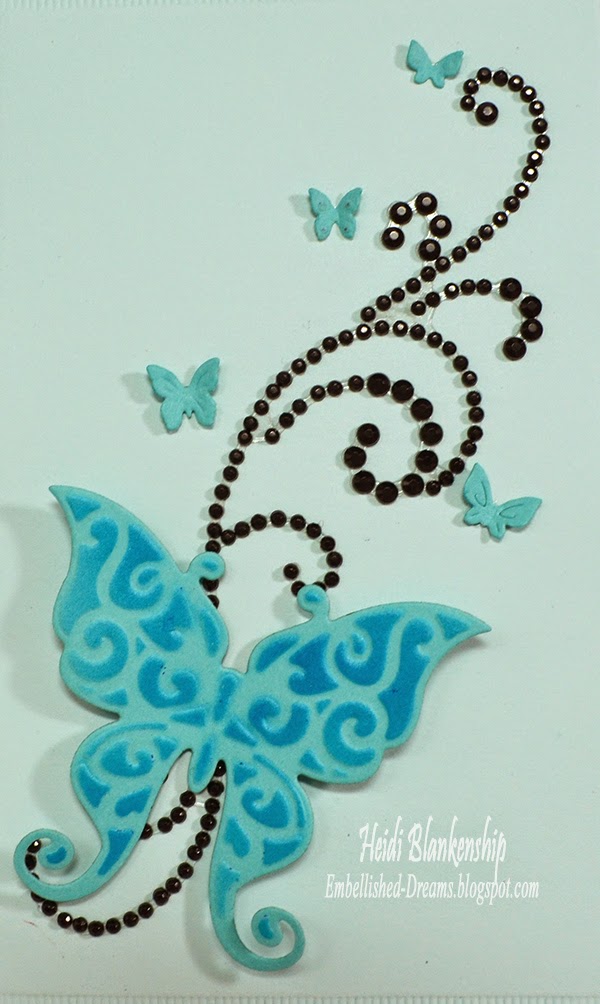
Here is the card that I designed.  I printed the sentiment from the computer and this card is going to be for a graduation.  But you could change the sentiments on the inside of the card and then this could be used for several different occasions.  The base of the card is aqua cardstock and then I used the S6-001 5 x 7 Matting basics A to cut/emboss the mat with the sentiment.  Then I used the S5-211 Romantic Rectangles 2 along with snow cone cardstock to create the pretty rectangle die cut.  Next I die cut the butterflies using aqua cardstock and S4-395 Les Papillions TwoS2-083 Flutter Tree die templates.  Before removing the larger butterfly from the die template I used a Copic marker B04 Tahitian Blue and airbrushed through the die template using it as a stencil.


I added the rhinestone bling on to the card front and then I added all of the butterflies.


I found this little poem on Pinterest and printed it with the computer and then I used S5-211 Romantic Rectangles 2 to create the die cut.  I also air brushed the die cut before removing it from the die.  This is on the inside of the card on the left.


Here is the Congrats sentiment on the inside of the card on the right.


Like I said you could change out the sentiments and then this card could be used for several occasions.  I hope you enjoyed the card today.

Thanks so much for stopping by and I hope you are having a great weekend!

Hugs & Smiles,
Heidi


Supplies
Paper:  White, Snow Cone, Aqua
Copic Marker:  B04 Tahitian Blue
Dies:  Spellbinders Paper Arts® S6-001 5 x 7 Matting basics A, S6-002 5 x 7 Matting Basics B, S5-211 Romantic Rectangles 2, S4-395 Les Papillions Two, S2-083 Flutter Tree
Accessories:  Scrapbook Adhesives by 3L™ 3D Foam Squares, E-Z Runner® Permanent Strips-Refillable Dispenser 49', Bling

Friday, June 20, 2014

The Stamp Simply Ribbon Store - Our Day Just Married Wedding Card

Hello everyone!  Today, is my day to post for The Stamp Simply Ribbon Store.  I know my posts are usually on Monday but we changed my day and now I will be posting every Friday.  I have a wedding card to share with you today using some of the beautiful  Prima Something Blue paper collections and one of the dies and texture plates from A Gilded Life collection from Spellbinders Paper Arts®.


Here is the card that I designed.  I just love this paper collection!  The patterns and colors are fabulous.


To start I picked a piece of light pink with polk-a-dot pattern paper from the  Prima Something Blue 6 x 6 Paper Pad.  Next I used Versa Magic Pink Petunia ink and applied it to the GLT-004 French Script Texture Plate.  Then I embossed the paper as usual creating a letterpress effect.


Here is a close up of the paper.  


Then I used the Zutter Distrezz-it-All tool on the pattern papers.  I also distressed the edges of a larger pink with polk-a-dot piece that is now shown in the picture.  On the smaller piece of the pink paper I only distressed three edges.  I knew I was going to layer a border die cut on the one side of the pink paper and I didn't want the layers to get to thick.


Here is a close up where you can see two of the images I fussy cut from the paper pad.  I also have the border die cut in the back and I used GLD-002 Imperial Border and wove May Arts Ivory Silk Ribbon through the border and then I added some pretty Petaloo Botanic Collection Coral flowers and  Melissa Francis Cream Pearls.


I hope you enjoyed the card today and as always you can click on all the photos to enlarge them and all of the supplies are listed below with links.

Please be sure to check out The Stamp Simply Ribbon Store for all of the fantastic paper crafting products and the Blog for inspiration from the Design Team.

Thanks so much for stopping by today! 

Hugs & Smiles,
Heidi

Supplies
Paper:  Prima Something Blue 6 x 6 Paper Pad-The Stamp Simply Ribbon Store; Ivory Cardstock
Ink:  Memento Espresso Truffle, Versa Magic Pink Petunia
Dies:  Dies:  Spellbinders Paper Arts® A Gilded Life GLD-002 Imperial Border, GLT-004 French Script Texture Plate
NOTE:  You can also find Spellbinders® products at The Stamp Simply Ribbon Store
Ribbon:  May Arts Ivory Silk Ribbon-The Stamp Simply Ribbon Store
Accessories:  Melissa Francis Cream Pearls, Petaloo Botanic Collection Coral, Zutter Distrezz-it-All- The Stamp Simply Ribbon Store, Scrapbook Adhesives by 3L® 3D Foam SquaresEZ Runner® Permanent Strips-Refillable Dispenser 49'
NOTE:  You can also find Scrapbook Adhesives by 3L® products at The Stamp Simply Ribbon Store

Wednesday, June 18, 2014

Tutorial Tuesday for JustRite Papercraft - Christmas Card Ideas using Background Stamps and Gelatos

Hello everyone!  Today, I have a Tutorial Tuesday project and video to share with you.  Now I know you are probably thinking--wait a minute it's Wednesday not Tuesday LOL.  Yes, we are sorry and apologize for the delay.  The weather in the Midwest has been kind of crazy the past couple of days and our electricity has been out a couple of times.   

For the tutorial I will show you how to use Gelatos with your Christmas Background stamps.  


For the first card I used the CL-02049 Christmas Postcard Background Cling Stamp.  I show how to layer and blend the Gelatos using a Q-tip and baby wipes.  


I used the CL-02063 Ornament Background Cling Stamp for the second card.  This is a quick and easy card and I share how to create a watercolor wash using the Gelatos.

To find out all of the details with a written step-by-step tutorial and lots of pictures and a video tutorial please hop on over to the JustRite Inspiration Blog!

GIVEAWAY ALERT on the JustRite Inspiration Blog!!!

For this week's Tutorial Tuesday Giveaway one lucky winner will receive two Christmas Background Stamps of their choice plus one 4 piece Gelato set of their choice. For your chance to win simply leave a comment on the Tutorial Tuesday post or on Heidi's video (leave a comment on both to double your chances of winning), telling us how many Christmas Cards you make each year and when you normally start making them.

Good Luck and Thanks so much for stopping by today!!

Hugs & Smiles,
Heidi


Supplies
Stamps:  JustRite® Papercraft CL-02049 Christmas Postcard Background Stamp, CL-02063 Ornament Background Stamp
Paper:  Simply Smooth White, Kraft, Red, Light Blue
Ink:  Memento Espresso Truffle, Versa Mark
Gelatos:  Butter Cream, Lime, Spearmint, Green Tea, Pistachio, Red, Gold, Butterscotch, Blueberry, Cotton Candy, Snow Cone, Aqua Dolce, White
Accessories:  The Stamp Simply Ribbon Store-Red Metallic Velvet Ribbon, Light Blue Seam Binding; Ranger-Diamond Stickles; Wood Snowflakes, White Pearl, White Button Snowflake, Bling, White Embossing Powder, Heat Tool, Zutter Distrezz-it-All, Scrapbook Adhesives by 3L™ E-Z Runner®Permanent Strips-Refillable Dispenser 49’

Monday, June 9, 2014

The Stamp Simply Ribbon Store - Botanical CAS Card

Hello everyone and happy Monday!  Today, is my day to post for The Stamp Simply Ribbon Store and I have a CAS (Clean And Simply) floral card to share with you using some of the beautiful papers from Graphic 45 Botanical Tea collection and the CR02044 JustRite Clear Stamp - Rose Bouquet Vintage Labels stamp set.


I started by trimming the main image with the rose and butterfly and then layered that with a piece of blue pattern paper.  Next I randomly stamped the rose image from CR02044 JustRite Clear Stamp - Rose Bouquet Vintage Labels stamp set with Memento Rich Cocoa ink on to an ivory piece of cardstock.  Then I used a cotton ball and applies Spun Sugar Distress Ink to the roses.  I also inked the around the paper with Tim Holtz Distress Inks Antique Linen and then inked the very outer edges with Espresso Truffle.  The base of the card is pink cardstock and I layered a piece of blue pattern paper and then added the stamped layer and the main image.  I added 3D Foam Squares to the top two layers to pop them up a little and I used EZ Runner® Permanent Strips-Refillable Dispenser 49' to adhere all of the other pieces.


I know in the first picture it's a little hard to see but here in this close up you can see the May Arts Pink Tulle that I added to the card.  This tulle is so pretty and adds a nice soft touch to your projects.  I also added some beautiful Petaloo Botanica Minis - Pink flowers.  I love that the flower packs have a few different varieties of flowers.


I also added a few Webster's Pages Sequin Mix - Party Time collection to the card for little embellishments.  These sequins are really pretty and the pack comes with a variety of spring colors.


As always you can click on all the photos to enlarge them and all of the supplies are listed below with links.

Please be sure to check out The Stamp Simply Ribbon Store for all of the fantastic paper crafting products and the Blog for inspiration from the Design Team.

Thanks so much for stopping by today! 

Hugs & Smiles,
Heidi


Stamps:  CR02044 JustRite Clear Stamp - Rose Bouquet Vintage Labels-The Stamp Simply Ribbon Store
Paper:  Graphic 45 Botanical Tea 8 x 8 paper pad-The Stamp Simply Ribbon Store, Cardstock-Ivory, Pink
Ink:  Memento Rich Cocoa, Espresso Truffle, Tim Holtz Distress Inks Antique Linen, Spun Sugar-The Stamp Simply Ribbon Store
Ribbon:  May Arts Pink Tulle-The Stamp Simply Ribbon Store
Accessories:  Petaloo Botanica Minis - PinkWebster's Pages Sequin Mix - Party Time, Tombow Mono Multi Liquid Glue - The Stamp Simply Ribbon Store, Scrapbook Adhesives by 3L® 3D Foam SquaresEZ Runner® Permanent Strips-Refillable Dispenser 49'
NOTE:  You can also find Scrapbook Adhesives by 3L® products at The Stamp Simply Ribbon Store

Thursday, June 5, 2014

Elegant Christmas Swirls Clear Stamps and Ornament Cling Background Stamp - Joy to the World Card - JustRite Papercraft Day Four June Release

Hello everyone and welcome to Day Four of the JustRite® Papercraft June Release.  Today, we are showcasing a new Christmas background stamp and Christmas sentiment stamp set along with a beautiful new die.  I know it's early but for papercrafters and people who like to make handmade Christmas cards and gifts it's never too early to get started LOL!  Just think if you start making some Christmas cards now you could be all finished up and ready to go before the rush of the holiday sets in.  Now that would be a wonderful feeling!


Here is the card that I designed using AG-02052 Elegant Christmas Swirls Clear StampsCL-02063 Ornament Cling Background Stamp, and AG-02043 Heirloom Flourish Two Dies.  I started by stamping the background image on to kraft cardstock using Versa Mark ink and then I used white embossing powder and a heat tool to set it.  Then I stamped the image a second time on to gold foil and fussy the largest ornament and popped it up using 3D Foam Squares.  I added a few mats of red and gold foil and red for the card base.  I also used gold foil to die cut the flourish.  To finish off the card I stamped the sentiment at the bottom and embossed with gold embossing powders and added some red rhinestones.


Here is a close up of the beautiful flourish die cut.  Love this!


Here is a close up of the Christmas ornaments and the sentiment.  This is a really quick and easy card to create--just a little stamping, heat embossing and a die cut.  :)

Please be sure to visit all of the Design Team Members in the link list below to see that they have created to share with you using the new Christmas stamps.


Thank you so much for stopping by today!

Hugs & Smiles,
Heidi


Stamps:  JustRite® Papercraft AG-02052 Elegant Christmas Swirls Clear StampsCL-02063 Ornament Cling Background Stamp,
Paper:  Kraft, Gold Foil, Deep Red
Ink:  Imagine Crafts/Tsukinneko Versa Mark
Dies:  JustRite® Papercraft AG-02043 Heirloom Flourish Two Dies
Accessories:  White Embossing Powder, Gold Embossing Powder, Red Rhinestones, Scrapbook Adhesives by 3L™ 3D Foam Squares, E-Z Runner® Permanent Strips-Refillable Dispenser 49'

Wednesday, June 4, 2014

Sculpted Leaves Cling Background Stamp - Choose Hope Card - JustRite Papercraft Day Three June Release

Hello everyone!  Today is Day Three of the JustRite® Papercraft June Release!  


Here is the card that I designed using the CL-02046 Sculpted Leaves Cling Background StampCR-02044 Rose Bouquet Vintage Labels Clear Stamps and  AG-02039 Vintage Filigree Layer Dies. The background stamp is so dainty and I love the new die templates designed by Becca Freeken for JustRite® Papercraft.  I used Versa Mark ink and white embossing powder for the background image.  


Here is a close up of the die cuts.  I used  Spectrum Noir™ Ultra Smooth 8.5" x 5.5" White Cardstock and then stamped the rose images and sentiment---they are from the CR-02044 Rose Bouquet Vintage Labels Clear Stamps stamp set.  I colored the roses using Spectrum Noir™ Markers PP1, PP2, LG1, LG3.  Then I used 3D Foam Squares to pop the die cuts up a little.  For embellishments I added 4mm Flat Back Pearls and White Flowers Cabochons from Em's Emporium and then I added Clear AB SS12 Flat Back Crystal Rhinestones from  ButterBeeScraps to the flower centers.


Please be sure to visit all of the Design Team Members in the link list below to see what they have created to share with you.


Thanks so much for stopping by today!

Hugs & Smiles,
Heidi


Supplies
Stamps:  JustRite® Papercraft CL-02046 Sculpted Leaves Cling Background Stamp, CR-02044 Rose Bouquet Vintage Labels Clear Stamps
Paper:  Spectrum Noir™ Ultra Smooth 8.5" x 5.5" White Cardstock, Pink Lemonade
Ink:  Imagine Crafts/Tsukineko Versa Mark, Memento Rich Cocoa
Markers: Spectrum Noir™ Markers PP1, PP2, LG1, LG3
Dies:  JustRite® Papercraft AG-02039 Vintage Filigree Layer Dies
Accessories:  White Embossing Powder, Scrapbook Adhesives by 3L™ 3D Foam Squares, E-Z Runner® Permanent Strips-Refillable Dispenser 49', ButterBeeScraps Clear AB SS12 Flat Back Crystal RhinestonesEm's Emporium 4mm Flat Back Pearls, White Flowers Cabochons,

Tuesday, June 3, 2014

Tutorial Tuesday - 4th of July Celebration - JustRite Papercraft New June Release

Hello everyone!  Today, is my day to post for the Tutorial Tuesday for JustRite® Papercraft and it is also Day Two of the New June Release.  If you missed all of the beautiful projects from day one you can click HERE to visit the JustRite® Inspiration Blog.


Here is the 4th of July Celebration ensemble that I designed using the CR-02081 Let Freedom Ring Clear Stamp SetCL-02077 Shooting Star Stitched Background Cling Stamp, and  JustRite® Papercraft SVG-02081 Let Freedom Ring Digital Cut File Download for CR-02081 (Used Offset File for projects) all from JustRite® Papercraft.  These projects are fun, easy and inexpensive to create.  


Framed art--home decor piece with paper star garland, hemp cord, and burlap.


Inexpensive 4th of July centerpiece.  Red metal bucket and red foil stars came from the dollar store.  The red foil stars with sprigs is part of a balloon weight.  


Mason Jar for a drinking glass.


Ring Pop--banner was fussy cut for hot air balloon image and hot glued to the ring.
**Inspired by Pinterest


Napkin--stamping on napkin with StazOn ink.


It wouldn't be 4th of July without a box of Sparklers!
**Please use caution!!

I have a YouTube video, instructions, supply list and more photos over on the JustRite Inspiration Blog.

GIVEAWAY on the JUSTRITE INSPIRATION BLOG!!!

This week's Tutorial Tuesday Giveaway.  

For your chance to win leave a comment HERE or on Heidi's Video telling us if you have created a home decor piece or a holiday table setting using papercrafting supplies.  One lucky winner will win the two Americana stamp sets that Heidi used in this video and one 6 pc Spectrum Noir set of your choice.  We love reading your comments and getting to know our readers.

Please be sure to visit all of the Designers in the link list below to see what they have created to share with you using the new CR-02081 Let Freedom Ring Clear Stamp SetCL-02077 Shooting Star Stitched Background Cling Stamp and SVG-02081 Let Freedom Ring Digital Cut File Download for CR-02081.


Thanks so much for stopping by today and I hope you enjoy Tutorial Tuesday and the New June Release!

Hugs & Smiles,
Heidi

Supplies
Stamps:  JustRite® Papercraft CR-02081 Let Freedom Ring Clear Stamp Set, CL-02077 Shooting Star Stitched Background Cling Stamp
SVG Files:  JustRite® Papercraft SVG-02081 Let Freedom Ring Digital Cut File Download for CR-02081 (Used Offset File for projects)
Inks:  Imagine Crafts/Tsukineko Memento Espresso Truffle, Lady Bug, Nautical Blue, StazOn Ink Black Cherry, Ranger Antique Linen Distress Ink
Markers:  Spectrum Noir CR8,EB1, EB2, TB9, EB7
Accessories:  Burlap, Hemp Cord, Rustic Barn Wood Frame, Red Metal Bucket, Red Foil Stars Balloon Weight, White Roses, Silver Wire, Sparklers, Mason Jar, Plate, Napkin, Plastic Tableware, Ring Pop, Hot Glue