Saturday, June 30, 2012

Shabby Chic Flower Card

Hello blogging friends!  Today is my day to post for Julianna C. Hudgins Design Team and I have a card to share with you using two of the New die template sets from Julianna's Positively Me Collection.


 I used one of the tags from S5-114 Jewel Sentiments and flowers, a flourish and leaves from the  S5-143 Jewel Flowers & Flourishes die template sets.  I have to tell you I was so thrilled to find out that one of Julianna's New Releases included flowers, flourishes and butterflies!  If you missed the blog frenzy for Spellbinders™ you can click HERE to see Julianna's New die templates and her beautiful artwork showcasing her new die templates.


Here is a close up of the flower, leaves and tag.  I love the fullness of the flower and the shabby chic look.  I used a sentiment from the CR-03705 Botanical Medallions & Banners from JustRtie Papercraft.  I also used S5-123 Asian Accents die templates from Spellbinders.  Then I added some Light Blue Seam Binding from Really Reasonable Ribbon and Ivory Pearls and Diamond Glitter from The Rubber Cafe.


One thing I love about making flowers is that with different papers, inks and mists you can create the flowers to fit whatever style you are going for.  To see more pictures and find out all of the details on how I designed this card please visit Julianna's Blog Positively Me.

Thanks so much for stopping by today and I hope you have a Fabulous weekend!!  
Hugs,
Heidi

Supplies
Spellbinders:  Grand Calibur® Machine, Positively Me Collection S5-114 Jewel Sentiments, S5-143 Jewel Flowers & Flourishes, S5-123 Asian Accents
Stamps:  JustRite Papercrafts CR-03705 Botanical Medallions & Banners
Paper:  Bazzill Basics Paper Card Shoppe Cotton Candy, Icy Mint, Easter Grass, Butter Mints, Vintage Marketplace 6 x6 Mini Prints; Old Book Pages 
Ink:  Tsukineko Memento Rich Cocoa; Ranger Distress Ink Antique Linen, Distress Stain Victorian Velvet, Paint Dabber Snow Cap
Accessories:  Really Reasonable Ribbon Light Blue Seam Binding; The Rubber Cafe Ivory Pearls, Scrap Happy Sheer Glue, Diamond Clear Glitter   

Friday, June 29, 2012

Pretty Pink Peony Scrapbook Layout

Hello blogging friends!  It's going to be another quick blog post for today.  It won't be too much longer and all of my CHA artwork will be done and then I can get back to doing tutorials with step shots.  ;-) 


This is a small 8 x 8 layout and it's kind of a chunky one.   But I am not going to be putting it in an album, I am going to put it on a small easel and leave it out for a home decor piece.   For the photo and the matting I used  the NEW LF-016 Decorative Grand Ovals One from Spellbinders™.  


To create this beautiful little butterfly I used the NEW S4-371 Les Papillion die template and  Sno Cone and Simply Smooth White cardstock.  I layered the two butterflies and then added Diamond Clear Glitter from The Rubber Cafe.   The bling is a Recollections Swirl.


To create the peony I used the NEW S4-370 Blossoms Five.  I used Pink Lemonade cardstock and Picked Raspberry Distress Ink.  I added Diamond Clear Glitter to the flower and leaves.  


The lace trim is from The Stamp Simply Ribbon Store from May Arts Ribbon Sampler Delicate Vintage Lace.  I also added a handmade stick pin.


Thank you so much for stopping by today!

I hope you have a Fantastic Friday!!

Hugs & Smiles,
Heidi

Supplies
Paper:  Discount Cardstock Pink Lemonade, Simply Smooth White, Sno Cone, Soot
Ink:  Ranger Distress Ink Picked Raspberry
Dies:  Spellbinders Grand Calibur LF-016 Decorative Grand Ovals One, S4-370 Blossoms Five, S4-371 Les Papillion
Accessories:  The Rubber Cafe Scrap Happy Sheer Glue, Diamond Clear Glitter; The Stamp Simply Ribbon Store May Arts Ribbon Sampler Delicate Vintage Lace; I am Roses Leaves; Recollections Swirl Bling; Handmade Stick Pin; Hot Glue

Wednesday, June 27, 2012

Sneak Peek: Spellbinders™ Summer Spectacular Day 8


This contest is now closed.  Thank you for all of you wonderful comments!!

Hello blogging friends!  I am so happy to have you join me today and I am thrilled to be introducing the NEW LF-015 Grand Decorative Circles One die template set from Spellbinders™.  I know how much you all love the Nestablities® Decorative Elelments die templates with the decorative edges and now you will be able to have and create so many beautiful projects using the Grand Nestabilites® Decorative Elements die templates with the decorative edges. Think of all the fabulous projects you will be able to create!  

 
LF-015 Grand Decorative Circles One

MSRP US$49.99

Approximate Die Templates Sizes:

1: 4 ¾”

2: 5 ¾”

3: 6 ¼”

4: 7 7/8”


Here is my first project that I have to share with you using the LF-015 Grand Decorative Circles One die template and shrink art.  Did you ever create with Shinky Dinks when you were little or do your kids create with them now?  Who knew Shrinky Dinks could look so glamorous and beautiful LOL!  Below I have a full tutorial to share with you on how I created this sweet little Paris shrink art pin.

Supplies
Spellbinders Paper Arts:  Grand Calibur® Machine, LF-015 Grand Decorative Circles One, S5-145 French Frills Samantha Walker Designer Collection

Cross Promotional Partners:

Other products used:
K & B Innovations Inc. Shrinky Dinks Crystal Clear, White, Black
Copic:  Air Brush System, Markers - YG63, B04, R85, 100
Tsukineko StazOn Metallic Silver Ink
Ranger Glossy Accents
Oven and Pin Back


For my project I used die templates one, two and three in the LF-015 Grand Decorative Circles One die template set, with the smallest die template being number one.  I started by using the Grand Calibur® Machine to die cut the shrink plastic.


For the smallest circle in the LF-015 Grand Decorative Circles One die template set I used Tsukineko StazOn Metallic Silver Ink and CL-03790 Paris Background Stamp from JustRite Papercraft to stamp the background image on to the shrink plastic before removing the die template, using the die template as a stencil.  I set this aside to dry for a few minutes and then carefully removed the shrink plastic from the die template. 


I also die cut the Eiffel Tower from the S5-145 French Frills die template set from the Samantha Walker Designer Collection using Black Shrink Plastic. 


Once I had all of the Shrink Plastic die cut then I put it in the oven to shrink it down, following the instructions on the package.  Here is a picture of the largest die template used and the die cut once it was shrunk down.  Even once it is shrunk down it still maintains all of the detail!


Here is another picture with some of the die cuts once they were shrunk down in size.


I wanted to have the largest circle black but I didn't happen to have a large enough piece of the black shrink plastic so I used the Copic Air Brush System and Copic marker 100 Black to color the shrink plastic to match my project. 


I used Crystal Clear Shrink Plastic for the smallest circle and I wanted to add some color so I airbrushed the back side of the die cut using Copic markers YG63, B04 and R85.


Here is a picture of all the die cuts before I assembled the pin.


I used Glossy Accents to layer and adhere all of the pieces together.  Then I added Clear Rhinestones  from The Rubber Cafe' using the Stick "EM" Up Tool for perfect placement.  To finish of the pin I covered the entire piece with Glossy Accents and added a pin back. 


Check it out!  Here is a picture so you can see just how much everything shrunk down in size!  


For my second project I designed a large shape card using LF-015 Grand Decorative Circles One, S5-145 French Frills and S5-146 Botanical Swirls and Accents from the Samantha Walker Designer Collection.


Supplies
Spellbinders Paper Arts:  Grand Calibur® Machine, LF-015 Grand Decorative Circles One, S5-145 French Frills and S5-146 Botanical Swirls and Accents from the Samantha Walker Designer Collection. 
Cross Promotional Partners:
Other products used:
Discount Cardstock:  Simply Smooth White, Soot, Pop-Tone Pink Lemonade
Really Reasonable Ribbon:  Noelle White Crochet Lace Trim, Pink Crushed Ribbon
Pro 31 Designs:  Rhinestone Ribbon Slider, Circle Pearl Spray
Scrapbook Adhesives by 3L 3D Foam Squares 


I hope you love the NEW LF-015 Grand Decorative Circles One die template as much as I do!  Thank you so much for visiting my blog today and following along with the Spellbinders Blog Frenzy.  This is going to be another Amazing Release and I hope you have been inspired to create!!

Hugs & Smiles,
Heidi

The Sneak Peek: Spellbinders™ Summer Spectacular! Begins on June 21st and will end on June 28th, 2012.  It consists of 24 individual prizes and one grand prize drawing.  Enter the Sneak Peek: Spellbinders™ Summer Spectacular! by visiting the participating blogs each day. 
At the end of each blog post, click on the "Enter HERE" to open the entry form. You may only enter once from each blog each day. 

Spellbinders™ will randomly draw one winner from each participating blog to receive that blog’s newly revealed dies. The Grand Prize Winner will be randomly drawn from the pool of entrants who sent entry forms from each and every participating blog during the 48 hours each blog was open. For the full list of official rules please click RULES.

**Enter the contest by clicking HERE**

Don’t forget to visit the other participating blogs for more chances to win!

Questions? ContestQuestions@Spellbinders.us  No entries will be accepted at this email address. 

If you missed any of the other days here is a link list.

Inspire Yourself Card with New Spellbinders Die Templates - Pro 31 Designs & Pink Paislee

Hello blogging friends!  I have a card to share with you today using some of the fantastic New Releases from Spellbinders™ and embellishments from Pro 31 Designs.


I used  S5-131 A2 Matting Basic A, S5-136 A2 Fancy Wave, S4-377 Fancy Framed Tags One die templates from Spellbinders.  All of these die templates are from the New Release Summer CHA 2012 Collection from Spellbinders.  I think the Card Creator collection is going to be one of my favorites!


The stamped image is from Pink Paislee Spring Jubilee which can be found over at Pro 31 Designs.  I love this stamp set!  It is very shabby chic and it includes 22 stamps!!  I colored the image using Prismacolor Colored Pencils.  The sentiment is from the same stamp set.  I used 3D Foam Squares to pop up the center image and both pieces of the tag.  Then I added this pretty and dainty Crochet Pink Lace Stretchy Trim and Shabby Chic Pink Mulberry Roses.  The trim and roses are both from Pro 31 Designs.  I added some homemade vintage gold shimmer spray to the roses to tone down the pink and add a little shimmer.  I used Simply Smooth White and Pink Lemonade paper from Discount Cardstock.


Thank you so much for stopping by today!  Don't forget to check back later tonight for my Spellbinders Blog Frenzy Reveal!!  I can't wait to share it with you!!  Also don't forget to check out Spellbinders and Pro 31 Designs for all your paper crafting needs!  

Hugs & Smiles,
Heidi

Supplies
Stamps:  Pro 31 Designs Pink Paislee Spring Jubilee
Paper:  Discount Cardstock Simply Smooth White, Pink Lemondade
Ink:  Tsukineko Memento Tuxedo Black, Rich Cocoa; Prismacolor Colored Pencils 1090, 941, 1082, 946
Dies:  Spellbinders Grand Calibur® Machine, S5-131 A2 Matting Basic A, S5-136 A2 Fancy Wave, S4-377 Fancy Framed Tags One
Accessories:  Pro 31 Designs Shabby Chic Pink Mulberry RosesCrochet Pink Lace Stretchy Trim; Scrapbook Adhesives by 3L 3D Foam Squares, Adhesive Sheets; Homemade Vintage Gold Shimmer Spray

Tuesday, June 26, 2012

Embellished Butterfly Card - Spellbinders Day 6

Hello blogging friends!  Today's post is going to be a quick one--so many things to do and so little time LOL!  

Here is a card I designed using papers from Discount Cardstock, die templates from Spellbinders and stamps and embellishments from Pro 31 Designs.


I used Sea BlueBaronial Ivory Laid and Berry Pink papers from Discount Cardstock for the butterflies.  I used  S5-051 Fanciful FlightS5-101 Wings of HopeLF-006 Wonderful Wings die templates and the Grand Calibur to cut/emboss the die cut shapes.  Then I layered the three butterflies and added  Circle Pearl Sprays to the top wings, Pearl Sprays at the bottom and a little cluster of Blue Porcelain Roses all from Pro 31 Designs.


For the background I used Peacock Feathers Distress Ink from Ranger and a stamp from the Pink Paislee London Market Rare Finds & Curiosities Collection.  


To finish off the card I added Aqua, Diamond and Cotton Candy Stickles for a little sparkle.


Don't forget to check out Day 6 of the Spellbinders Blog Frenzy!!

June 26


Thank you so much for stopping by today!

Hugs & Smiles,
Heidi

Supplies
Paper:  Discount Cardstock Sea Blue, Baronial Ivory Laid, Berry Pink
Stamps:  Pro 31 Designs Pink Paislee London Market Rare Finds & Curiosities Collection
Ink:  Ranger Distress Ink Peacock Feathers
Dies:  Spellbinders Grand Calibur, S5-051 Fanciful Flight, S5-101 Wings of Hope, LF-006 Wonderful Wings
Accessories:  Pro 31 Designs Circle Pearl Sprays, Pearl Sprays, Blue Porcelain Roses; Ranger Stickles Aqua, Diamond, Cotton Candy; Hot Glue

Monday, June 25, 2012

Spellbinders Sneak Peek Blog Frenzy - Beautiful Peony Card - Special Birthday Wish

Hello blogging friends!  Sorry I have been mia for a few days.  I have been busy working on projects for CHA!  I wish I could share with you but I can't just yet.  ;-)

So what do you think about the Spellbinders Sneak Peek Blog Frenzy?  Have you been following along on all of the days? What do you think about the New Releases?  I have to tell you I am loving everything!!!  So many new and different die template designs--oh the possibilities!!  Click HERE to check out the Rules.  If you have missed any of the days in the blog frenzy here is a link list for the first few days.  

June 21

June 22

June 23

June 24

June 25


To design my card I used the New S5-131 A2 Matting Basics A, S5-135 A2 Fancy Ribbon Threader die templates designed by Cindy EchtinawSpellbinders along with S4-367 Back To Basics Tags die templates.  I have to tell you I absolutely LOVE the New Nestabilities® Card Creator Collection!!  It is so quick and easy to use!!


To start I stamped the peony image from CR-03755 Seeds Of Summer stamp set from JustRite Papercraft on to watercolor paper using Rich Cocoa ink.  Then I colored the image using Distress Markers (colors listed below) from Ranger.


After I colored the image then I used S5-135 A2 Fancy Ribbon Threader die template from the Nestabilities® Card Creator Collection to to cut/emboss the Fancy Ribbon Threader mat for my card.  I also used Herbal Garden cardstock and S5-131 A2 Matting Basics A for the background.  To create the tag I used S4-367 Back To Basics Tags and a sentiment from CR-03815 Large Fancy Sentiments stamp set from JustRite Papercraft.  Before removing the die template from the tag and floral image I used inked the inside edges of the paper using the die template as a stencil.


Here is a close up of the tag.  I added a bow to the top using May Arts Ribbon Sampler Spring Green from 


Here is a close up of the bottom of the card and you can see how I threaded the pink velvet ribbon.  The ribbon is from May Arts Ribbon Sampler Vintage Pink from The Stamp Simply Ribbon Store.  I also added Pearl Jellie Dots along the bottom using Scrap Happy Sheer Glue and the Stick "EM" Tool all from The Rubber Cafe'.


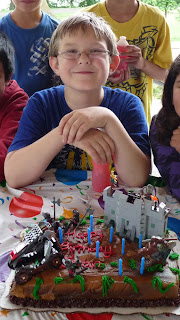
On a more personal note I want to say a Special Happy Birthday to my baby boy who is not so much of a little guy any more LOL!


This is a picture from his birthday party on Saturday.  Happy Birthday Evan!!!  I can't believe you are already 10 years old!!  Double digits--Woo-Hoo!!!  You are such an Amazing kid--so loving, caring, smart talented and funny!!  I hope you have a Fantastic Birthday!!  I love you--mom xoxoxoxo

Thanks so much for stopping by today!  Don't forget to check out the Spellbinders Blog Frenzy and all of the Fabulous artwork and New Releases!!

Hugs & Smiles,
Heidi

Supplies
Stamps:  JustRite Papercraft CR-03755 Seeds Of Summer, CR-03815 Large Fancy Sentiments
Paper:  Discount Cardstock Pink Lemonade, Herbal Garden; ProArt Watercolor Paper
Ink:  Tsukineko Memento Rich Cocoa; Ranger Distress Ink Spun Sugar, Distress Markers Spun Sugar, Worn Lipstick, Bundled Sage, Peeled Paint, Aged Mahogany
Dies:  Spellbinders Grand Calibur, S5-131 A2 Matting Basics A, S5-135 A2 Fancy Ribbon Threader, S4-367 Back To Basics Tags
Accessories:  The Rubber Cafe' Pearl Jellie Dots, Scrap Happy Sheer Glue, Stick "EM" ToolThe Stamp Simply Ribbon Store May Arts Ribbon Sampler Spring Green (sheer green w/ polka dots) & Vintage Pink (velvet)

Thursday, June 21, 2012

Sneak Peek: Spellbinders Summer Spectacular! Day One!

Today is Day ONE of the of the Sneak Peek: Spellbinders Summer Spectacular!  For the next eight days designers will be giving you sneak peeks of some of the NEW Releases for CHA Summer 2012!!  They will be giving away some Fabulous Prizes  so be sure to click HERE for all of the details!

Here is a link list for the Designers for Day One.
July 21, 2012


Thanks so much for stopping by today!

Hugs & Smiles,
Heidi

Sunday, June 17, 2012

Father's Day Shadow Box

Hello blogging friends!  Before I get started today I want to say a special Happy Father's Day to my Dad, my Husband and my Grandpa!!  They are all wonderful men and we are so blessed to have them in our lives!! 


This is a shadow box that I made to give to my dad as part of his Father's Day gift.


I started by stamping the CL-03740 Going Places Vintage Labels image with Rich Cocoa ink on to Whip Cream cardstock and then added in the color with Copic markers.


Once I had the image colored then I created die cuts using the Grand Calibur from Spellbinders and JustRite Papercraft Custom Dies JB-09730 Vintage Label and Banner.  I also used the Copic airbrush system to add some color to the banners.


Then I added a piece of Sno Cone cardstock to fit the shadow box, added the wide brown ribbon and then added the die cuts and embellishments.

Thank you so much for stopping by today!
I hope you have a Wonderful Day!!

Hugs & Smiles,
Heidi

Supplies
Paper:  Discount Cardstock Sno Cone, Whip Cream
Stamps:  JustRite Papercraft CL-03740 Going Places Vintage Labels
Ink:  Tsukineko Memento Rich Cocoa; Copic B000, B00, BG70, B01, BG53
Dies:  JustRite Papercraft Custom Dies JB-09730 Vintage Label and Banner; Spellbinders Grand Calibur
Accessories:  Tim Holtz Gears; Brown Ribbon; Brads; Scrapbook Adhesives by 3L 3D Foam Squares; Shadow Box


Wednesday, June 13, 2012

Really Reasonable Ribbon June Blog Hop


Good morning blogging friends!   Today, is the Really Reasonable Ribbon Blog Hop for the month of June. The RRR Design Team Members and Special Event Design Team Members will be showcasing the Monthly Ribbon Club.


This month there is a wonderful assortment of Red, White & Blue ribbons included in the June Ribbon Club Click HERE for more details.

If you are following the order of the blog hop you should have just come from Bonnie's Blog. If not and you just happened to pop in for a visit please click HERE to start the blog hop at the Really Reasonable Ribbon's Ramblings! Blog.


For my project I designed a mini wall hanging for the 4th of July.  I used four of the different ribbons included in the June Ribbon Club.
 
 
I wanted the wall hanging to have vintage look so I used a homemade vintage gold shimmer spray and Vintage Photo Distress Ink to give the ribbons an aged look.


I started with a 7 x 7 Corrugated Board and I torn off most of the top layer of paper and then I painted the board white and sprayed it with homemade pearl shimmer spray.  Then I inked the edges of a couple paper doilies, sprayed them with homemade vintage gold shimmer spray and adhered them to the board.  Next I used S4-092 Stars Five die template from Spellbinders and Simply Smooth White, Really Red and Dusk Blue cardstock from Discount Cardstock to create the stars.  I scored and inked the stars to give them some dimension and then I added the ribbons.  


I added a pleated ribbon border across the bottom of the board.  


For the sentiment I used CR-03745 Summer Words from JustRite Papercraft.  I used S4-335 Star Circles and S4-116 Standard Circles Small to create the die cuts.


For a little bit of sparkle I added You're So Fine Glitter - Diamond Clear, Patriot Red, Canadian Blue from The Rubber Cafe.

Now to continue in the blog hop you need to hop on over to Patti's Blog and check out her fantastic project!

Thank you so much for stopping by today and I hope you enjoy the Really Reasonable Blog Hop!! Don't forget to visit the RRR Store and check out all of the beautiful ribbons, lace and trims!

I hope you have a wonderful and creative day!

Hugs & Smiles,
Heidi

Supplies
Really Reasonable Ribbon June Monthly Ribbon Club, Scor-Tape 1/4''
Stamps:  JustRite Papercraft CR-03745 Summer Words
Paper:  Discount Cardstock Simply Smooth White, Really Red, Dusk Blue
Ink:  Tsukineko Memento Rich Cocoa; Ranger Distress Ink Antique Linen, Vintage Photo
Dies:  Spellbinders Grand Calibur, S4-335 Star Circles, S4-116 Standard Circles Small, S4-092 Stars Five
Accessories:  The Rubber Cafe Scrap Happy Sheer Glue, You're So Fine Glitter - Diamond Clear, Patriot Red, Canadian Blue; Zutter Donna Salazar 7 x 7 Corrugated Board; Paper Doilies; Homemade Vintage Gold, Pearl Shimmer Spray; Hot Glue; White Acrylic Paint